


Complexity
No toolsNot indicated
Period: Week Month Year
For 30 days:
For 7 days:
Viewing duration:
Watching now:
average rating
Rate article
Good (4 points)
No tool
All operations can be performed by hand, without tools.
Not indicated
Average running time
Service brake system - hydraulic, double-circuit, with diagonal separation of the circuits, which increases the safety of vehicle operation. One of the circuits of the service brake system ensures the operation of the brakes of the left front and right rear wheels, and the other - of the right front and left rear wheels.
In normal mode, when the system is in good order, both circuits work.
In the event of failure (depressurization) of one of the circuits, the other circuit provides braking of the car, although with less efficiency. The service brake system includes the wheel brakes, pedal assembly, vacuum booster, brake master cylinder, hydraulic reservoir, ABS unit, as well as connecting pipes and hoses.

Elements of the brake system:
1 - ABS unit;
2 - hydraulic drive tank;
3 - the main brake cylinder;
4 - brake fluid level sensor;
5 - vacuum amplifier;
6 - tubes of the main brake cylinder.
A brake pedal position sensor is installed in the pedal assembly bracket, combined with a brake signal switch - its contacts close when the brake pedal is pressed. The sensor sends a signal to the ECU that the brake pedal is depressed. The vacuum brake booster is designed to reduce the force that must be applied to the brake pedal when braking the vehicle by using a vacuum in the intake manifold of a running engine. The booster is located between the brake pedal and the brake master cylinder and is secured with four nuts to the pedal bracket. The vacuum amplifier is non-separable; if it fails, it is replaced with a new one.

Brake pedal assembly.
The brake master cylinder is attached to the booster housing with two nuts. On top of the cylinder there is a common reservoir for the hydraulic drive of the brake system and clutch, in which there is a supply of fluid. The tank body is marked with the maximum and minimum fluid levels. A liquid level sensor is installed in the reservoir, which, when the liquid level drops below the MIN mark, turns on the indicator in the instrument cluster.
When the brake pedal is pressed, the pistons of the master cylinder move, creating pressure in the hydraulic drive, which is supplied through pipes and hoses to the working cylinders of the wheel brake mechanisms.

The main brake cylinder.
Front wheel brake - disc, with a floating caliper, which includes a single-piston wheel cylinder.
The brake disc is ventilated for more efficient cooling.
Brakes of the left and right front wheels are not interchangeable.

Front wheel brake.
The left brake caliper is marked L. On the right brake caliper, R is marked.

The markings on the brake calipers.

Front brake caliper complete with guide and pads.
The brake pad guide is attached to the steering knuckle, and the caliper is attached with two bolts to the guide pins installed in the shoe guide holes. Protective covers are installed on the fingers. When braking, the fluid pressure in the hydraulic drive of the brake mechanism increases and the piston, moving out of the wheel cylinder, made in one piece with the caliper, presses the inner brake pad against the disc. Then the caliper (due to the movement of the guide pins in the holes of the shoe guide) is shifted relative to the disc, pressing the outer brake pad against it. A piston with a rubber sealing ring is installed in the cylinder body. Due to the elasticity of this ring, a constant optimal clearance is maintained between the disc and the pads of the brake mechanism (similarly, the optimal clearance is maintained in the rear disc brake mechanism).

Front wheel brake elements:
1 - shoe guide;
2 - outer brake shoe;
3 - guide plate;
4
5 - upper guide pin;
6
7
8 - lower guide pin;
9 - inner brake pad.
An acoustic wear indicator is riveted to the inner brake pad and an anti-vibration plate is attached, which also protects the boot of the brake cylinder.

Brake pad elements:
1 - anti-vibration plate for brake pads;
2 - acoustic brake pad wear indicator.
Depending on the configuration, cars can be equipped with two types of rear wheel brakes: disc or drum.

1 - ABS sensor;
2 - brake hose;
3 - parking brake cable;
4 - return spring of the parking brake mechanism;
5 - protective cap of the pumping union;
6 - guiding finger;
7 - protective cover for the guide pin;
8 - a support with a working cylinder;
9 - brake disk.

Elements of the rear wheel disc brake:
1 - shoe guide;
2 - outer brake shoe;
3 - guide plate;
4 - protective cover for the guide pin;
5 - upper guide pin;
6 - a support with a working cylinder;
7 - the bolt of the caliper to the guide pin;
8 - lower guide pin;
9 - inner brake pad with acoustic wear indicator.

Elements of the drive of the parking brake on the caliper:
1 - lever arm;
2 - returnable spring;
3 - threaded rod.
Rear disc brake - with a floating caliper, which includes a single-piston slave cylinder.

Rear wheel brake caliper.
The design of the rear brake cylinder is very complex, since it combines a conventional hydraulic cylinder (similar in design to the front brake cylinder) and a parking brake mechanism. The parking brake drive works as follows. The parking brake cable acts on the drive lever and turns it. The spring returns the actuator lever to its original position.
Thus, the movement of the lever is transmitted to the threaded rod, which interacts with the threaded pin installed in the piston.

Threaded rod in the caliper cylinder.
The threaded pin can be rotated in the piston. Moreover, when the finger is pressed against the inner surface of the piston, turning is very difficult, and if the finger moves away from the piston, it turns easily on the thrust bearing.
The threaded pin in the piston is pressed (through the thrust bearing) by a spring. Thus, as the brake pads wear out, the threaded pin is unscrewed further from the threaded rod, allowing the piston to exit the cylinder and at the same time maintain a constant parking brake stroke.
This design of the rear brake cylinder determines the way the piston is recessed into the cylinder when replacing the pads.
The piston cannot simply be pushed into the cylinder.
Using excessive force will damage parts.
The piston must be screwed in clockwise and at the same time firmly applied to ensure proper friction and screwing of the threaded pin into the threaded rod of the parking brake actuator.
The shoe guide is attached to the rear suspension arm.
The disc brake pads of the front and rear wheels differ in design.

Piston with threaded pin.
Drum brake- with a two-piston wheel cylinder, two brake pads with automatic adjustment of the gap between the pads and the drum.

Rear wheel drum brake (shown with wheel hub removed for clarity):
1 - rear brake shoe;
2 - support post bracket;
3 - support stand;
4 - parking brake drive lever;
5 - spacer bar;
6 - upper clamping spring;
7 - working (wheel) cylinder;
8 - ratchet;
9 - adjusting lever;
10 - spring of the adjusting lever;
11 - front brake pad;
12 - brake shield;
13 - lower tension spring;
14 - spring of the parking brake cable.
The automatic adjustment mechanism starts to work when the clearance between the pads and the brake drum increases. When the brake pedal is pressed, the pads begin to disperse and press against the brake drum, while the protrusion of the adjusting lever moves along the cavity between the ratchet teeth. With a certain amount of pad wear and depressing the brake pedal, the adjusting lever has enough travel to turn the ratchet one tooth, thereby increasing the length of the spacer bar and at the same time reducing the gap between the pads and the drum. Thus, the gradual lengthening of the spacer bar automatically maintains the gap between the brake drum and the pads. The wheel cylinders of the rear wheel brakes are the same. The front pads of the brake mechanisms are the same, and the rear pads are different (they are mirror-symmetrically installed non-removable levers of the parking brake drive).
The spacer bar and the brake ratchet of the left wheel have a silver color (the ratchet rod and the hole of the spacer bar are left-handed), and the right wheel are golden (the ratchet bar and the hole of the spacer bar have a right-hand thread). On the cylindrical ends of the ratchets, the tips of the spacer bars are put on, which are the same for the brakes of the left and right wheels. The adjusting levers of the brake mechanism of the left and right wheels are mirror-symmetrical.

Elements of the mechanism for automatic adjustment of the gap between the shoes and the drum:
and- brake mechanism of the left wheel;
b- brake mechanism of the right wheel;
1 - spacer bar;
2 - ratchet;
3 - the tip of the spacer bar;
4 - adjusting lever.
The parking brake lever, fixed between the front seats on the floor tunnel, is connected to two cables via the front cable and equalizer. The rear ends of the cables are connected to the parking brake drive levers attached to the rear brake calipers (disc mechanism) or to the rear brake pads (drum mechanism). The parking brake is adjusted by turning the adjusting nut located on the tip of the front cable.

Parking brake lever elements:
1 - parking brake lever;
2 - switch of the parking brake indicator;
3 - adjusting nut;
4 - front parking brake cable;
5 - equalizer.
Cars are equipped with anti-lock braking system (ABS).
Brake fluid from the brake master cylinder enters the ABS unit, and from there to the brakes of all wheels.
The ABS unit, mounted in the engine compartment on the left side member, under the vacuum booster, consists of a hydraulic modulator, a pump and a control unit.
ABS operates in response to the signals from the wheel speed sensors.
When the vehicle is braking, the ABS control unit detects the start of wheel blocking and opens the corresponding modulator solenoid valve to release the pressure of the working fluid in the channel.
The valve opens and closes several times a second, so you can make sure that the ABS is working by a slight tremor of the brake pedal at the time of braking.
ABS has a built-in brake force distribution (EBD) system, which acts as a pressure regulator in the hydraulic drive of the rear wheel brakes. If the rear wheels begin to block when the vehicle is braking, the intake valves of the rear wheel brakes in the modulator are switched to maintain a constant pressure, preventing a further increase in pressure in the working cylinders of the rear brakes.
In the event of a malfunction in the ABS, the brake system remains operational, but the wheels may lock. In this case, the corresponding fault code is written into the memory of the control unit, which is read using special equipment at the service center.

Elements of the ABS unit:
1 - Control block;
2 - hole for connecting the brake tube of the right front wheel;
3 - hole for connecting the brake tube of the left rear wheel;
4 - hole for connecting the brake tube of the right rear wheel;
5 - hole for connecting the brake tube of the left front wheel;
6 - hole for connecting the tube of the main brake cylinder;
7 - pump;
8 - hydraulic modulator.
The front wheel speed sensor is installed in the steering knuckle hole and secured with a bolt. The sensor drive disk is pressed onto the outer CV joint housing. The rear wheel speed sensor is installed in the hole in the flange of the rear axle beam arm and is also bolted. The sensor driver disk is installed in the rear wheel hub assembly (the hub assembly is non-separable).

Rear wheel speed sensors.

Front wheel speed sensors.
The article is missing:
- High-quality photos of repair
The cost of a set of front pads is 1200–3200 rubles, rear - 980–1700 rubles.
The cost of a set of front pads is 1200–3200 rubles, rear - 980–1700 rubles.
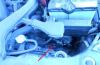
Replacing the front brake pads
Inner pads are equipped with acoustic wear indicators that give you a screeching noise when braking. The pads also need to be renewed in case of oiling of the linings, if deep grooves, cracks, chips are found. If the fluid level in the brake and clutch reservoir is at the MAX level, then before installing new pads, we pump out part of the fluid from the reservoir with a syringe or rubber bulb. We install the car on a factory-made stand. Remove the front wheel.
Before installation, we clean the parts of the brake mechanism from dirt and corrosion, especially the seats of the brake pads in the guide plates of the caliper and the guide pads. It is forbidden to use gasoline and diesel fuel to clean the brakes. If the guiding pin protective covers are torn, replace them with new ones. We assemble the brake mechanism in reverse order. After replacing the pads on both front wheels, press the brake pedal several times to set the gaps between the pads and discs.
Replacing the rear brake pads
Depending on the Solaris modification, the rear brakes can be disc or drum. We will look at the procedure for replacing pads on a disc version (works are shown on the left rear wheel). We install the car on a factory-made stand. Remove the rear wheel.
On a note
Brake pads need to be replaced only as a set - all four pieces on both front (or rear) wheels. Replacing the pads of only one brake mechanism can lead the vehicle to the side during sudden deceleration.
The maintenance process of the Hyundai Solaris brake system is quite simple if we are familiar with the features of this model. Lubricating the guides, monitoring brake disc wear, replacing the front and rear pads are simple operations that anyone can do with their own hands. It is more difficult to decide which brake pads are better for Solaris, since brands can easily get confused and buy consumables of poor quality.
Which of these brake pads is the best? Of course on the right, it's new.
Really, brake pads are consumables, which is replaced as it wears out. Everyone understands that the average price of a pair in 700-900 rubles will not be a guarantee that the spare part will serve for a long time and efficiently. You can overpay only for a sonorous brand and again become repaired after 25 thousand km. And all because pads may not be fitted correctly.
Front brake pad types
The pads can be of several types with linings of different materials. This affects both ride comfort and mileage and braking performance.
For example, if you choose soft pads, in which the friction lining is made of organic fibers of glass, rubber, high-temperature resin, they can please with silent operation, softness, but they can wear out very quickly.
Ceramic pads ate brake disc on Hyundai Solaris
On the contrary, having bought expensive lightweight ceramic pads, you can easily be disappointed in them - they do not make much noise, but they grab very sharply and quickly kill the brake disc. Consequently, for every driving style, for every operating conditions, you need to consciously select pads according to the material of the friction lining. And they can be like that.
What are the pads on Hyundai Solaris
We will not go into the jungle and study in detail the chemical compositions of the friction linings on Hyundai Solaris pads. Each manufacturer indicates them on the packaging, and the price can tell a lot. In short, any last, regardless of the brand, can be one of four types:

Based on this, we can conclude that our Solaris is far from a sports car, so we don't need expensive ceramic pads. We will choose from the middle price category among the most popular and respected brands.
What are the best brake pads for the Hyundai Solaris?
In terms of material costs, it doesn't really matter how stiff the brake pads are - if they are soft, they will need to be replaced frequently, but you can save on expensive discs. If the pads are rigid, then they change less often, but the disc wears out more intensively. It all depends on the driving style. Here's a quick overview of the stock and most requested non-stock pads.
- Original Mobis pads, which are installed from the conveyor. Catalog number 58101-1RA05 for the front, 58302-1RA30 for the rear. They are sold complete with brackets, but for the aftermarket they are branded Sangsin. Their part numbers are SP1399 for the front and SP1401 for the rear. During the tests, they proved to be excellent, do not require lapping, to lock the wheels at a speed of 70 km / h, a brake pedal effort of about 12 kgf is enough. Wear for 40 km of intensive test was 0.33 mm. Front pads price about 1 250 rubles, back - 1200 rubles.
58101-1RA05 - Hi-Q brake pads are beating according to the same article. Also very high quality pads.
- Most expensive pads available Hankook Frixa FPH27 / Hankook Frixa FPH26R
(front / rear). Average price about 2.5 thousand rubles... The softest of the Frixa series. Test wear was 0.43 mm, minimum pedal effort, stable performance at all temperatures.
Hankook Frixa FPH27 / Hankook Frixa FPH26R.
- Pads Akyoto AKD-12101 ... Low-noise, asbestos-free pads with low noise level. Brake pedal effort is average. In the mode of medium temperatures they behave very decently, but in the mode of mountain descent they can heat up to 300 degrees, but this does not affect stability. Price approx 1500 rubles, test wear - 0.44 mm.
Brake pads Akyoto AKD-12101
- Bosch 0986494566, price from 2100 rubles... In the range of speeds up to 100 km / h, they behave perfectly, minimal pedal effort, stable operation. Test wear is within the normal range, about 0.4 mm, and during operation they wear out evenly without the need to adjust to the change in the geometry of the friction lining.
This is only a small part of the pads that can be used on the Hyundai Solaris. However, it should be understood that A 500-ruble consumable will hardly work for a long time and stably, even if the famous logo is printed on the box. Strong brakes to all and safe roads!
Tool:
- key 12
- key 17
- brake cylinder release tool or round nose pliers
- flat screwdriver
It is recommended to change brake pads at least every 40,000 - 60,000 km. mileage. The process of replacing the rear brake pads is the same as with the front pads, but there is a small nuance, the brake cylinder has 4 grooves, to press it in, you must not only press it, but also turn it clockwise! In this case, a special tool for pressing the piston will be useful. With a certain skill, this can be done without using a special tool.
A step-by-step guide to replacing rear brake pads on a Hyundai Solaris
- We unscrew the cap of the brake fluid reservoir.
- Before removing the rear wheel, place a chock under the front wheel.
There is no need to put on the handbrake, as is the case with the front pads.
- Using a 12 key, unscrew the nut, which will allow us to free the rubber sleeve from the bracket.
- Using a 17 key, unscrew the upper and lower caliper guides.
- The caliper can now be removed.
Note! There are 4 grooves on the brake cylinder in which a service tool is installed to push the piston inward. If there is no special tool, you can use a regular open-end wrench or round nose pliers.
- Consider the use of an open-end wrench. We push the caliper against the body, push the key into the grooves on the cylinder, turn it clockwise and press on the piston.
- Using a flat screwdriver, remove the outer and inner pads.
- We clean the seats with a metal brush.
- We install new pads (with the antennae of the pads you need to get into the seats).
- We put on the caliper back and tighten the guide bolts from above and below.
Be careful! Don't rip off the bolts!
- We tighten the mounting nuts by 12, which holds the bracket for the rubber brake pipe.
- Putting the wheel back on and twisting the lid under the hood on the brake fluid reservoir.
- We start the car and press the brake pedal 3-5 times to bleed the system.
The safety of car operation directly depends on the serviceability of the braking system. When depressurizing during repairs, air enters the system, which, ultimately, can cause disastrous consequences on the road. In order to avoid them, you need to pump the Solaris brakes. Driving a car with air tubes is very dangerous, because at the most inopportune moment the pedal can simply fail, which will provoke an accident.
Also worth remembering! If the brake pedal has become noticeably softer than usual, this most likely indicates that air locks have formed in the system.
Cooking tools and accessories
In general, this job is not difficult if you know what to do and have a reliable partner. It is also quite possible to pump one alone, but it is still difficult. Before pumping the brakes on Solaris, make sure that the brake fluid, which we will add, corresponds to the parameters already filled. If we do not know, we will have to change it completely.
Tools and parts:
- Open-end spanner 10 mm. A spanner wrench is also suitable, but it will not be so convenient to work with it.
- Suitable container for draining liquid. A clean bottle of mineral water is quite suitable.
- The hose is about 20 - 30 cm long.
- Brake fluid.
We pump the brakes on Solaris with our own hands
Air is removed alternately from each circuit separately and with the power unit turned off.
The order of pumping:
- Right rear wheel.
- Left front wheel.
- Left rear wheel.
- Right front wheel.
Hyundai Solaris brake bleeding sequence

Before you start pumping the system, it is worth remembering that when doing this work, you should monitor the liquid level in the tank and periodically top up it. Otherwise, air will enter the brake lines again and the procedure will have to be started anew.


If the pressure on the pedal remains the same soft or the hardness is negligible. It is considered normal when the pedal travel is no more than half the distance to the floor.
Most likely there is still air in the system. However, do not immediately start pumping over again. Most likely, brake hoses, their joints, or cylinders are not tight. Therefore, the first step is to pay attention to finding a place where air enters, and after fixing the problem, pump the system again.
You will also be interested in:
To change the oil in the variator, you need a little: First of all, you need the oil itself, for my ...

The Skoda automobile concern is one of the oldest in the world. We remind you that in 2000 ...

Through the site service, you can find out data from the STS. These include: sts number, brand, model, ...
Audi Q5 2.0 TFSI quattro / Audi Ku5, 5dv off-road vehicle, 211 hp, 7 automatic transmission, 2008 - 2012 -...

Test drive What is permanent four-wheel drive? And then why on the field the lever "lock ...

