


Dear friends! We often do questions about how to independently replace the factory seats covers that have already bathed, new ones. That is why we decided to publish several tips, with the help of which the replacement procedure will greatly ease. In fact, the main part of the questions disappears after the removal of the old coating, when you get a visual understanding of how to drag the upholstery.
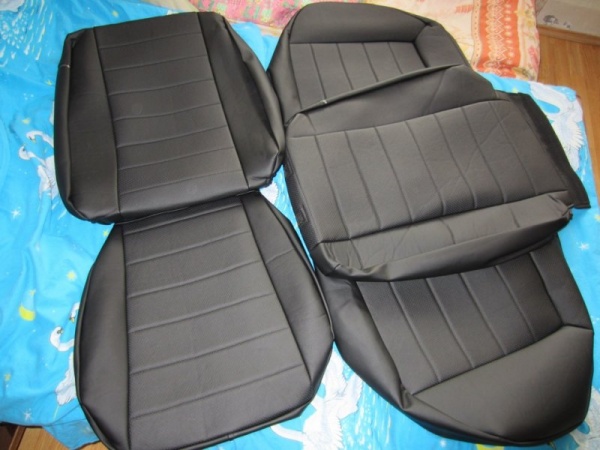
1. If you do not have a garage or dry and convenient room for the work of this species, the upholstery really and in the apartment will be replaced, there will be no more space, of course, if you do not take the entire salon at the same time. And so, let's start with the front seats. Remove the seat and wonder them into three parts: seat, back and headrest. To better understand the principle of work, start from the simplest, with head restraints, remove the old trim and pull the new one (see photo No. 1)

2. After you removed the old coating, you will see that the case (casing) is fixed with special metal hooks to the frameworks of the seats. From the back of the back, they are located below. To speed up the case and simplify it, instead of hooks, you can take plastic clamps or otherwise they call nylon ties (see photo №2, 3 and 4)


3. To give the shape of the trim in them, special metal spokes are used; they need to be removed from the standard set, because With new in the kit they do not go. (see photo №5)

4. There is still a moment that cannot be left without attention! If the service life of old seats is already big, most likely a foam under covers are not in the best condition. If it does not seem to buy a new foam rubber immediately on both front seats, make a replacement at least driving, well, or on Earthlyk, change places with passenger (they are interchangeable see. PHOTO No. 6), as a rule, the driver wear more. If you still did not want to replace the foamo, the advice is as follows: when we dress the metal needle, leave a little space from each edge, approximately 3 cm. That is, the skin is fixed in 3 places, if you make an indent, see, then the edges will be fastened Spoke on the needle, but only from the middle part through the material.


5. Let's go back to the problem with the old foam rubber. If you do not have the opportunity to replace, we advise on the sids not to install vertical knitting needles (see photo) Remove them marked in the photo.

6. The case is changing almost on the same principle. Already shot spokes from old upholsters insert into a new case and fix the cloth. The fastening type will depend on which model of the car. On some cars as fasteners there can be rubber shoelaces or the metal hooks already known to us, etc.

7. It is extremely rare, but it happens that after replacing old covers to new, in some places there may be not significant and practical not visible dents. In order to eliminate it and make everything perfectly smooth, you need to try the surface with the sppachener (see photo number 8)

8. By the way, do not forget that hauling seats is the most convenient time to jointly put or replace the heating of the seats, clean the lower parts of the frames / sleds from rust, and even if you immediately removed all the seats, it is possible to clean the ceiling, it will be more convenient.
It seems like this process will take you a lot of time and it is very difficult, but if you have a positive attitude, you will handle this for five to six hours of operation. And what then a pleasant feeling get from driving in the updated salon
Any project tuning, and especially the car's interior cover requires partial or complete disassembly. It is not always a simple task - a cunning fastener in the car's cabin abundantly. But the extensive experience in the automotive tuning tells the master, where it can hide under the trim of a car's interior with a piston, a self-tapping screw or screw. Car seats are attached to bolts through the sheath to the floor. In order to remove the seat with your own hands, it is enough to unscrew four bolts and open the electrical connectors.

01. We pulled out the seat of the salon and put on the table, so that it was more convenient to plan the location of the skin fragments and Alcantara on the cover of the seating. Schweynka was marker, signed each panel cover with the name of the material from which it will be cut.
02. In order to remove the cover from the seating frame, we need strong hands. In the fields of division into fragments (in the corners of the adjoining of the skin panels) on the back and sidushka, the case will be pulled to the frames of the pillows with steel rings. The design of the draws is different, but the polyurethane pillows in any case strongly spring and keeps the case.

03. The shot of the seat of the seating goes into the hands of the cruel, a specialist in the car's lounge. The master breaks the case into separate panels - prepares for the transfer to new materials.

04. For example, the detail of the Alcantara planned for the seating is declined on the table and presses to Alcantara Wezhkov. Wires the gel handle along the contour and for the combination of flaps is placed short notches around the perimeter. Alcantara, like the skin, is easily cut by tailoring scissors.
There is one very important task in the process of cutting parts of the car's interior with Alcantara. Alcantara looks like suede and has a short pile. This pile is directed in one direction. Guess that the direction of the pile must be taken into account in the street? Error in the direction of the pile will look like the difference in the shade and tone of the shoal part.

05. Seat hauling and some other parts of the car's interior covering do not cost without strengthening the skin and Alcantara foam rubber on a tissue basis. Circled leather and alcantar details of seats covers are pasted on the foam rubber (from the side of the foam, and not tissue) with the help of glue in the spray cannon. It is impossible to smear the foam rubber for having a brush seats - you can spoil the item with your own hands: the glue passes deep into the pores and glues the internal structure of the foam rubber. Simply put, the foam rubbing will not return to its original position.

06. The covered panels covered with the seats of the seats are stitched together. When stitching, you need to gently combine the labels on the edges of the parts.

07. Next operation is sublined by seam divorced sides from the wrong side of the seat drying covers. The question is what to glue what? First, cut the strips of the foam rubber, which remained near the obtasses to clear the alkantara and leather taps for the liner. Then, we divorce the leaks of the skin and Alcantara to the sides and press them to the foam rubber. An important point of the car's interior cover is the chuck of Alcantara and the skin on the foam rubber. Slaughter seams with a conventional hammer.

08. Now the weaglets are stitching with a double finishing line. Free edges behind the thread line are not cut off - it will not be noticeable under the foamonalone. You can cut the edges with your own hands on the edge of the detail of the case.

09. The crosslinked cover of the seating is turned on the front side and cracks. Tighten and secure the cover on the seat frame task is not simple. Especially the back cover - it has a closed form and has to work in cramped conditions.

10. Case "Sidushka" Sitting Treasures also has its troubles. At first, the case is folded on the seat cushion, and then it must be attached to the frame. To attract seat cover, plastic clamps are used in the middle. The clamps are drawn through the pillow in the special holes just as it was on the native design. On the case, the clamp clings to the needles, covered with cloth and crawled to the case with an inside. The edges of the cover are tensioned on the seating frame along the contour. From behind, the native plastic bracket (reversal from native seating), from the sides and in front of the seating in the cover of the seat).

11. The cover of the car's cabin always ends with a drying and sweeping of the response parts. Covers of seats are heated by a jet of hot air from a hair dryer - leather, firing, stretched like a drum. All seats are fluttered by steam through a rag. After these procedures, the hauling seats becomes absolutely smooth, as if made of solid material. I think these operations can be done to each do it yourself.
If the car is operated for a long time, sooner or later she will need a hauling of automotive seats. But it is not worth a hurry. In many cases, special detergents are enough to return a decent look. If recovery is not possible, everything that remains is to repair.
Spots from drinks and skin damage or other material are not always an impetus for having seats. In some cases, it is enough to see from another driver the salon of his dreams to challenge the idea to change everything.
Some people will say that this is a waste of money and, perhaps, something will be right. But let's turn to statistics. According to the latest research, a person in his entire lives spends about two years on the road to work and from work. In some apartments, people live less than driving in the car, so really need to refuse themselves in a hawk of the car's seats?
In addition, it is not necessary to limit himself only with a tightening seat of a car. If you want to completely change the inner view of the machine you need to drag the entire salon. Even the floor in skillful hands can be a work of art. The most interesting thing is that the transformation can be made with your own hands.
If you are worried about the fact that you can not find the material for the drying of the seats of the car or the entire cabin with their own hands, just go to the nearest car market. There will be a huge selection of all sorts of materials for the most distinguished taste and price capabilities.
We choose the material
Here you need to make one important clarification. Materials for drying the seats of cars There are so many that they can be listed to infinity, and this is if not to take into account the possibilities of an individual order. Nevertheless, there are certain trends in the automotive world that have already managed to prove well. Among the most popular materials in the market are listed:

In principle, all of the above materials are good in their own way. Some attract their operational qualities, other beautiful appearance and a small price. It is much more important to look at the goods during the purchase.
Important! To dry the seats of the car passed without difficulties check the homogeneity of the material during the purchase.
If you have chosen as a material for drying the seats of the car Alcantara, pay attention to the direction of the Village. It plays an important role when cutting. Otherwise, all seats will differ from each other by shade.
Hauling with your own hands
Any repair work begins with the creation of the project. After you understand what you want, you calculated the desired amount of fabric or skin, picked up a color and looked at a few training videos, the time comes to take a touch of a car's seat.

What is needed for dry
First you need to collect everything you need, then not to spend time. This will allow all manipulations with the interior of the car not only quickly, but also qualitatively. You will need:
- tools,
- scissors,
- foam
- iron,
- fabric or leather
- spray glue.
This is a universal set, which will make the car seat drawing. The main thing is not to rush and do everything gradually. Reasonable calculation is the key to successful completion of the case.
Processing process
It is best to break the seats of the car to the stages. This will achieve maximum effect with minimal costs both forces and time. The repair process should include such steps:
- Disable wiring.
- Disassembly of old covers. To do this, set the seat from the car. Usually they are attached on four bolts. To unscrew them will not be difficult. This will free space for further work.
- Cleansing the surface of the seat of the car from the mud.
- Details of plastic and metal need to be deguted.
- Drawing up the pattern of new covers. Repair the old case. Estate the tissue or the skin on the floor and put the parts of the old cover on it. Make marking and use scissors.
- Sweep the details of each other. The edges of each detail must fit tightly to the edges of the other.
- Treat seams. For this operation you will need glue. Also, the joints of the joints need to be flashing for greater reliability. All irregularities are cut off with scissors.
- Tension new covers. They should fit tightly to seats. Loose ends are stretched through the holes in the car seat.
- Dry. To get the desired tension, use the hairdryer. Having cooled material will be stretched. This will make the surface smooth. To achieve the optimal effect, use iron with an excrement function.
At the end of the work, the seats are collected and installed in the car.
Hauling other auto elements
Of course, hauling the seats of the car is an extremely important task. But do not forget about the rest of the elements of the interior, which are also important. To create a finished concept, you need to take care of the doors, ceiling and armrest.

To change the upholstery on the door of the car you will need to do the pattern. Do not forget to leave on the batups about the centimeter on each side. Special attention is paid to the creation of holes for door handles. It must be done extremely gently. If in the design of the machine there are windows with handles, keep in mind and their location.
Important! Where the upholstery will lay down to the door, the glue layer is applied.
The replacement of the ceiling is perhaps the most difficult task for a drawing. Case in the system of top lighting auto. With lamps and wiring you need to be extremely careful. Start with their complete dismantling. Also need to be done with handles and decorative elements of racks, if there are in stock.
The process of blending ceiling is similar to the suspension, even a hairdryer is used in the end to pull the leatherette. It is recommended to heat it before starting. This will ensure elasticity and convenience during a drawing.
Most of all in common seats with renovation of armrests. They are first removed. After that, on old covers, the pattern is made. On the edges also leaves the supply of fabric or skin.
In order to secure a new case, glue is used. With it, the edges of the armrest are sampled, and the fabric is carefully fixed. For reliability of the place of gluing, it is better to dry the hair dryer.
Tip! To give the Salon the best view of the details can be put in the foam rubber. In principle, any insulation material is suitable.
RESULTS
Drawing the seats of the car with your own hands is quite a sink task for each person. All you need is to schedule a plan, buy materials and collect tools. The only drawback is that the procedure takes a lot of time.
In addition to the take-off car seats, you can make a complete restyling salon. True, in this case, you will need at least weekend. But the result is worth it. The hauling allows you to completely change the inner world of the car.
An additional advantage of self-adhesive seats auto and the entire cabin is saving money. No need to spend finance for car service. After all, the procedure is not so complicated to delegate it to someone for money.
If you have a desire to drag the veins of the car, it is not necessary to go to a specialized salon, the task can be solved with your own hands. Such a way can be updated the appearance of the cabin, give it the original style and remove the trembling seats. To perform this work, it is not necessary to have a sewing formation, enough to have a sufficient amount of patience and desire. Work on the change of the trim is impossible to be called complex, but at the same time it is quite painstaking.
Materials and tools:
- perforated eco-button (used beige color) 2.5 m
- eco-friendly eco-hole (used beige color) 1.5 m
- artificial leather (used black) 3.5 m
Note: You should choose a special skin for the car, it is designed for temperature drops, also resistant to burnout. The furniture leatherette is not suitable due to the fact that it is not adapted to the conditions of the car, and is only suitable for apartment conditions.
- foam rubber thin thickness 0.5 cm (for sizing leather parts)
- furniture glue
- Sewing machine
- Leather needles № 90 or 100
- threads for sewing skin (usual are not suitable, suitable with the mark of Extra Strong or for shoes) three 200 meter coils
- Adhesive Flizelin 3-5 m
- Machine oil


Step one. Preparation of material.
All the existing foam rubbed fliesline using iron. This procedure is required in order that during operation, the foam rubber stood up the load on it and did not face. An additional benefit of Fliselin is to relieve the sliding of the foam on sewing.

Step second. Preparation of seats.
For convenience, the seats are removed from the car. Next, you need to remove all the old trim.

Step Three. Marking.
At first glance, looking at the cover everything appears quite understandable. But when the old case is revealed on the details, it will be very easy to get confused. Therefore, the author, armed, marker numbers each part of the cover. To remember what number what is suitable, the author on the paper sheet painted the circuit of each seat with the backs, and numbered the details of the cover. Using the numbering on the details of the trim, and the leaflet will be confused now it will be impossible.

Step fourth. Spokes.
On the wrong cover there are pockets with knitting needles. Since they will need for an updated tightness, they needed to pull out, and so far to postpone. The arrangement of the spokes also noted on the paper scheme.

Pitch fifth. Preparing pattern.
After all the preparations, you can resort the covers, seam letters are cut off. So, looks like patterns for a new trim.

Step six. Cut.
Each item was transferred to the leatherette. In order not to get parts in the mirror image, they are applied to the wrong side of the material with an invalid.


Step seventh. Punches on the seams.
From all the necessary sides, the author made an allowance for seams of 1 cm. All items are also numbered.


Step eighth. Cut.
All prepared parts of the cover are once again checked, after which they are cut out.

Step eighth. Set of details.
Thus, the author received a complete set of details for covers. In the photo, it can be seen, the back seat, the same way the back and front seats are performed.


Step ninth. Glue.
As mentioned at the beginning of the article, the details of the skin require the sickness of the foam rubber. The author was required to make such work only with Beige, as the black leather was already with a sizing when buying. The glue was applied with a rubber spatula and a tassel. Before the main sickness, the author was practiced on trimming.

Step tenth. Features of gluing and needles.
When gluing perforated eco-stakes with foam rubber, glue began to leak into the holes. Therefore, the author decided to sneak offend first with fliselin, and then glue the foam rubber. The overall picture looked like this: the skin, on her Flizelin, on top of it, foaming, and then again Flizelin.
After drying, the parts could be started to cut them out and proceed to the sewing. Starting from the central details caused markup for lines.
The spokes put the spokes with the inside, and the future arrangement was noted with the scheme drawn. For the spokes, stripes made of tissue of long spokes were cut. Having folded the fabric along the knitting needles, sewed to the involve side of the desired details.


Step eleventh. Lines.
The decorative lines were made by a sewing machine, the front side of the material was smeared with oil, for better promotion of the paw on it.
Step twelve. Build details.
When all the details were ready, it was time to start assembling. All the elements of the cover were sewn into one, referring to the drawn scheme. All items were finally drowned.


Step thirteette. Clothespins.
Stationery clothespins can help to help with a sewing machine. They connected the part for even sewing items, their advantage is that they do not leave traces on the material.


Step fourteenth. Appearance.
After the sewing machine, you need to cut extra foam.
In the course of operation, wear is not only technical details, but also the cabin itself. Most often, the owners of the car have to deal with the repair of the seat upholstery or the replacement of covers. Let's figure out how to rehabilitate the seats with your own hands and save not only money, but also time.
If your leather seats, Look at our material on professional, in another material.
When you need to repair seats in the car
Situations and reasons for which you have to restore the chairs in the car can be the most different - from the physical wear of the device to serious damage to the design due to accidents (accidents). It should be remembered that the use of a vehicle even with spoiled seats is fraught with dangerous consequences. The aged upholstery or selent chairs are able to deliver the maximum of inconvenience and discomfort both passengers and the driver itself.
In addition, the dilapidated lifting of automotive seats looks extremely not aesthetic. With the help of modern finishing materials, reconstruct the coating and returning it to him is quite simple.
Types of defectors of car seats
The most common issues of auto shifts are:
- erasing armrests, upholstery and pillows;
- breakdown of gaskets and base of the design of the automotive armchair;
- damage to special springs;
- changing the color of the trim and its cracking due to temperature drops or ultraviolet radiation;
- mechanical flaws that are not related to the operation of the device - the burner, the gap, the base breakage or cuts due to the non-accurate treatment or exposure to external factors.
- deformation of the seat design due to the operation of the automotive security system as a result of an accident.
The choice of a way to solve the problems of the car seats is carried out with the type and nature of damage. Tools and materials are also defined in accordance with the situation.
Timing the seats of the vehicle
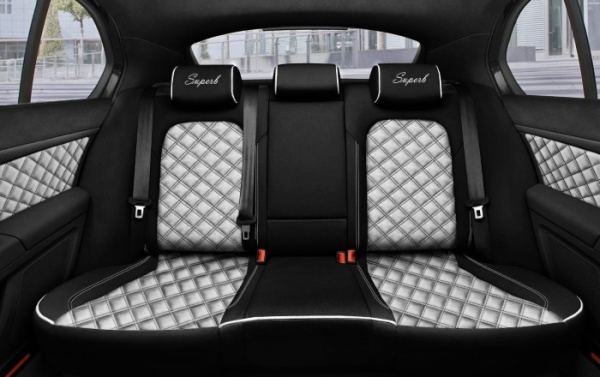
When changing the car's cabin, it is important to take into account the type of coverage used and working tools. The complexity of the process itself and the quality of the final result depends on this. So after having seats, the interior of the machine looked harmoniously, the color range of upholstery should be accurately chosen under its main shade and not to get out of the overall picture.

Secrets! Most of the drawing materials, you can purchase in China on the Aliexpress site! For example, artificial horsepower http://ali.pub/2jm5ix or alligator skin http://ali.pub/2jm6ii
Material and tools for changing the seat upholstery with their own hands
Cutting for automotive seats can be performed from leather, fabric, leatherette or Alcantara. The latter is a stuff material that resembles a natural suede. Working with Alcantara is needed very carefully, given the direction of hairs of the fabric when striking.
To replace leather coatings, artificial or synthetic leather can become a good alternative surface. Eliminate velor utility defects or leatherette is more convenient with the help of special compositions that are available at any vehicles store.
In addition to the coating material, you must have the following tools:
- set of hand needles;
- awl;
- chalk or a piece of dry white soap;
- dense silk threads;
- glue;
- hammers;
- keys and nuts with washers;
- cold welding;
- tap for towing;
- pliers;
- hacksaw;
- screwdrivers;
- machine vacuum cleaner.
Also do not forget about the foam on the lining of the car seat. All this can be found on the Internet, including on the beloved Ali.
Step-by-step instructions for independent repair of car chairs
- Dismantling and disassembling seats on the details. It is advisable to do this on the table, signing each removed element and a fragment of the design. Covers and pillows should also be separated and marked for convenience in the further sewing of the upholstery. A case is removed with a sample of metal clamps on the back of the armchair direction up.
- Disintegration of seats covering seams. For quick and convenient cutting threads, the working plot should be tightened slightly, and the line and lines make an incision. If there are problem seats, you can use gasoline so that the surface is softening a little.
- Completion of the full disassembly of the seat frame, upholstery, backrest and design pillows.
- Preparation for the installation of new elements of the chair. In the flows of old cases, fresh patterns and sketches are created, which are neatly transferred to the working surface.
- Assembling prepared components of seats. You can carry out the fastening of parts using a sewing needle, glue or welding. At this stage, maximum attention is required to properly and accurately glue the seams of case and compliance with drawn contours.
- Repair backs. To fix the design, a special stand is used on which all restoration work is produced.
The repair of the seats of the car is completed with their own hands connecting the pillow with the back of the chair and attaching the screws with screws.
Secrets of the replacement of upholstery on car seats
- Any hauling of the car seat must be accompanied by the strengthening of the upholstered material of the foam rubber. This important nuance without which it is impossible to high-quality car seat repair. Mandatory condition for the pillow is the tissue basis of the synthetic substrate and its thickness equal to 5 mm.
- Small scuffs, scratches or cuts are better close using small upholstery pieces. The main thing is that quality and color are completely harmonized with the main surface.
- The material is stitched along the edge of the details, strictly following the stubble tags. Deviation or violation of the contours of the sketch will spoil not only the material, but also the entire result of the work done.
- Put foambone to upholstery better glue-spray and before connecting the elements of the case. At the same time, it is important to glue the foamo-opposite to its foundation, and in the case of Alcantara, the flaps of the material with a pile in one direction.
- Wrapped seam challenges must be processed and smoothed. For this, a hammer is applied, with which it is easy to repel the scars, and sewing needles with threads to secure obtasses.
- Finishing the restoration of automotive seats always need to withdraw the response parts and their drying with a technical hair dryer and a hot air flow. Make this procedure should be carefully so as not to burn the surface.
Repair of the inclined mechanism of the chair
The inclined mechanism is a complex technical device responsible for changing the position of the backrest of automotive seats. Troubleshooting the design process is quite time consuming and produced in the following sequence:
- removing the facing lining at the base of the pillow and fastening bolts;
- dismantling the backrest of car seat;
- cutting up the top of the hinges;
- fixation by bolts of a new mechanism;
- connections of the backrest chairs with a pillow with an axis;
- bonding hinges and backs with welding.
With minor damage to the inclined mechanism or its jealous, it is enough to do with the lubrication of the device.
Repair of heating seats auto
This type of construction assumes the presence of a security system (airbag) and connecting to an on-board computer. As a consequence, repair, checking the electronics of the machine or configuring the computer is more reliable in the service, service station. Independent adjustment of the device operation without the availability of the desired qualifications of fraught with errors in the electronic system of the car and the functional failure of the machine.
Seat packing repair
Main lining material for car seat - This is a foam on a tissue basis. In rare cases, it can be replaced with a dense cotton. The upholstery is attached to the base or frame design of the seat and rummage, suede or any other type of upholstery. Self-repair is carried out on the same principle as the restoration of the facial case.
Note! Before using the finishing agent, it is necessary to pre-conduct it testing on the internal or inconspicuous section of the trim to see the possible reaction of the material on the effect of the substance. This is especially true if the repair is used with fillers or aerosol paints.
To achieve a stronger upholstery clutch with a lining and better landing of a frame of a frame, you should thoroughly clean all the elements of the design of the seat from old materials and their residues, degreased and dry surfaces.
Repair of a lured chair. Video:
Lumbar Car Chair Pouch
The lumbar stop allows the driver or passenger to hold the posture, evenly distributing the body weight and providing a comfortable feeling in a sitting position. In the absence of a special device from the grid, a self-made plate of flexible material can be used as a subjoiler. The mount is carried out with cold welding, long bolt and glue.
Leather Seat Repair Features
To restore the leather coating, the use of leatherette or special mixtures, such as liquid skin, is allowed. The independent repair of leather chairs begins with degreasing and polishing the surface of the surface of the skin. After that, a plastic mesh is superimposed on the damaged section and the tool itself, which after the top perfectly emitting the leather texture.
Author
Professional car mechanic with work experience more than 7 years old on one of the largest hundred in Moscow. I understand well in such machines as VAZ, Kia, Peugeot, BMW, Audi, Mercedes and many others. If you want to get a professional answer, leave your feedback in the comments to this material.
You will also be interested:
The main goal of stating on the body of each car VIN-code is to protect the car from the hijacking. But...

Insufficient or overestimated tire pressure threatens premature failure ...

Drivers who decided to replace the wheels need to accurately calculate the ratio of fasteners ...
Drivers who decided to replace the wheels need to accurately calculate the ratio of fasteners ...

Using automatic selection of tires and discs for the car VAZ 2107, you can avoid ...

