


The little cars come from China. Hence, some of the features of operation and maintenance.
It is worth saying that of the entire range of engines installed on our great wall hover cars, there is only one original one, this is a two-liter diesel engine with the code GW4D20. The rest of the engines are Mitsubishi engines, respectively 2.4 liters 4G64S4M and 2 liters 4G63S4M. From the point of view of the operation that interests us, we can say the following. The timing drive on all these motors is belt-driven, there is a difference in the layout, but more on that later.
It is worth saying that the manufacturer has set the same 60,000 km or 36 months (3 years) for replacement of belts for all these motors, whichever comes first.
Let's start with the 2.4 4G64S4M engine is a four-cylinder engine with one camshaft... The timing belt is a belt, but not one, as in most cases, but two! What's the secret? It's pretty simple. The 4G64S4M engine has balance shafts and one of them is driven by a small toothed belt, separate from the main timing belt.

In general, the procedure for replacing belts on this engine is not very difficult. To begin with, they disassemble the front part, we will not be in detail, since it is quite obvious what needs to be removed to access the timing belt covers. When we get to the covers, remove the pulley crankshaft... Then remove the top, aluminum cover and the bottom plastic one. Next, we combine the marks on the camshaft gear and casing valve cover.
The marks on the crankshaft and on the gear of the oil pump should also match.

After inspecting our belts, let's start replacing. We unscrew the tensioner roller, remove the belt, unscrew the rest of the rollers, remove the balance shaft belt and the tensioner. Getting started with the installation. First, install the roller and balancer shaft belt. The marks on the crankshaft and balancer shaft toothed pulleys must match the marks on the covers.

Adjustment of the balance shaft belt tension is made by the roller eccentric and is considered correct if the belt deflection from above, by hand, is 5-7 mm, the tightening torque of the roller bolt is 18 Nm.
When installing the belt, the marks on the gears of the shafts must match the marks on the covers. There is one caveat. The oil pump gear is also the drive for the second balancer shaft. To check the correct installation of the oil pump gear: Unscrew the plug from the cylinder block. Insert an 8 mm Phillips screwdriver into the hole. Make sure the screwdriver is inserted 60mm deep. If the screwdriver can only be inserted 25 mm: Rotate the oil pump sprocket 360 ° and reinsert the screwdriver. This will ensure that the second balancer shaft is installed correctly.

Now is the time to tackle the automatic belt tensioner. It is worth making sure that the tensioner walks in its body without assignments. Before installing the tensioner in place, it must be "cocked", squeezed until the holes align and insert a suitable cotter pin. Then put the tensioner in place, tighten the tensioner bolts to 23 Nm.
Install the belt. Check the alignment of the marks on all the gears. Carefully turn the engine a quarter of a turn back and then back until the marks are aligned. Check all the labels again. Next, you need to tighten the belt, for this there is a special device, with which you need to tighten the belt with a force of 3.5 Nm and tighten the roller bolt with a force of 48 Nm.

Next, remove the cotter pin from the automatic tensioner. We crank the engine 2 revolutions, check the marks, and after 15 minutes measure the distance the tensioner pusher came out. It should be between 3.8-4.5 mm. Next, we assemble the engine in the reverse order, the crankshaft pulley pulls a torque of 88 Nm.
Well, we figured it out with the 2.4 engine, it's time to talk about replacing the timing belt on a 2.0 engine marked 4G63S4M. Let's take a look at the front of this engine.

As we can see, everything is practically the same except for the absence of a balance shaft belt. And the bottom line is that balancing shafts are not installed on 4G63S4M motors, otherwise the timing mechanism is completely identical. From this it follows that all of the above for the previous engine is also valid for our two liter, with the exception of the moments associated with the balance shafts.

And so the third engine that we will consider is the GW4D20 diesel. The timing mechanism is driven by the same belt. We dismantle everything that interferes with removing the timing belt covers. Remove the belt covers, unscrew the 4 crankshaft pulley bolts and remove it. Now we see the whole mechanism and can set the labels as shown in the picture.


After that, we turn the crankshaft 2 turns clockwise and check the coincidence of all the alignment marks., We also control the position of the tensioner roller pointer, if something does not match, repeat the procedures described above. If everything is "ok", then we assemble everything in the reverse order, pull the crankshaft pulley bolts with a torque of 20-26 Nm.
In general, everything, as can be seen for a mechanic of average qualification, the procedure itself will not be a big problem, and if you have the skills and tools, the car owner can do this work on his own. Next, I want to talk about the pitfalls. Typically, when replacing a belt drive, the mechanic will advise you to replace the water pump (pump). What is the reason for this? The fact is that the service life of the pump is not much longer than the service life of the belt with rollers. In case of gasoline engines When changing the belt, the water pump is fully accessible and easy to replace, which ultimately reduces the total maintenance cost. If the pump fails, the volume of work on its replacement will be large and the cost of this work will be significant. In the case of a diesel engine, the pump is driven directly by the timing belt, which increases the risk of engine damage when the water pump is jammed, here the repair price can be cosmic ... Also, some parts that the mechanic removes when replacing the belt may need to be replaced. For example, the crankshaft pulley has a rubber damper and if it is heavily worn, the pulley must be replaced. I would also like to draw your attention to spare parts ... Those elements that change during our procedure should be high Quality, otherwise, repeated intervention may be required, and in some cases expensive repairs due to the destruction of the timing drive.
So, based on the experience gained by RSV Service, let's summarize. The procedure for replacing the timing belt on these engines does not require special special devices, but like any intervention in critical engine systems requires experience, attention, and understanding of the operation of vehicle systems. We advise you to entrust this work to experienced mechanics. The RSV Service technical center has extensive experience with cars of this series, these motors are well known to us. Come and we will quickly and efficiently carry out all the work related to replacing the timing drive on your car.
Specify the cost of work and spare parts by phone, the article cannot reflect the real prices at the moment.
Best regards RSV Service!
Good luck on the road! See you at scheduled maintenance (Maintenance)!
Change the timing belt to Hover DIY H3 and H5
Auto Hover H3, H5 are among the most reliable Chinese cars and have the highest performance properties. This allows them to be operated under extreme conditions, which usually increases the requirements for consumables. Therefore, replacing the timing belt with the Hover H5 ( petrol) are very important for the reliable operation of the machine. It is carried out without the help of others, an article with a detailed annotation and video will help here.
In what cases is it necessary replacement?
The timing belt is part of the gas distribution mechanism and serves to synchronize the operation of 2 shafts: crankshaft and camshaft. The main task of the belt is to smooth out the pulsation of the motor, synchronize the shafts, ensure the operation of the drives of the water and oil pumps. This is a heavy load that leads to high wear and tear.
The part is a rubber rim on inside which has special teeth needed for good adhesion to the toothed pulleys. On Hover H3, H5, the timing belt for a gasoline engine differs from the belt for diesel engines... A rubber product with rounded teeth is installed on a diesel engine, and a product with rectangular teeth on gasoline engines.
A broken belt has severe consequences for both a gasoline engine and a diesel engine. When this part breaks, the synchronization of the shafts disappears, the valves begin to hit the pistons. Thus, the pistons become unusable, the surface of the cylinders is scratched, the valves bend. This leads to costly repair of the motor by another replacement. The wear of the timing belt itself is also unsafe, after a while it stretches, the teeth wear off, which leads to deterioration of the engine, loss of power, and increased gasoline consumption.
Replacing timing hover n5 petrol 2 4.
Cracks on an ancient timing belt
Read the same
A prerequisite for a breakdown will be:
- untimely replacement of consumables;
- unqualified repairs;
- repair without use the necessary parts and accessories;
- introduction of consumables of low quality.
Signs of product breakage:
- extraneous sounds during engine operation;
- changed color of exhaust gases;
- the motor does not start immediately with difficulties;
- during operation of the motor, extraneous vibrations occur.
Timing belt replacement is done according to the manufacturer's advice. For Hover H3, H5 at least 60 thousand km of run on russian roads... The frequency of the change depends on the following reasons:
- The criterion in which the car is operated. For example, in urban areas, an uneven load on the engine occurs due to sudden stops and accelerations. On the track, more suitable conditions for the performance of motor work.
- High-quality consumables last longer, so you have to change them less often.
- It is essential that the replacement work be performed by a great specialist. Because the future operation of the car depends on the quality of the work performed.
Prerequisites for replacing consumables:
- routine replacement of consumables;
- detection of oil on one of the belt surfaces;
- the occurrence of cracks along;
- worn out teeth;
- peeling of fabric from rubber;
- stratification of material, fluffy side surfaces.
Replacing the timing belt hover 2 4 petrol.
Step by step instructions for replacement
The timing belt is replaced without the help of others, if you have an idea of \u200b\u200bthe motor device and experience in repair work. With all this, our client should strictly follow the manufacturer's advice on substitution. The procedure takes approximately 3-4 hours.
Tools
To complete the work, you need to prepare tools that are always needed nearby:
- set of wrenches;
- a set of heads, better "long";
- torque wrench;
- screwdrivers;
- tension roller;
- new timing belt.

A set of tools for work
Replacement belt Timing and front crankshaft oil seal Great Wall Hover engine 4G64
Replacing the timing belt and front crankshaft oil seal Great Wall Hover.
Stages
- First of all, you should de-energize the car by removing the negative terminal from battery... We turn off all the electrics that will interfere with the replacement.

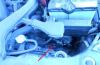
Hover car engine compartment

Read the same
Remove the top protective cover

Alignment of marks at the top of the camshaft
Next, we combine the mark on the crankshaft gear washer with the mark on the balance shaft.

Aligning the balancer shaft strap marks

Aligning the holes on the automatic tensioner
Hello dear!
Removing the belt:
1. Disconnect the negative cable from the battery.
2. Set the piston of the 1st cylinder to the TDC position and remove the drive belts of the generator, the air conditioning compressor and the power steering pump.
3. Remove the cooling fan.
Timing belt:
1 - Upper timing belt casing; 2 - the lower casing of the timing belt; 3 - Steering pump bracket; 4 - crankshaft position sensor; 5 - Timing belt; 6 - Tension roller; 7 - Tension lever; 8 - Automatic tensioner; 9 - bypass roller; 10 - Oil pump bracket; 11 - the crankshaft pulley bolt
shaft; 12 - the crankshaft pulley; 13,14- Flanges; 15 - Tension roller; 16 - Timing Belt; 17 - Balancer shaft pulley; 18 - Bushing; 19 - the crankshaft pulley; 20 - Engine support bracket; 21 - the camshaft pulley bolt; 22 - a camshaft pulley; 23 - Rear timing belt casing.
4. Mark the direction of movement of the timing belt for easier installation.
5. Block the flywheel with the tool.
6. Remove the crankshaft toothed pulley. If it was not possible to remove it, use a puller.
7. Mark the direction of travel of the balancer shaft drive belt and remove.
11. Using a special tool, block the camshaft pulley and tighten the bolt.
8. Install the special tool to block the balancer shaft pulley.
Unscrew the nut and remove the pulley from the balance shaft.
9. Remove the crankshaft pulley.
10. Using a special tool, block the camshaft pulley and loosen its mounting bolt.
Installing the belt.
13. Install the balancer shaft pulley.
12. Coat the engine support bracket bolts with sealant.
14. Align the marks on the crankshaft and balancer shaft pulleys with the marks on the front timing belt cover. Install the balancer shaft drive belt to the crankshaft and balancer shaft pulleys.
15. Make sure the location between the center idler pulley and the center of the bolt is respected as shown in the figure.
16. Move the idler roller in the direction of the arrow with your finger to create the required belt tension. In this position, tighten the tension roller mounting bolt. When the bolt is tightened, check that the shaft has not turned. If the shaft is turned, the belt may be over-tensioned.
17. Make sure the marks on the pulleys and front cowl are aligned. Press your finger on the belt from the tension side and check the belt deflection. It should be within 5-7 mm.
18. Install the crankshaft pulley, blocking the flywheel using the special tool.
19. Install the automatic tensioner. If the tensioner rod is in the fully retracted position, reinstall it using the procedure below. Secure the tensioner in a vise. Push the rod into the tensioner step by step so that hole A in the rod aligns with hole B in the tensioner housing.
20. Insert the 1.4mm wire into the aligned holes.
21. Remove the tensioner from the vise.
22. Install the tensioner on the front casing and tighten the bolts of its fastening.
Attention! Do not remove steel wire from tensioner.
23. Install the idler roller so the two holes are vertical.
24. Make sure the idler roller is installed correctly.
25. Align the marks on the camshaft pulley and cylinder head.
26. Align the marks on the crankshaft pulley and front cover.
27. Align the mark on the coolant pump pulley with the timing mark.
28. Unscrew the plug on the cylinder block and insert a 8 mm screwdriver into the hole.
28. If the screwdriver fits more than 60 mm, the marks are aligned correctly. If the depth is only 2025 mm, turn the coolant pump pulley one turn and check the alignment of the marks. Then insert the screwdriver again. The screwdriver must remain inside the hole until the timing belt is fully installed.
29. Install the timing belt to the crankshaft pulley, idler pulley, camshaft pulley and then to the idler pulley.
30. Move the idler roller in the direction of the arrow and tighten the center bolt.
31. Make sure all marks are aligned.
32. Remove the screwdriver from the hole and screw in the plug.
33. Rotate the crankshaft a quarter turn counterclockwise. Then scroll it clockwise until the marks are aligned.
34. Install the special tool with a torque wrench on the idler pulley and loosen the idler pulley center bolt.
35. Apply a torque of 3.5 Nm with the torque wrench. While holding the idler roller, tighten the center bolt.
36. Rotate the crankshaft two full turns and let the engine rest for 15 minutes. Then make sure the wire in the automatic tensioner moves with ease.
37. If the wire does not move freely in the tensioner, repeat the mark offset procedure.
38. Measure the distance A between the tensioner rod and its body.
Nominal value: 3.8-4.5 mm.
The little cars come from China. Hence, some of the features of operation and maintenance.
It is worth saying that of the entire range of engines installed on our great wall hover cars, there is only one original one, this is a two-liter diesel engine with the code GW4D20. The rest of the engines are Mitsubishi engines, respectively 2.4 liters 4G64S4M and 2 liters 4G63S4M. From the point of view of the operation that interests us, we can say the following. The timing drive on all these motors is belt-driven, there is a difference in the layout, but more on that later.
It is worth saying that the manufacturer has set the same 60,000 km or 36 months (3 years) for replacement of belts for all these motors, whichever comes first.
Let's start with the 2.4 4G64S4M engine, which is a four-cylinder engine with one camshaft. The timing belt is a belt, but not one, as in most cases, but two! What's the secret? It's pretty simple. The 4G64S4M engine has balance shafts and one of them is driven by a small toothed belt, separate from the main timing belt.
In general, the procedure for replacing belts on this engine is not very difficult. To begin with, they disassemble the front part, we will not be in detail, since it is quite obvious what needs to be removed to access the timing belt covers. When we get to the covers, remove the crankshaft pulley. Then remove the top, aluminum cover and the bottom plastic one. Next, we combine the marks on the camshaft gear and the valve cover.
The marks on the crankshaft and on the gear of the oil pump should also match.
After inspecting our belts, let's start replacing. We unscrew the tensioner roller, remove the belt, unscrew the rest of the rollers, remove the balance shaft belt and the tensioner. Getting started with the installation. First, install the roller and balancer shaft belt. The marks on the crankshaft and balancer shaft toothed pulleys must match the marks on the covers.
Adjustment of the balance shaft belt tension is made by the roller eccentric and is considered correct if the belt deflection from above, by hand, is 5-7 mm, the tightening torque of the roller bolt is 18 Nm.
When installing the belt, the marks on the gears of the shafts must match the marks on the covers. There is one caveat. The oil pump gear is also the drive for the second balancer shaft. To check the correct installation of the oil pump gear: Unscrew the plug from the cylinder block. Insert an 8 mm Phillips screwdriver into the hole. Make sure the screwdriver is inserted 60mm deep. If the screwdriver can only be inserted 25 mm: Rotate the oil pump sprocket 360 ° and reinsert the screwdriver. This will ensure that the second balancer shaft is installed correctly.
Now is the time to tackle the automatic belt tensioner. It is worth making sure that the tensioner walks in its body without assignments. Before installing the tensioner in place, it must be "cocked", squeezed until the holes align and insert a suitable cotter pin. Then put the tensioner in place, tighten the tensioner bolts to 23 Nm.
Install the belt. Check the alignment of the marks on all the gears. Carefully turn the engine a quarter of a turn back and then back until the marks are aligned. Check all the labels again. Next, you need to tighten the belt, for this there is a special device, with which you need to tighten the belt with a force of 3.5 Nm and tighten the roller bolt with a force of 48 Nm.
Next, remove the cotter pin from the automatic tensioner. We crank the engine 2 revolutions, check the marks, and after 15 minutes measure the distance the tensioner pusher came out. It should be between 3.8-4.5 mm. Next, we assemble the engine in the reverse order, the crankshaft pulley pulls a torque of 88 Nm.
Well, we figured it out with the 2.4 engine, it's time to talk about replacing the timing belt on a 2.0 engine marked 4G63S4M. Let's take a look at the front of this engine.
As we can see, everything is practically the same except for the absence of a balance shaft belt. And the bottom line is that balancing shafts are not installed on 4G63S4M motors, otherwise the timing mechanism is completely identical. From this it follows that all of the above for the previous engine is also valid for our two liter, with the exception of the moments associated with the balance shafts.
And so the third engine that we will consider is the GW4D20 diesel. The timing mechanism is driven by the same belt. We dismantle everything that interferes with removing the timing belt covers. Remove the belt covers, unscrew the 4 crankshaft pulley bolts and remove it. Now we see the whole mechanism and can set the labels as shown in the picture.
After that, we turn the crankshaft 2 turns clockwise and check the coincidence of all the alignment marks., We also control the position of the tensioner roller pointer, if something does not match, repeat the procedures described above. If everything is "ok", then we assemble everything in the reverse order, pull the crankshaft pulley bolts with a torque of 20-26 Nm.
In general, everything, as can be seen for a mechanic of average qualification, the procedure itself will not be a big problem, and if you have the skills and tools, the car owner can do this work on his own. Next, I want to talk about the pitfalls. Typically, when replacing a belt drive, the mechanic will advise you to replace the water pump (pump). What is the reason for this? The fact is that the service life of the pump is not much longer than the service life of the belt with rollers. In the case of gasoline engines, when replacing the belt, access to the water pump is completely open and it is not difficult to replace it, which ultimately reduces the total amount of maintenance. If the pump fails, the volume of work on its replacement will be large and the cost of this work will be significant. In the case of a diesel engine, the pump is driven directly by the timing belt, which increases the risk of engine damage when the water pump is jammed, here the repair price can be cosmic ... Also, some parts that the mechanic removes when replacing the belt may need to be replaced. For example, the crankshaft pulley has a rubber damper and if it is heavily worn, the pulley must be replaced. I would also like to draw your attention to spare parts ... Those elements that change during our procedure must be of high quality, otherwise repeated intervention may be required, and in some cases expensive repairs due to the destruction of the timing drive.
So, based on the experience gained by RSV Service, let's summarize. The procedure for replacing the timing belt on these engines does not require special special devices, but like any intervention in critical engine systems requires experience, attention, and understanding of the operation of vehicle systems. We advise you to entrust this work to experienced mechanics. The RSV Service technical center has extensive experience with cars of this series, these motors are well known to us. Come and we will quickly and efficiently carry out all the work related to replacing the timing drive on your car.
Specify the cost of work and spare parts by phone, the article cannot reflect the real prices at the moment.
Best regards RSV Service!
Good luck on the road! See you at scheduled maintenance (Maintenance)!
Timing belt: 1 - Upper timing belt casing; 2 - the lower casing of the timing belt; 3 - Steering pump bracket; 4 - crankshaft position sensor; 5 - Timing belt; 6 - Tension roller; 7 - Tension lever; 8 - Automatic tensioner; 9 - bypass roller; 10 - Oil pump bracket; 11 - the crankshaft pulley bolt; 12 - the crankshaft pulley; 13,14- Flanges; 15 - tension roller; 16 - Timing Belt; 17 - Balancer shaft pulley; 18 - Bushing; 19 - the crankshaft pulley; 20 - Engine support bracket; 21 - the camshaft pulley bolt; 22 - a camshaft pulley; 23 - Rear timing belt casing.
1. Disconnect the negative cable from the battery.
2. Set the piston of the 1st cylinder to the TDC position and remove the drive belts of the generator, the air conditioning compressor and the power steering pump.
3. Remove the cooling fan.
4. Mark the direction of movement of the timing belt for easier installation.

5. Block the flywheel with the tool.

6. Remove the crankshaft toothed pulley. If it was not possible to remove it, use a puller.

7. Mark the direction of travel of the balancer shaft drive belt and remove.

8. Install the special tool to block the balancer shaft pulley.

CHECKING THE TIMING BELT
The belt must be checked carefully. If the following defects are found, the belt must be replaced with a new one:
Hardened rubber on the outside of the belt. The outer side of the belt is shiny, inelastic and so hard that no marks are left on it when pressed firmly with a fingernail;

Cracks 4 in the rubber on the outside, cracks 2 or loose material, cracks 1 and 3 at the root of the tooth;

Cracks on the sides of the belt, the sides of the belt are badly worn out;

Initial stage: The material on the side of the belt that was subjected to greater stress is worn out (the fabric is frayed, the rubber is peeling, the color has turned white; the structure of the material is not determined).
Final stage: The fabric on the side surface of the teeth from the side of the greater load is worn out and the rubber is completely exposed (the width of the tooth is reduced).
CHECKING THE AUTOMATIC TIMING BELT TENSIONER
1. Check the tensioner for leaks. If any are found, replace it.
2. Check the end of the tensioner rod for wear and damage. Replace it if necessary.
3. Measure the protrusion of the stem over the body.
Standard value: 12 mm.

4. Press on the tensioner rod with a force of 98 to 168 N and measure the protrusion of the rod. If the stem sag is more than 1 mm or it protrudes from the body less than 12 mm, replace it.
Note: Check the condition of the pump. Replace if necessary.
Installation
11. Using a special tool, block the camshaft pulley and tighten the bolt.

12. Coat the engine support bracket bolts with sealant.

13. Install the balancer shaft pulley.
14. Align the marks on the crankshaft and balancer shaft pulleys with the marks on the front timing belt cover. Install the balancer shaft drive belt to the crankshaft and balancer shaft pulleys.

15. Make sure the position between the center of the idler pulley and the center of the bolt is as shown.

16. Move the idler roller in the direction of the arrow with your finger to create the required belt tension. In this position, tighten the tension roller mounting bolt. When the bolt is tightened, check that the shaft has not turned. If the shaft is turned, the belt may be over-tensioned.

18. Install the crankshaft pulley, blocking the flywheel using the special tool.
19. Install the automatic tensioner. If the tensioner rod is in the fully retracted position, reinstall it using the procedure below. Secure the tensioner in a vise. Push the rod into the tensioner step by step so that hole A in the rod aligns with hole B in the tensioner housing.

Attention! Do not remove steel wire from tensioner.
24. Make sure the idler roller is installed correctly.
25. Align the marks on the camshaft pulley and cylinder head.

26. Align the marks on the crankshaft pulley and front cover.

27. Align the mark on the coolant pump pulley with the timing mark.

28. Unscrew the plug on the cylinder block and insert a 8 mm screwdriver into the hole.

28. If the screwdriver fits more than 60 mm, the marks are aligned correctly. If the depth is only 2025 mm, turn the coolant pump pulley one turn and check the alignment of the marks. Then insert the screwdriver again. The screwdriver must remain inside the hole until the timing belt is fully installed.
29. Install the timing belt to the crankshaft pulley, idler pulley, camshaft pulley and then to the idler pulley.
30. Move the idler roller in the direction of the arrow and tighten the center bolt.

31. Make sure all marks are aligned.
32. Remove the screwdriver from the hole and screw in the plug.
33. Rotate the crankshaft a quarter turn counterclockwise. Then scroll it clockwise until the marks are aligned.
34. Install the special tool with a torque wrench on the idler pulley and loosen the idler pulley center bolt.

35. Apply a torque of 3.5 Nm with the torque wrench. While holding the idler roller, tighten the center bolt.
36. Rotate the crankshaft two full turns and let the engine rest for 15 minutes. Then make sure the wire in the automatic tensioner moves with ease.

37. If the wire does not move freely in the tensioner, repeat the marking re-spotting procedure.
38. Measure the distance A between the tensioner rod and its housing.
You will also be interested in:
To change the oil in the variator, you need a little: First of all, you need the oil itself, for my ...

The Skoda automobile concern is one of the oldest in the world. We remind you that in 2000 ...

Through the site service, you can find out data from the STS. These include: sts number, brand, model, ...
Audi Q5 2.0 TFSI quattro / Audi Ku5, 5dv SUV, 211 hp, 7 automatic transmission, 2008 - 2012 -...

Test drive What is permanent four-wheel drive? And then why on the field the lever "lock ...

