


It often happens that before painting a used car, we find a through hole formed due to corrosion. What can be done in this case, if you leave the topic of professional body repair and high costs. Is it possible to fix the hole yourself, and if so, how to do it? All this will be discussed below.
ATTENTION! Found a completely simple way to reduce fuel consumption! Don't believe me? An auto mechanic with 15 years of experience also did not believe until he tried it. And now he saves 35,000 rubles a year on gasoline!
Of course, the possibility of self-repair body repair is associated with the level of damage to the car. For example, if a through hole is seen only in one place, and the entire body or its part is not completely rotten, you can proceed to self-elimination. In other words, if there is a partial problem, and not a set of defects, you can do without specialists 100%.
Note. In addition, it is important to eliminate through holes with your own hands only if they are not too large. Otherwise, you will have to order a professional service.
Sealing holes in the body with putty
As a rule, holes appear more often on the underside of a car. And in this case, everything around is thoroughly cleaned, auto cosmetics (rust converter) and many other sets are used. Degreasing and priming are also required.

Direct application of the filler, without the use of a patch, implies the application of the back of the lining area. Thus, it will be possible to substantially achieve the maximum fixation of the composition. You can use a metal mesh instead of the lining itself. These are even sold in the store, you can make them yourself, etc.
The putty must be evenly distributed over the surface, filling the entire space of the hole. After the solution has dried, the area is treated with a painting auto-filler. Then, after drying, paint and put a protective film.
This option for eliminating the through hole in the body is the simplest one. Experts, however, do not recommend using it, since the putty will eventually allow moisture to pass through and collapse. This method is most acceptable if recovery is urgently needed and there are no other alternatives.
Algorithm for the process of eliminating the through hole by applying a patch with a soldering iron

Here's what to do:
- To begin with, it is recommended to thoroughly clean out the rust from the corrosive place. You can use attachments and a drill (also a different set of tools).
- A patch is cut from a piece of metal sheet. Option - use a can of auto chemicals, etc.
The patch must completely cover the hole in the car frame element.
- A powerful soldering iron is being prepared, with which the patch is applied.
- Now you need to tin the edges of the patch.
Particular attention is paid to the edges of the hole where the patch will be placed.
- A piece of metal is soldered with a continuous seam.
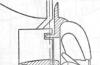
- It is checked by measuring whether the patch protrudes above the surface of the body as a bubble.
You can diagnose a protrusion using a flexible ruler.
- The protrusion (if found) is recessed by gentle hammer blows.
After the patch is recessed, a small dip is bound to occur. It will need to be leveled using a putty. We must not forget that the thickness of the putty layer should not exceed 2-3 mm. Otherwise, after drying, the layer will crack easily.
- Before puttingtying, the surfaces are properly prepared: the rust is brushed off with a metal brush, and then sandpaper is applied.

It is better to use sandpaper 120. Do not forget that the matting zone should be larger than the directly putty area.
- An abrasive risk is applied to the surface. This is done so that the putty has something to hold on to.
- Now you need to treat all areas after sanding with a degreaser.
- The surfaces should be primed first. This is done no later than an hour after sanding, since the cleaned metal without paintwork quickly undergoes oxidation processes.
It is better to take a phosphate primer as the first layer. It is a 2-component primer of this type, easily diluted with water.
Attention. Diluting the phosphate primer is prohibited in a metal container. The fact is that phosphate tends to interact with iron, which is not good. Better to use a glass or plastic container.
If it was not possible to find a phosphate primer, aerosol KSL primer in spray cans is also an option.

As soon as 10-15 minutes have elapsed after applying the first primer, it is necessary to proceed to the surface treatment with acrylic. This type of soil is applied already in 2-3 layers. The gap between the layers is kept for about five minutes.
Note. Again, acrylic primer can successfully replace the AER cartridge. This is especially true if there is no compressor.
The acrylic is completely dried within 3-4 hours. If it is possible to use INFR heating, the drying interval can be significantly reduced.
It remains to putty the surface, then sand and prime.
The method of sealing a through hole with a patch is considered the most rational for a number of reasons.
- Soldered patches last much longer than just glass fiber putty.
- The patch gives a more reliable connection.
- You can close the holes of almost any size (except for too large, when only the service of specialists is relevant).
- Simplicity of technology. Even a beginner can handle the job.
Video on how to patch a through hole
Other remedies
Recently, it is possible to close the holes in other ways. One of them involves working with fiberglass.

Instructions:
- The body surface is also cleaned and degreased, as in the two cases described above.
- Pads are cut from fiberglass, the size of which should be 2 cm larger than the hole size.
- The zone is pre-primed, the composition is given time to harden.
- The patch is applied to a completely dry surface.
- The fiberglass pads are fixed with an adhesive-resin composition.
First, one pad is glued, then the second, the third, and so on. Again, padding is recommended on the back.
After the glue dries, the body surface is treated and painted.
As you can see, holes on the car body caused by corrosion can be easily removed with your own hands. Illustrative examples can be seen in the video and photos.
One of the most problematic and expensive options for giving a car a presentation is to repair holes in its body. This damage can be repaired at a service station or you can try to get rid of it yourself. The first method will require significant costs, but the second will cost less, but it will take quite a long time. In addition, not everyone can properly repair holes.
Stages of repairing body holes
Work to eliminate holes in the body requires careful preparation of the area to be treated. The area around the hole is carefully cleaned with coarse sandpaper, while its radius should be at least 3 cm larger than the size of the hole itself. They remove not only the top layer of paint and varnish, but also the primer. As a result, in the cleaned area, metal should be visible, which is treated with an anti-corrosion compound.
 Next, you need to solder the patch. Any piece of metal of a suitable size can be used for it. It is important to take into account that such repairs are carried out from the back of the body so that the violation of its integrity is least noticeable. Before soldering, the patch, as well as the place of damage itself, is tinned using orthophosphoric acid as a flux. Its use is especially appropriate in this case, because, firstly, it excludes the likelihood of corrosion in the place of the solder, and secondly, it allows you to make the most reliable and invisible seam.
The patch is soldered in a continuous manner, leaving no loose gaps. After the treated place has cooled down, you should check if our patch is a bubble on the surface of the car. If, nevertheless, it turned out to be uneven, straightening is carried out with a small hammer, avoiding damage to the paint.
 Further, the repair involves puttingtying the area with a patch in order to hide it as much as possible. First you need to sand the repaired area, then degrease and dry it. Important: the putty should be applied in a rather thin layer, because if it is more than 3 mm thick, the material on the metal will not hold well. The priming itself is carried out in two stages: the application of an acidic and acrylic primer. In order not to bother with the preparation of a two-component composition for the first stage, you can use a phosphate primer packaged in cartridges. Acrylic primer is also sold in aerosol form, which will be very useful in the absence of a compressor and little damage.
Alternative options for repairing holes in the body
To repair a hole with a small size, you can seal the hole with a putty, mixing it with fiberglass. This method is much faster and simpler than the previous one, but it will not last long either - under the influence of precipitation, the place of the hole will begin to swell and become too noticeable. However, this option may come in handy if you are preparing a car for sale.
If you have no desire or opportunity to repair the hole, but you don't want to ride with it, use car stickers. This is very often done with corporate or work machines. This type of repair is conditional, but the appearance remains at its best.
If your car has serious damage, larger than a matchbox, it is best to fix them by welding. A professional at a good service station can skillfully perform them. Alternatively, you can do the welding yourself if you have the necessary experience and the necessary equipment.
The first manifestations of through corrosion of the body of cars of the domestic auto industry appear already in the second year of operation. In this case, it is not necessary to go to a car workshop, since sealing holes in a car body without welding is quite simple. Craftsmen have come up with several ways to quickly patch small holes, such as arches or holes in the wing. However, non-welded methods are unacceptable for the repair of load cells.
Before sealing through holes from their edges, you need to remove rusted metal with a grinder. In the area around the hole, paint, dirt, traces of corrosion are removed. Then it is treated with an anti-corrosion compound and degreased. To close the hole in the body, choose one of the following methods. To give the repaired place the desired shape, an automobile putty is used.
Body repair with putty
This method is used when you urgently need to close a small hole without welding or there are no other options for car repair. However, it should be understood that this is a temporary measure as the putty will quickly disintegrate. To repair the damage, use a special putty with fine, medium, large fiberglass. When preparing it, you need to monitor the absence of air bubbles. A liner is placed on the back of the hole to create an even layer.
A primer is applied to the prepared damage site. After it dries, a coarse filler is applied. Depending on the size of the hole, several layers are applied with complete drying of each. The total thickness should not exceed 2 mm, otherwise the patch will start to crack. The last layer is applied with a fine grain filler. The repaired car surface is treated with fine-grained emery paper.
Fiberglass and mesh
To repair more extensive damage, an aluminum patch mesh is used. A piece a little larger than a hole is cut out of it and attached with masking tape. Further, the sealing of holes in the car body without welding is carried out in the following sequence:
- a thin layer of fiberglass putty is applied without touching the tape;
- after drying, the tape is removed;
- subsequent layers of putty are applied after the previous one has dried;
- the surface of the car is processed with sandpaper or a grinder to a smooth state;
- to reinforce the mesh, several layers of putty are applied on the back of the body.
Permanent car patches are made of fiberglass and epoxy. Several overlays are cut from it, the first of which should close the hole with a margin of 2 cm. The size of each next piece is made larger than the previous one. The last pad should cover all the metal cleaned during the preparation process.
The cut pieces are soaked in resin and placed on the hole in a sequence of increasing sizes. If you need to close large holes on the back of the body, use linings so that the fabric does not sag. After all layers of fiberglass have been laid, the resin is expected to completely harden. The time required for this is indicated in the instructions.
Soldering car body
This method is used to seal small and large holes without welding. For work, you will need a flux that will protect the metal from rapid oxidation. Soldering acid sold in radio stores will successfully cope with this task. To achieve the required temperature, you will need a soldering iron with a power of 1 kW or more, or its version with heating with a blowtorch, but it is better to use a gas torch. The solder is chosen as refractory, since it can be used to seal a hole in the car body more reliably.
Small holes are simply filled with solder, starting from the edges and gradually fusing towards the center. A large hole in the body is covered with a patch cut from tin from a tin can. It provides:
- strong connection, almost like that;
- significantly longer service life than putty, but less than welding;
- the possibility of sealing large holes;
- ease of implementation, repair is available even for beginners.
The work is performed in the following sequence:
- A patch is cut out with a margin for the size of the hole. The larger the area of \u200b\u200bits contact with the body, the more reliable the connection.
- The soldered edges of the patch and places of damage are sanded to a shine.
- Using flux and solder, the brushed surfaces are tinned.
- Having applied a patch to the repair area of \u200b\u200bthe car, it is heated to the melting point of the solder. In this case, you need to monitor the continuity of the seam so that there are no missing sections.
- After cooling, the flux residues are removed, the soldering point is washed with hot water and soda.
Please note!
The disadvantage of this method is the swelling of the patch due to heat. If checking with a ruler confirms this, the bubble is removed by light hammer blows.
The resulting depression is leveled with a putty:
- On the surface of the patch, plus a few millimeters from each edge, risks are applied with 120th sandpaper. This is necessary for reliable adhesion of the putty to the metal.
- The cleaned surface is cleaned of dust and degreased with a solvent.
- To prevent the metal from getting covered with rust, the primer is applied no later than an hour after preparation.
- The first 2 coats are applied with a phosphate or acid primer at intervals of 15 minutes.
- After waiting another quarter of an hour, 2 - 3 layers of acrylic primer are applied at intervals of 5 minutes.
- It takes 3-4 hours to dry completely. The drying process can be accelerated with an infrared heater.
Rivets
In this way, not only large holes in the car body are closed, but also parts (fenders, aprons) are changed without welding. In terms of reliability, it is not inferior to welding. It is recommended to install the rivets in an inconspicuous place. Since there is no splash of molten metal during work, like welding, it is often used to repair the floor in the car interior.
The riveter you need for work can be bought in a store (cost about 500 rubles). The technology is simple:
- Cut the patch so that it overlaps 2 cm around the edges of the hole.
- Attached to the body, it is given the desired shape.
- Places of holes for rivets are marked.
- After drilling the patch with a drill according to the diameter of the rivets (4 - 6 mm), it is advisable to countersink the edges of the holes so that it adheres more tightly to the surface of the car body.
- Attaching the patch again, the center of the first hole is punched and drilled.
- After riveting and leveling, the patches are screwed and the remaining holes are drilled in place.
- To ensure a snug fit of the patch to the car body, rivets are fixed from the center to the edges.
- To prevent moisture from getting inside, the joint along the perimeter and rivets is coated with sealant.
The final stage
Regardless of how the car body was repaired, they all end with putty. However, it absorbs moisture, which leads to rapid destruction. Therefore, it must be coated on top with an anti-corrosion or epoxy primer. The body repair is completed without welding by painting. To do this, use a spray gun or aerosol cans, having previously covered the adjacent surface of the car with plastic wrap. Do not use a brush, as drips are possible.
The proposed methods will help to repair a car without welding in case of single damage. However, if a significant area is affected by corrosion, it will be easier and safer to contact a car repair shop for. Most often this happens with the floor, so it is recommended to regularly check it from the bottom of the car in a viewing hole or lift.
Owners of old cars often have problems with holes in the car body. These holes naturally occur due to the rusting of old metal. Any manufacturer will not provide a body corrosion warranty for more than 12 years. Consequently, a 15-year-old car will definitely have traces of metal corrosion on the body, which will only increase over the years. So over time, in places of corrosion, the metal can corrode through and through. In this article, we will tell motorists how to repair a hole in the body of a car with their own hands, on their own.
Preparing to seal the hole in the car body
So, you've found a hole through the body of your car. do not rush to contact expensive craftsmen who guarantee the high quality of their work with a guarantee that rust will not appear in this place for many years. If you are limited in money, such an appeal will lead you into debt and taking out loans. An alternative to such a development of the situation can be self-sealing a hole in the body of the car.
First, it is necessary to prepare for filling the hole in the car body. To do this, you need to go to the nearest car market or auto parts store. We will need materials for working with paintwork and metal panels of the car body:
- Metal sheet;
- fiberglass and epoxy adhesive;
- high power soldering iron;
- sandpaper;
- a hammer with a wooden head or a hammer and a wooden pad;
- acid rust converter;
- White Spirit;
- putty, car enamel;
- two-component acrylic primer;
- two-component acid (phosphate) soil.
Next, a place is prepared on the car body, where a through hole appeared due to natural corrosion. It is necessary to carefully sand the surface at a distance of several centimeters around the hole in the body panel using sandpaper. We must remove the layer of varnish, paint, possible putty and sand the traces of rust. The surface around the hole should be carefully treated with an anti-corrosion solution.
Ways to seal a hole in a car body
Currently, there are two effective ways to seal a hole in the car body with your own hands.
- The first method involves the application of a patch in the form of fiberglass treated with epoxy glue.
- The second method is to apply a sheet of metal patch.
Applying a patch of fiberglass and epoxy adhesive
The algorithm for filling a hole in a car body using fiberglass with epoxy glue is quite simple.
- We clean the area of \u200b\u200bthe body panel surface around the hole. Be sure to treat the cleaned surface with a rust converter.
- Cut out at least three fiberglass patches in size that exceed the size of the hole in the body on all sides by at least 20-30 millimeters. The first patch is 20-30 mm larger, the second patch is 30-40 mm larger, and the third patch is 50-60 mm larger.
- It is necessary to impregnate each patch with epoxy glue, which will not only allow them to be glued together, but also prevent moisture from seeping from outside to inside. It will also allow avoiding in the future bubbles under the paint in this place of the patch, which arise due to the hygroscopicity of the material. Epoxy glue eliminates hygroscopicity.
- The hole is sealed from the back of the body panel - from the inside of the body. The layers of fiberglass in epoxy glue are glued one by one. In this case, wait until the bottom layer of the patch has dried before gluing the top layer.
- Further, from the outside of the body panel, the surface of the protruding part of the fiberglass is cleaned. After that, a layer of putty is applied, and then the entire body panel is rubbed and painted with varnish.
Applying a sheet of metal patch to a hole in the car body
The second method of filling the hole in the car body is more reliable. Its algorithm is shown in the table below.
| Step | Description |
| 1. Cut out a patch from a sheet of metal. | We need to cut a patch from a sheet of metal so that it is 20-30 millimeters larger on all sides of the hole in the car body panel. |
| 2. Tinning of metal patches. | It is imperative that the body panel patch be tinned. It also needs to be tinned from the edges of the hole in the body panel on both sides. |
| 3. Solder the patch to the body. | Using a powerful soldering iron, you need to solder the metal patch to the hole in the body panel. In this flux soldering, it is worth using an acid based rust converter. The patch soldering contour must be continuous. After soldering, thoroughly rinse the entire surface around the sealed hole in the car body panel. |
| 4. Drowning the patch in relation to the plane of the hole. | Outside, the patch of the hole in the body panel should be below the plane of the panel. If the patch peeps out, it must be drowned with light blows with a mallet. It is necessary to drown the patch so that the applied layer of putty on it is not thicker than 3 millimeters. |
| 5. Putting putty on the patch. | Next, we put putty on the body panel hole patch, leveling the entire surface. Before applying the putty, once again, sand the outer side of the patch with coarse abrasive paper. |
| 6. Preparation of the surface for the primer. | We have to visually define the area where the mat will be applied. This area should be larger than the filled area. First, apply the adhesive strip with coarse sandpaper. Next, degrease the sanded surface with white spirit. This will remove dirt and dust. |
| 7. Application of an acidic primer. | A two-component phosphate primer must be used. Before starting work, the primer must be diluted in a plastic container. You can also use an acidic aerosol primer. Only one coat of primer is applied. |
| 8. Application of acrylic primer | After 20 minutes, apply 2-3 coats of acrylic two-component primer. Leave the surface to dry for 10-15 minutes between each layer. The acrylic primer can also be applied from a spray can. The last coat of primer must dry for at least three hours. |
Operation of a car in real road conditions provokes the development of corrosion centers on the body. This is especially true in relation to domestically produced cars and inexpensive foreign cars. The metal begins to rust, the paint swells, and through holes form. Meanwhile, welding-related body repairs are quite expensive. Therefore, it is not economically feasible to repair an old car in a car service. You can fill up small holes yourself at home. In this case, the volume of financial investments will be minimal. The considered repair can be conditionally divided into several stages.
Surface preparation stage
Getting started consists in high-quality surface preparation. In this case, loose rust and old paint are roughly cleaned with a metal brush, after which the area of \u200b\u200bdamage is estimated. It should be noted that the metal never rots strictly locally. There is always a certain amount of thinned metal around an existing hole, which ideally also needs to be removed. The boundaries of this zone are determined by pressing firmly. If the metal crunches and bends under pressure, it must be removed. You can cut sections of thinned metal using a "grinder" with a cutting disc.
After the frankly rusted metal is removed, the edges of the treated area are cleaned and leveled with sandpaper or the same "grinder", but with a grinding disc. The metal around the edges of the hole should be clean and shiny. In cases where it is not possible to completely clean the edges of the hole from rust (small cavities remain), the metal is treated with an acidic rust converter. To do this, the composition is applied to the areas of corrosion, the reaction is allowed to take place (15 - 30 minutes). After that, the converter is washed off with a large amount of water, the treated area is wiped and dried.
Further work must be done immediately after the initial processing. A delay of several days in most cases leads to the appearance of new foci of corrosion, which will have to be processed again.
Direct repair phase
The existing hole can be closed in various ways, the choice of which depends on the level of load on the body element being repaired, the size of the hole and the availability of the necessary tools and materials.
Repair by covering the hole
The simplest to implement is the method of filling the hole with epoxy resin or fiberglass putty. This repair method is perfect for small holes in inconspicuous areas of the body that are not too strongly influenced by road factors. Before processing, the edges of the hole are rubbed with sandpaper, creating small scratches (at risk), and degreased with gasoline, alcohol or acetone. After that, the hole is roughly covered with the selected composition, filling the internal cavity if possible.In this case, it is better if the hole is not completely filled. The filler level should remain a couple of millimeters below the level of the main surface.
After the fiberglass putty is dry, fill the remaining hole with a multi-purpose putty or finishing putty. After it dries, the surface is sanded, comparing the level of the main surface with the level of the repair material. In this case, grinding is carried out with fine sandpaper, using a wooden sanding bar. The result of grinding should be such that a person, passing his hand over the place of repair, does not feel tuberosity.
For aesthetic purposes, the place of repair can be glued with a decorative picture or primed and tinted. However, it will not be possible to completely hide the place of intervention at home. To do this, it is necessary to completely repaint the body element or resort to a complex procedure for touching up the damaged area with a “spot”.
Repair by sealing the hole with metal
This repair method is somewhat more complicated and requires certain tools. However, in this way it is possible to repair holes, which cannot be covered with fiberglass due to their large size.
The hole is measured to get the job done. After that, a patch is cut out from a separate piece of metal, covering the hole by 1 - 2 centimeters and extending to the area of \u200b\u200bstrong metal. The patch is adjusted in shape, the edges are aligned and cleaned of sharp burrs. After that, holes are drilled along the edges of the patch, the distance between which should be about one centimeter.
Before installing the patch, the repaired area is treated with anti-corrosion compounds and sealant. You can also process the bottom of the patch. The processed insert is pressed to the installation site and fixed. After that, they are fastened with self-tapping screws for metal through pre-drilled holes. At the same time, the fixing strength is sufficient for elements that do not undergo significant loads, and the treatment with a sealant prevents moisture from penetrating through the gap.
After the patch is fixed, the protruding heads of the screws are almost completely grinded with a "grinder". However, the residual thickness of the cap should not be lower than 0.4 - 0.5 mm. Otherwise, the patch will simply fly off the mounts. The patch itself and the adjacent area are deepened with a hammer, after which the repair area is putty and tinted.

Repair by welding the hole
This method is the most correct of all of the above. In this case, the patch is fixed not with self-tapping screws, but by welding. This can be done by points through the drilled holes. At the same time, the mount is more durable and invisible. After finishing the welding work, the patch is also sunk and putty.
For welding work on a car, it is better to use welding - a semiautomatic device. Operation with an arc inverter is also possible, however, the weld seam is rougher and requires significant post-processing. In addition, thin automotive metal simply burns out under the influence of the electrode.
End of work
Before puttingtying, it is necessary to apply a layer of anticorrosive primer or rubber-bitumen mastic to the fixed patch. The putty is applied only after it is completely dry and sandpaper is used to create risks. For puttying, a universal putty or several types of specialized putty can be used. After the applied compositions have dried, the area is sanded, while achieving an ideal match between the main and repair surfaces.
Before touch-up, the area is degreased and another layer of anti-corrosion primer is applied. After it dries, tint is made in several layers. Metallic paints must also be covered with clear varnish. This is done until the paint has completely dried, 15 - 20 minutes after applying its last layer.
To make the repair area less visible, paint is applied without masking tape, avoiding the appearance of a clear border of the painted area. This makes the transition smoother. It is necessary to glue only those areas where paint is undesirable (glass, door handles, headlights, chrome elements).
The choice of paint is a huge topic that cannot be covered in the format of one of the sections of this article. However, here are some of the most relevant tips for running this event yourself.
1. The cost of selecting and creating paint that exactly matches the color of the car is quite high. In different shops, it can vary from 3 to 5-6 thousand rubles per kilogram. However, when repairing old cars, it is not at all necessary to tint them with exactly the same paint. In most cases, it is enough to remove the flap (the only painted part, the removal of which takes no more than a minute) of the gas tank and come with it to the store. Sellers will easily pick up paint using special color sheets. This paint will have minimal differences from the native car paint, which are not noticeable without close inspection.
2. For the selection of paint, do not take plastic painted elements with you to the store. Due to the nature of the material, the paint on them can differ quite significantly from that on the metal parts of the body.
3. It is better to use a paint designed for a spray bottle
You will also be interested in:

Under the supervision of his father. The situation is relatively under control - the kid hardly gets to ...

Ford-T is the first mass-produced vehicle. Making one car a month at the beginning of the 20th century ...

Street in Sweden, the day after the left-hand traffic was changed to ...
To narrow your search results, you can refine your query by specifying the fields by which ...
Ensuring the ship's turnability is achieved by using controls and ...

