


Mid-range cars are factory-made with boring gray and black trim. Whether it is more expensive models: their salons are made in pleasant colors, and soft leather is used as a material. But what's stopping you from redesigning your salon? This is especially true for machines with a long service life: during the operation, cheap fabric is wiped, stains form on it that cannot be removed. If these problems are familiar to you, now is the time to start covering the car interior with leather. In addition, this process is quite realistic to do with your own hands.
The choice of material for cladding
Genuine and artificial car leather are best suited for upholstering the car interior. Both materials are characterized by high performance, which makes them stand out from the less popular carpet or velor. At the same time, covering with leather is much easier to do with your own hands than, for example, flocking the interior. The reason for this is the high elasticity of the material, as well as the everyday set of necessary tools. Recently, motorists increasingly prefer Alcantara. However, the price for the original material is almost higher than the cost of genuine leather, while its cheaper substitutes cannot boast of high quality.
For these reasons, we will dwell on materials such as genuine leather and eco-leather in more detail.
Genuine Leather
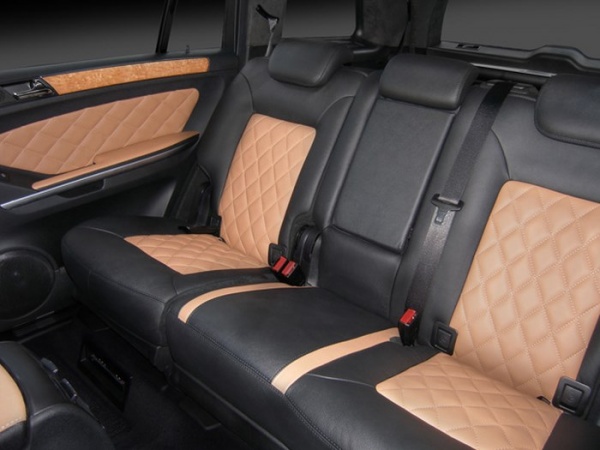
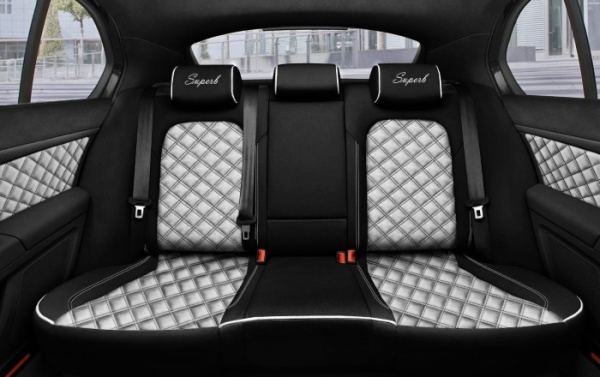
Genuine car leather will become a real interior decoration. Is it possible to imagine a luxury car covered with a hard carpet or pasted over with a multi-colored vinyl film?
However, a beautiful appearance is far from the only advantage of natural leather. She is able to withstand both frost and heat. Cracks will not appear on it from temperature drops. Another positive property is resistance to ultraviolet radiation. Many materials fade in the sun, which is why after a few years of use, the control panel and the front seats, which are located directly under the windshield, become noticeably paler than the rest of the trim. But this will not touch natural leather. You can be sure that the interior will retain its color.
Do not forget about the fire resistance of the material. Accidentally dropped cigarette ash will not harm the cabin. Moreover, genuine leather does not absorb odors, which is very important for those who smoke inside the car. The skin is not afraid of other mechanical damage: it will take a lot of effort to scratch or tear such a coating.
On sale you can find material of various textures, up to crocodile or ostrich leather. However, when choosing between smooth and perforated leather, it is best to opt for the latter. It is softer and more pleasant to the touch. In addition, its wear resistance is noticeably higher.
The only thing that can discourage you from covering the interior with genuine leather is its price. Its use becomes especially risky with self-tightening. After all, if at some point something goes wrong, a large amount will be thrown into the wind. If you are not ready to take such a risk, turn your attention to eco-leather.
Eco leather
Nowadays, artificial leather has practically received a second life. Outdated technologies have been replaced by newer ones. Low-quality leatherette is no longer used to constrict the interior of the car, giving way to eco-leather.
Eco-leather is a synthetic material. During its manufacture, a thin layer of polyurethane is applied to a woven cotton or polyester base. At the same time, the characteristics of the material directly depend on the thickness of the layer: the thicker it is, the stronger the eco-leather is, but at the same time it is tougher. For car upholstery, the optimal thickness of polyurethane was experimentally derived.
The material received the name "eco-leather" for two reasons. Firstly, during operation, it does not emit toxic substances that adversely affect the passengers of the car. And secondly, after its invention, the number of animals killed for the sake of skin has sharply decreased, which delighted the animal rights activists.
In terms of its external qualities, eco-leather is very close to its natural progenitor. With the help of special technologies, the material is embossed, thanks to which it becomes quite difficult to distinguish it from genuine leather. Moreover, the higher the price of the material, the more identical their appearance is.
Eco-leather has a rich palette. You can use classic black or extreme red in the interior, or you can combine colors to your liking. But staining a natural material will cost you a round sum.
In terms of other characteristics, artificial leather is also not inferior to natural: wear resistance, moisture resistance and fire resistance are its strong qualities. Both of these materials stay clean for a long time, and if necessary, stains and dust can be easily removed with a wet sponge and a soft cloth. It's no secret that many people are allergic to animal fur and skin, as well as chemicals used in tanning. Eco-leather is perfect for them, as it is absolutely hypoallergenic.
At the same time, the cost of eco-leather is several times lower than natural, which makes it more affordable for the general population. You can safely take one or two meters in reserve for your wallet if you are doing self-hauling for the first time. The rest of the material can be used to make steering wheel covers, gear lever and other small parts of the car.
Regardless of whether you choose natural or eco-leather, purchase the material in specialized automotive stores. There are many reasons why leather used to make furniture, clothing and footwear is not suitable for upholstering a salon. For example, its instability to temperature extremes and reduced wear resistance.
Both natural and artificial material have a drawback that may seem insignificant to someone. In cold weather, the coating cools quickly, and in the sun it gets very hot. Accordingly, this slightly lowers the comfort level. Whether it is worth paying attention to this feature of materials is up to you. In any case, leather is one of the best solutions for the interior decoration of a car interior.
Required tools and materials
If you have already decided on the material into which you will drag the salon, it's time to calculate its approximate volume. In total, you may need 6 to 25 meters. But these figures are very approximate: it all depends on the specific car model. So, a crossover or SUV will take much more material than a coupe. Therefore, do not be lazy and measure the length of the ceiling, the length of the cushions and seat backs, the size of the front panel, as well as the width and height of the car doors. Add all the numbers obtained and add at least a meter as an error. Believe me, it will come in handy.
In addition to the material itself, you will need other tools:
A set of flat and Phillips screwdrivers for removing some elements;
- foam rubber;
- sandpaper;
- degreaser;
- meter tape;
- masking tape;
- cling film;
- marker;
- stationery knife and sharp scissors;
- reinforced threads for sewing leather products;
- sewing machine with a needle and foot for working with leather;
- special high temperature glue for leather;
- rollers and spatulas with a rubber blade;
- industrial dryer.
I would also like to dwell on the choice of glue. Do not use Moment glue or other similar super glues. Universal glue 88 is often used for constriction, but it also has a number of disadvantages. Purchase a quality adhesive that can withstand high temperatures. MAH works well for these purposes. Its price is quite high, but if you don't want to see the coating swell and come off in a few months, spend money on it.
DIY hauling process
Doing it yourself is a painstaking task that can take you more than one day. All work can be divided into several stages:
- hauling of car seats;
- hauling the ceiling;
- hauling of doors;
- front panel hauling;
- hauling armrests;
- hauling the steering wheel and gear knob.
In order for the work to go faster and better, several general rules should be followed, which apply both to large parts with a complex shape and to smaller elements of the car.
- All parts must be dismantled, even the smallest and most inconspicuous ones. It may seem to you that pasting, for example, the gearshift knob, is quite possible to carry out inside the cabin, but this is not so. The seams will be crooked, and the space around will be dripped with glue.
- Remember to wash the parts and remove the old coating.
- If there is serious damage to the surface to be pasted, for example, dents or deep cracks, they must be repaired. To do this, you will additionally need a special putty compound and a primer for plastic.
- Leather, both natural and artificial, is an elastic material, so it must be well pulled. If you don’t do this, you will end up sagging ugly. To make the skin stretch better, soak it for 20-30 minutes in hot water, but not boiling water. You can determine the required temperature without a thermometer. Use water you can bathe yourself in.
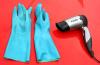
- During the process of covering with material, warm it up with a warm stream of air from a building hair dryer. If it is not in your arsenal, then you can replace it with a powerful household one. However, this will affect the degree of skin elasticity, so it is better to use a special tool.
- It will be quite difficult to perform some operations alone. So call a reliable comrade for help.
Be careful when cutting material. Think of school labor lessons and colored paper crafts. You need to position the patterns of the parts so that there is as little empty space between them as possible. This will reduce the amount of clipping.
Now let's look at the hauling of each element of the car in more detail.
We cover the seats
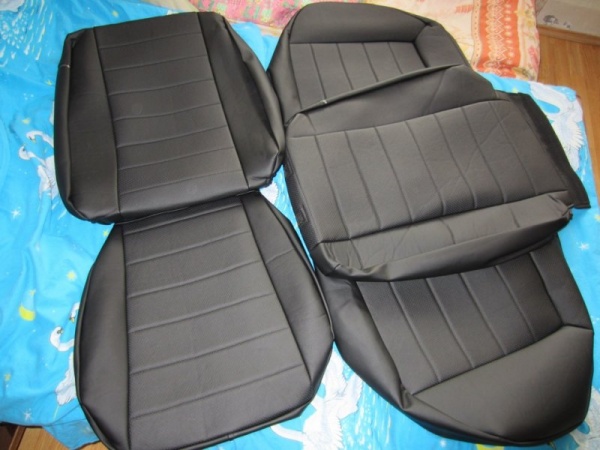
In order for the seats to be in harmony with the rest of the interior, you can simply sew covers for them. This work is perhaps one of the most difficult, as you need to be able to make patterns according to the parameters of chairs, as well as use a sewing machine. It is best to contact a car dealership for this. But if you are determined to do everything yourself, then carefully read the instructions.
- Measure the height and width of the seat cushion, backrest and headrest.
- On paper or transparent polyethylene, make patterns for parts taking into account all measurements. For more precision, place the plastic directly on the seat and trace the contours.
- Cut out the parts you received.
- Place the templates on the wrong side of the fabric and circle them with chalk. Leave about 2–3 cm as a reserve for later stitching parts.
- Use a sharp pair of scissors to carefully cut out the leather.
- Before sewing the elements with a machine, process them with a manual basting seam. This will make sure you get the shape you want. Do not tightly tighten the parts together. All you need at this stage is to connect the material to understand how the finished product will look like. In case of alteration, such a seam is easy to rip. And so that the elements of the product do not fall apart, secure them together with pins.
- Try on the resulting covers carefully. If the form is the same, and you do not need to make changes, start working with the machine.
- If you have chosen thin leather, but want your covers to be thicker and more durable, use the following trick: make similar patterns out of thick mattress fabric, and then sew them from the leather back to back. If desired, the interior space can be filled with foam rubber. This will make the covers even softer.
- Don't forget to add hooks and garters to help secure the cover to the chair.
- If airbags are installed in the seats, do not stitch these places on the cover with a sewing machine. It will be much easier to break the hand seam.
During the fitting phase, make sure the covers do not interfere with the seat belts.
Process in the photo
 Carefully measure the length and width of all seat components
  Make a pattern for the front seat, based on the diagram
  Make a pattern for the rear seat cushion, based on the diagram
  Make a pattern for the back of the back seat, based on the diagram
  Connect all parts as shown in the figure
Video: seat upholstery
Moving on to the ceiling
Despite the fact that the ceiling has a fairly large surface area, it is quite easy to paste over it with material. This is due to the lack of a pronounced relief, such as on the front panel.
- First remove all attachments from the ceiling and then dismantle it. The dismantling principle will differ depending on the vehicle model. This usually requires removing the front seat. The correct procedure is described in detail in the vehicle manual.
- Take a hard sponge and remove the old coating.
- Old glue will remain on the ceiling. It should also be removed. The easiest way to do this is with a degreaser.
- To prepare the surface for glue application and improve adhesion, the ceiling must be sanded. Use fine grit sandpaper.
- Pasting starts from the center of the ceiling. You need to apply a 10 cm long strip of formulation to the center of the surface.
- Take a piece of material of the desired length and attach it to the ceiling. Press down on the center and then smooth it out with a rubber trowel.
- In order to glue the rest of the skin, you need to apply the glue in a similar way at intervals of 15 cm. After each strip, the material must be pressed and smoothed. Don't forget to pull on. This will avoid sagging.
- Be careful not to wrinkle. When the material is fully glued, iron it additionally and then dry with a hair dryer. When the glue hardens and the leather is dry, the product will take its final shape.
- At the end of the work, the edges must be wrapped on the reverse side of the ceiling and glued, and the excess must be cut off.
Process in the photo
Due to the impressive volume of the ceiling, you may need an assistant in the process of its constriction. Have one stretch the leather and the other apply glue and press the material to the surface. So the work will go much faster, and the result will be better.
Video: how to fit the ceiling
Armrest padding
In the cabin, only the upper part of the armrest is visible, so you only need to cover it. This is very easy to do.
- Remove the armrest cover.
- New cladding can be glued directly over the old cladding.
- Cut a piece of material long and wide enough to completely cover the part.
- Apply a thin bead of glue to one of the edges of the armrest and attach the material to it.
- While heating the leather with hot air from a hair dryer, stretch it and glue the opposite edge.
- Pull the leather over the sides of the lid and glue them.
- Cut off the excess.
If you want to cover the sides of the armrest with material, then you will have to make a pattern. There are two ways to do this. The first is to measure the length and width of each of the edges of the armrest, and then drawing up a pattern based on these measurements. The second method is simpler and more accurate; we will describe it below.
Video: altering the armrest
Shift knob trim technology
It is easiest to pull the gearshift knob. However, a certain method is used for this process, which will be useful to you also when pasting the steering wheel, doors and dashboard. Alternatively, you can use it by hugging the entire armrest.
- Wrap the removed gearshift knob with cling film.
- Tightly glue it on top with masking tape in several layers.
- Mark with a marker the places of future seams. To do this, you need to trace the curves of the handle.
- Use a utility knife to cut the tape along the lines. If the handle has a standard shape, then you will most likely end up with two parts.
- Attach the resulting patterns to the wrong side of the material, and then circle them.
- Cut the pieces out of the leather and then sew them together.
- Turn the resulting product out, and then pull it over the gearshift knob. To help your skin stretch better, be sure to soak it in hot water.
There is another method for covering this part with leather. For it, you do not need to stitch the material after cutting. Sew on the sewing machine along the edge, backing 3 mm into the part. The stitches can be made with threads to match the skin, or they can be contrasting to create a certain image. Next, you will need to glue the parts, and then use a needle and strong thread to lace up the resulting cover, passing the needle under the stitches.
Process in the photo
 Cut the masking tape along the lines
  Cut out the details from the leather
  Sew each piece 3-5mm from the edge
  Thread the needle and thread under the stitches and pull the details
There are various methods of lacing: macrame, sports, herringbone and others. Choose the one that seems to you the most aesthetic and easy to implement.
Video: gear knob cover
Improving the steering wheel
Making a pattern for a steering wheel constriction is done in the same way as described in the previous section: the surface is wrapped with a film, and over it with tape. With a marker, lines are drawn at the seams. They need to be done on the inside of the steering wheel, as well as on the borders of the spokes.
- The resulting parts must be transferred to the material, retreating about 2 mm inward so that the sheathing does not sag. Cut out the resulting elements, and then sew together.
- Sew the edges of the parts on the sewing machine as described for the alternative gear knob stitching.
- Attach the cut-out parts to the handlebars. To prevent the material from crawling, place it on a thin strip of glue. Strength at this stage does not need to be achieved. In any case, you have the lacing ahead.
- Take a threaded needle, and then pass it under the stitches to lace up the braid. You can use different types of lacing for this.
- It is best to start lacing from the bottom of the handlebars and then work counterclockwise.
- Remember that you are working with leather. It needs to be constantly straightened and pulled.
- Dry the fully laced braid with a hair dryer. After that, it will take its final form.
Process in the photo
 Cover the steering wheel with masking tape in several layers
  Remove the masking tape from the steering wheel
  Transfer the contours of the parts to the material
  Sew the parts together
  Attach the resulting cover to the steering wheel
  Pass the needle under the stitches on one side and the other of the cover and pull the sides together
To make the interior look more stylish, use threads of the same color and the same seam for lacing the steering wheel cover and gearshift knob.
Video: hauling a car steering wheel
Padding of doors
The door pattern is also made using masking tape. Be sure to mark the places of the door handle, as well as the window handle. You will need to cut out these areas. The patterns are outlined on the material, and then the resulting parts are cut out.
- All plastic elements must be thoroughly sanded before applying the glue and then degreased.
- Along the line bordering the glass, apply a thin bead of glue and press the material against it.
- Direct a stream of hot air onto the leather and pull it all over the door. Watch out for the handle holes.
- Glue the middle and edges of the product in this way.
- To make the coating fit better, smooth it with a rubber spatula.
- Cut off the excess edges.
- When the door is finished, wait until the material is completely dry.
Process in the photo
 Tape the surface of the door to be sheathed with tape
  Draw lines at the places of the future seams, and then cut the tape along them
  Cut the fabric to fit the shape of the surface to be covered
  Before applying glue, the plastic surface must be sanded and degreased.
  Press and smooth the skin
Video: hauling car doors
Front panel padding (torpedoes)
Front panel upholstering is one of the most difficult processes in the upholstery and is therefore best done last. If the part has many bends, then first you need to make a pattern. This is done with masking tape, according to the same principle as in the manufacture of a cover for the steering wheel and gearshift knob.
- Circle the masking tape patterns on the covering material and add about 10 mm for the seams.
- Join the parts with a basting seam in the same way as you did for the chair covers.
- Try on the resulting product. If its shape matches the shape of the panel, machine the seams with a sewing machine.
- Since plastic is used for the manufacture of the panel, it must be sanded with an abrasive with fine grain, and then the surface must be degreased.
- Apply a few strips of glue to the prepared surface and attach the resulting cover.
- Smooth the material with rubber trowels or rollers. Make sure all seams are in place.
- Dry the product with a hair dryer.
Process in the photo
 Cover the front panel with a thick layer of masking tape
  Cut the parts out of the masking tape
  Transfer the contours of the parts to the material and cut them out
  Sew the parts together and glue the material to the panel
If the torpedo has a simple rectangular shape, then the process of constricting can be greatly simplified and skip the step of making a pattern. Just cut a piece of material just enough to its length and width, and then glue the leather at the top and stretch it over the entire panel. At the same time, help yourself with a stream of air from a hair dryer and smooth the material with a spatula.
Video: hauling the front panel of a car
How much will it cost to drag a salon with genuine and artificial leather
The total cost of the upholstery depends on the price of the material. Eco-leather is usually sold for 500-700 rubles. per running meter. But natural is at least 3-4 times more expensive. High-quality glue will cost about 1,500 rubles. One can should be enough for all the interior elements.
To calculate the resulting amount, add up the parameters of all parts. So, if it takes 5 m to the ceiling, 1.5 m to the front panel, 7 m to the door, 6 m to the seats and another 0.5 m to the steering wheel and gearshift knob, then you will need to buy about 20 m of fabric. Of course, the numbers can vary depending on the size of the car. But in total, the cost of self-tightening of the salon will be at least 20-25 thousand rubles.
For comparison: in a car repair shop for this service you will be asked from 50 thousand rubles and more, depending on the quality of the material. When working with your own hands, the savings will be more than 50%. Is it worth your time and effort - decide for yourself.
In order for the leather upholstery not to hit the budget, it makes sense to divide this process into several stages. Let's say this month you are working on the seats, the next month on the ceiling, and a month later on the front panel, armrest and other small details. This approach will save you energy, and you can also learn from your own mistakes. And we advise you to start with the smallest details - gearshift knobs and steering wheel. With their help, you can understand the general principle of constriction, and things will go much faster.
If the car is operated for a long time, then sooner or later it will need a hauling of car seats. But there is no need to rush. In many cases, special detergents are sufficient to restore a decent look to the interior. If restoration is not possible, all that remains is to make repairs.
Drink stains and damage to skin or other material are not always a trigger for seat constriction. In some cases, it is enough to see another driver's salon of your dreams in order to get the idea to change everything.
Some people will say that this is a waste of money and may be right about something. But let's turn to statistics. According to recent studies, a person spends about two years on the way to and from work in their entire life. In some apartments, people live less than they drive in a car, so do you really need to deny yourself the hauling of car seats?
In addition, it is not necessary to limit yourself only to the constriction of the car seats. If you want to completely change the interior of the car, you need to drag the entire interior. Even a floor in skilled hands can become a work of art. The most interesting thing in all this is that the transformation can be done with your own hands.
If you are worried about not being able to find material for upholstering car seats or the entire interior with your own hands, just go to the nearest car market. There will be a huge selection of all kinds of materials for a wide variety of tastes and price possibilities.
Choosing a material
There is one important clarification to be made here. There are so many materials for car seat upholstery that you can list them endlessly, and this is not taking into account the possibility of individual order. Nevertheless, there are certain trends in the automotive world that have already proven themselves well. Among the materials most in demand on the market are:
In principle, all of the above materials are good in their own way. Some attract with their performance, others for their beautiful appearance and low price. It is much more important to look at the product at the time of purchase.
Important! To make the car seat upholstery run smoothly, check the uniformity of the material at the time of purchase.
If you have chosen Alcantara as the material for the seat upholstery, pay attention to the direction of the villi. This plays an important role when cutting. Otherwise, all the seats will differ from each other in shade.
Do-it-yourself banner
Any renovation work begins with the creation of a project. After you understand what you want, calculated the required amount of fabric or leather, picked up the color and watched several training videos, it is time to take up the car seat constriction.

What is needed for constriction
First you need to collect everything you need so that you do not waste time later. This will allow you to carry out all the manipulations with the car interior, not only quickly, but also efficiently. You will need:
- tools,
- scissors,
- foam rubber,
- iron,
- fabric or leather,
- spray glue.
This is a versatile kit that will allow you to make car seat upholstery. The main thing is not to rush and do everything gradually. Reasonable calculation is the key to the successful completion of the case.
The constriction process
It is best to break the car seat upholstery into stages. This will allow you to achieve the maximum effect with the minimum expenditure of both effort and time. The repair process should include the following stages:
- Disconnection of electrical wiring.
- Dismantling of old covers. To do this, you need to expose the seats from the car. They are usually attached with four screws. It will not be difficult to unscrew them. This will free up space for further work.
- Cleaning the surface of car seats from dirt.
- Parts made of plastic and metal must be degreased.
- Drawing up a pattern of new covers. Open the old cover. Spread fabric or leather on the floor and place the pieces of the old cover over it. Mark up and use scissors.
- Sew the parts together. The edges of each piece should fit snugly against the edges of the other.
- Finish the seams. You will need glue for this operation. Also, the joints need to be stitched for greater reliability. All irregularities are cut with scissors.
- Slip on new covers. They should fit snugly against the seats. The free ends are pulled through the holes in the car seats.
- Drying. Use a hair dryer to get the right tension. Cooling down the material will stretch. This will make the surface flat. For best results, use a steaming iron.
At the end of the job, the seats are assembled and installed in the vehicle.
Padding other auto elements
Of course, car seat upholstering is an extremely important task. But do not forget about the rest of the interior elements, which are also important. To create a complete concept, you need to take care of the doors, ceiling and armrest.

To change the upholstery on the doors of a car, you will need to do a pattern. Don't forget to leave about a centimeter on each side for allowances. Pay particular attention to creating the holes for the door handles. This must be done very carefully. If the machine has power windows with handles, consider their location.
Important! A layer of glue is applied where the upholstery will adhere to the door.
Replacing the ceiling is perhaps the most challenging task when hauling. The point is in the auto overhead lighting system. Be very careful with lamps and wiring. Start by removing them completely. It also needs to be done with handles and decorative elements of the racks, if any.
The process of stretching the ceiling is similar to the hauling of the seats, even a hairdryer at the end is used to pull the leatherette. It is recommended to heat it up before starting installation. This will provide elasticity and comfort when tightening.
Seat upholstery has the most in common with armrest updates. They are removed first. After that, a pattern is made on the old covers. A stock of fabric or leather is also left around the edges.
In order to secure the new cover, glue is used. With its help, the edges of the armrest are glued, and the fabric is carefully fixed. For the reliability of the gluing site, it is better to dry it with a hairdryer.
Advice! To give the interior a better look, you can put foam rubber under the parts. In principle, any insulation material will do.
Outcome
Padding car seats with your own hands is quite a feasible task for every person. All you need to do is outline a plan, buy materials, and collect tools. The only drawback is that the procedure is time consuming.
In addition to car seat upholstery, you can make a complete restyling of the interior. However, in this case, it will take at least a weekend. But the result is worth it. Padding allows you to completely change the inner world of the car.
An additional advantage of self-tightening of car seats and the entire interior is money saving. No need to spend finances on auto repair services. After all, the procedure is not so complicated as to delegate it to someone for money.
Padding of car seats Is a great way to return the aesthetic appearance to the interior, because old, worn covers in the car can ruin the whole design. This is especially necessary for a salon of light shades, the upholstery of which has lost its brightness, stained and cannot be cleaned. Fortunately, now there are many materials and tools that allow you to do the hauling yourself. This is not as complicated a procedure as it might seem at first glance, you just need to have basic technical skills and the necessary tools.
Self-hauling car seats
Do-it-yourself car seat upholstery: where to start?
Every avid motorist will agree that the upholstery of the cabin is an important element, without which tuning any car will not do. But, alas, not everyone can afford this pleasure. In order to significantly save on car dealership services, this guide has been written. So, before starting work, you need to decide on the material that is most often used:
- Carpet. The most affordable and inexpensive option for armchairs. Usually its base is covered with decorative pile. The main advantage of this material is a wide range of colors and a simple process for upholstering a car seat.
- Velours. It began to lose its relevance, since now it is not easy to purchase high quality fabric. Many manufacturers make velor, the covers from which wear out quickly. You need to be careful.
- Alcantara. Differs in a fine fiber base. Motorists often choose it because Alcantara is of high quality and durable, pleasant to the touch. In addition, it has a special coating that protects the covers from dirt.
- Leather or leatherette for cladding. Padding of seats with leatherDespite being spectacular and durable, it has some disadvantages, including the low elasticity of the seat and the ability of the material to absorb odors.
When buying material for the upholstery of the salon, first of all, pay attention to the quality of the goods. Often the uniformity of its structure is of great importance for cutting. For example, when buying a non-uniform Alcantara, the details of the seats and armchairs may have different shades.
Instrument preparation
The procedure for performing seat constriction made of materials of any type (leather, leatherette, velor, etc.) has a similar algorithm, so this requires the same set of the following devices:
- Sewing machine;
- Soundproofing materials (if necessary);
- Wrenches and screwdrivers of different sizes;
- Glue;
- Foam rubber;
- Hair dryer;
- Scissors.
Do-it-yourself interior upholstery: preparation
1. Self-hauling of a seat and armchairs always begins with removing the old car seats. Dismantling makes it much more convenient to plan the size of Alcantara or leatherette and their location on the covers of the constriction. After that, you can sign each fragment on a standard case with a marker.
2.Using the clips on the back of the chair, remove the cover.
3. We unpick it into separate elements. This will make it easier to transfer their image to the prepared material.
We make sewing of new car covers for the car interior
4. First, press each element firmly and fix it with weights. After that, we outline the contour itself. To do-it-yourself car seat hauling was more successful and the flaps fit well, making small notches around the edges. The structure of each upholstery material lends itself easily to tailor scissors.
Important! If you are using fluffy Alcantara, make sure that the fluff on all parts is directed to one side. If you miss this moment, all the details will catch the eye with their differences.
Correct car seat upholstery is carried out using a spray adhesive, for example a can of Mah. This is a good option, made in Germany and is better suited for use in construction and car repairs. It is unacceptable to use the glue itself with a brush, because such a tool quickly penetrates the pores, deforming the structure of the entire part. After that, it will be impossible to return her to her previous state.
6. Fragments of the cover, glued to the foam rubber, are sewn together, carefully aligning the marks on the edges.
8. Cut off excess foam rubber flaps, so you can get more access to the upholstery material itself.
9. After that, bend the lapels to the sides, press them against the foam rubber. An important stage is the beating of the seams on the foam rubber. To do this, you can use a simple hammer.
10. Sew the cuffs with a double finishing seam. In this case, you do not need to cut off the edges that are behind the line - they will not be visible on the front side under the foam rubber.
Do-it-yourself leather upholstery: how to install
11. Turn out the made cover, straighten it out. It should be noted that it is not easy to put it on a chair: we thread the straps and pull our product to the back.
12. Next comes the seat's turn. Everything is quite simple here, only sometimes difficulties arise with the embossed seats - then you should attach the cover to the frame using special clamps. They should be pulled through the holes in the pillow and hooked onto the spoke. In this way, it will be easier to pull the cover along the contour.
The final stage
13. Do-it-yourself seat upholstery in the end, it necessarily provides for drying and steaming the manufactured parts. New seat covers need to be warmed up with a hairdryer, the main thing is not to overdo it and not to float them. After that, the surface dries up and stretches. Each seat needs to be ironed through gauze - this allows our cover to become smooth and "adjust" to their shape.
On this hauling car seats comes to an end: to complete the interior, it remains only to clean them, remove fingerprints, glue residues, etc. In order to visually assess the time that will be required, as well as the degree of complexity of the armrest, armrests and car doors with your own hands, you can watch videos and photos on the Internet.
Dear friends! We very often receive questions about how to independently replace factory seat covers, which are already worn out, with new ones. That is why we decided to publish some tips with the help of which the replacement procedure will be greatly facilitated. In fact, the main part of the questions disappears after removing the old cover, when you get a visual understanding of how to re-tighten the seat upholstery.
1. If you do not have a garage or a dry and comfortable room for this type of work, the upholstery can be replaced in the apartment as well, a large amount of space will not be needed, of course, if you do not take on the entire salon at the same time. And so, let's start with the front seats. We remove the seat and disassemble them into three parts: seat, back and headrest. To get a better understanding of how it works, start with the simplest, with the head restraints, remove the old trim and tighten the new one (see photo # 1)

2. After you have removed the old cover, you will see that the cover (trim) is fixed with special metal hooks to the seat frames. From the back of the back, they are located below. To speed up the matter and simplify it, instead of hooks, you can take plastic clamps or otherwise they are called nylon ties (see photo # 2, 3 and 4)


3. In order to shape the cladding, they use special metal knitting needles; they must be removed from the standard kit. they do not come with new ones. (see photo # 5)

4. There is still a moment that cannot be ignored! If the service life of old seats is already long, most likely the foam under the covers is not in the best condition. If it is not possible to buy new foam rubber for both front seats at once, replace at least the driver's one, or swap places with the passenger one for extreme ones (they are interchangeable, see photo No. 6), as a rule, the driver's one wears out more. If you still did not want to replace the foam rubber, the advice is as follows: When we put on a metal knitting needle, leave a little space from each edge, about 3 cm.That is, the sheathing is fixed in 3 places, if you indent a few cm, then there will be fastening along the edges knitting needle to knitting needle, but only from the middle part through the material.


5. Let's go back to the problem with the old foam rubber. If you are unable to replace, we advise you not to install vertical spokes on the seats (see photo), dismantle them marked in the photo.

6.The back cover is changed in almost the same way. We insert the already removed knitting needles from the old upholstery into a new cover and fix the fabric. The type of attachment will depend on which car model. On some cars, rubber laces or metal hooks already known to us, etc. can be used as fasteners.

7. It is extremely rare, but it happens that after replacing old covers with new ones, in some places there may be not significant and practically invisible dents. In order to eliminate this and make everything perfectly even, you need to iron the surface with a steamer (see photo No. 8)

8. By the way, do not forget that the seat upholstery is the most convenient time to jointly put or replace the seat heating, clean the lower parts of the frames / sleds from rust, and also, if all the seats are immediately removed, you can clean the ceiling, it will be more convenient.
It seems that this process will take you a lot of time and it is very difficult, but if you have a positive attitude, then you will cope with it in five to six hours of work. And what a pleasant feeling you will get from driving in the updated salon
During operation, wear occurs not only of technical parts, but also of the car interior itself. Most often, car owners have to deal with seat upholstery repair or replacement of covers. Let's figure out how to rehabilitate the seats with our own hands and save not only money, but also time.
If your seats are leather, see our material on the professional, in our other material.
When you need a car seat repair
Situations and reasons why you have to restore seats in a car can be very different - from physical wear and tear of the device to serious damage to the structure due to accidents (RTA). It should be remembered that using a vehicle even with damaged seats is fraught with dangerous consequences. Aged upholstery or squeezed seats can cause maximum inconvenience and discomfort to both passengers and the driver.
In addition, the dilapidated upholstery of car seats does not look very aesthetically pleasing. With the help of modern finishing materials, it is quite simple to reconstruct the coating and return it to its former appearance.
Types of car seat defects
The most common car seat problems are:
- wiping armrests, upholstery and cushions;
- breakage of gaskets and the base of the car seat structure;
- damage to special springs;
- discoloration of the skin and its cracking due to temperature changes or ultraviolet radiation;
- mechanical flaws that are not related to the operation of the device - burn-through, rupture, breakage of the bases or cuts due to careless handling or exposure to external factors.
- deformation of the seat structure due to the activation of the car safety system as a result of an accident.
The choice of a way to solve the problems of car seats is made taking into account the type and nature of the damage. The tools and materials are also determined according to the situation.
Padding of vehicle seats
When changing the upholstery of a car, it is important to take into account the type of coating used and working tools. The complexity of the process itself and the quality of the final result depend on this. In order for the car interior to look harmonious after the seat constriction, the color scheme of the upholstery should be precisely matched to its main shade and not be out of the general picture.

Secrets! Most of the materials for the constriction, you can purchase in China at the Aliexpress site! For example, artificial horse leather http://ali.pub/2jm5ix or alligator leather http://ali.pub/2jm6ii
DIY material and tools for changing seat upholstery
Car seat upholstery can be made of leather, fabric, leatherette or Alcantara. The latter is a material with a short pile, somewhat reminiscent of natural suede. It is necessary to work with Alcantara very carefully, taking into account the direction of the fabric hairs during cutting.
To replace leather coverings, artificial or synthetic leather can be a good alternative to a natural surface. It is more convenient to eliminate defects in velor upholstery or leatherette with the help of special compounds that are available in any automotive store.
In addition to the coating material, the following tools must be available:
- a set of hand needles;
- awl;
- chalk or a bar of dry white soap;
- thick silk threads;
- glue;
- hammers;
- keys and nuts with washers;
- cold welding;
- towing strap;
- pliers;
- hacksaw;
- screwdrivers;
- machine vacuum cleaner.
Also, do not forget about the foam rubber for the lining of car seats. All this can be found on the Internet, including your beloved Ali.
Step-by-step instructions for self-repair of car seats
- Dismantling and disassembling the seats for details. It is advisable to do this on the table, signing each removed element and fragment of the structure. The covers and the pillow should also be separated and marked for convenience in further sewing the upholstery. The case is removed by unclenching the metal clips on the back of the chair upward.
- Ripping the seams of the seat trim. For quick and convenient cutting of threads, the working area should be slightly pulled, and an incision should be made along the line and stitching. If you have problem areas, you can use gasoline to soften the surface a little.
- Complete disassembly of the seat frame, upholstery, backrest and cushion designs.
- Preparing to install new elements of the chair. Fresh patterns and sketches are created based on the patterns of old covers, which are carefully transferred to the work surface.
- Assembling the prepared seat components. You can fasten parts with a sewing needle, glue or welding. At this stage, maximum attention is required for the correct and accurate gluing of the seams of the case and adherence to the drawn contours.
- Backrest repair. To fix the structure, a special stand is used on which all restoration work is carried out.
Do-it-yourself car seat repairs are completed by connecting the pillow to the back of the chair and attaching the hinges with screws.
Secrets of replacing upholstery on car seats
- Any constriction of car seats should be accompanied by reinforcement of the upholstery material with foam rubber. This is an important nuance without which a high-quality car seat upholstery repair is impossible. A prerequisite for the pillow is the fabric base of the synthetic backing and its thickness equal to 5 mm.
- Minor scuffs, scratches or cuts are best repaired with small pieces of upholstery. The main thing is that the quality and color are in complete harmony with the main surface.
- The material is sewn along the edge of the parts, strictly following the labels. Deviation or violation of the outline of the sketch will ruin not only the material, but also the whole result of the work done.
- Glue foam to upholstery fabric better with spray glue and before connecting the elements of the case. In this case, it is important to glue the foam rubber on the side opposite to its base, and in the case of Alcantara, place the flaps of the material with the pile in one direction.
- The cuffs of the back seam should be finished and smoothed. For this, a hammer is used, with which it is easy to beat off scars, and sewing needles with threads to secure the cuffs.
- It is always necessary to finish the restoration of car seats by steaming the overtightened parts and drying them with a technical hair dryer and a hot air stream. This procedure should be done carefully so as not to burn the surface.
Repair of the reclining mechanism of the car seat
The reclining mechanism is a complex technical device responsible for changing the position of the backrest of car seats. Elimination of a design malfunction is a rather laborious process and is performed in the following sequence:
- removing the lining at the base of the cushion and mounting bolts;
- dismantling the back of the car seat;
- cutting off the upper link of the hinges;
- bolting the new mechanism;
- connecting the back of the chair with a pillow by means of an axis;
- fastening the hinges and back by welding.
In case of minor damage to the tilt mechanism or its jamming, it is enough to do with lubricating the device.
Car seat heating repair
This type of design assumes the presence of a security system (air cushion) and connection to the on-board computer. As a result, it is more reliable to carry out repairs, check the electronics of a machine or set up a computer in a service station. Self-adjustment of the operation of the device without the necessary qualifications is fraught with errors in the electronic system of the car and the functional malfunction of the machine.
Seat pad repair
Basic lining material for car seats - this is foam rubber on a fabric basis. In rare cases, it can be replaced with thick cotton wool. The upholstery is attached to the seat base or frame of the seat structure and upholstered in leather, suede or some other type of upholstery. Self-repair of the lining is carried out according to the same principle as the restoration of the face case.
Note! Before using the finishing agent, it is necessary to first test it on an internal or inconspicuous area of \u200b\u200b\\ u200b \\ u200bthe cladding to see the possible reaction of the materials to the effect of the substance. This is especially true if polish with fillers or spray paints are used in the repair.
To achieve a stronger adhesion of the upholstery with the lining and a better fit of the cover on the frame, you should thoroughly clean all elements of the seat structure from old materials and their remnants, degrease and dry the treated surfaces.
Repair of a sitting chair. Video:
Car seat lumbar support
The lumbar support allows the rider or passenger to maintain correct posture by evenly distributing body weight and providing a comfortable seated feeling. In the absence of a special mesh device, a homemade plate made of flexible material can be used as a support. Fastening is done by cold welding, a long bolt and glue.
Features of repairing a leather car seat
To restore the leather cover, it is allowed to use leatherette or special mixtures, for example, liquid leather. Self-repair of leather chairs begins with degreasing and sanding uneven surfaces with sandpaper. After that, a plastic mesh and the product itself are applied to the damaged area, which, after drying, perfectly emits a leather texture.
Author
Professional auto mechanic with more than 7 years of experience at one of the largest hundred in Moscow. I am well versed in cars such as Vaz, Kia, Peugeot, Bmw, Audi, Mercedes and many others. If you want to get a professional answer, leave your feedback in the comments to this material.
You will also be interested in:
Why are special technological holes made in the pulleys? In auto repair shops to fix ...
Even the most careful drivers sometimes find themselves in unpleasant situations. If you are leaving ...

Well, finally, I decided to pay attention to this important aspect of the game, in fact ...

No? But in vain! After all, it is the name that characterizes the game. And it translates as follows: ...

Tuning mod for GTA San Andreas will add to the game new options for upgrading cars, ...

