


Looking at an old washing machine, any housewife wants to quickly replace it with a new assistant. A home craftsman, on the contrary, does not rush to throw the machine into the junk. He ponders where this "wealth" can be adapted.
Answering the question of what can be done from a washing machine, we will carefully consider it from all sides.
We will see that there are many useful components and assemblies in the design that can get a new life in the hands of a good master.
Judge for yourself: the body and engine, pulleys and drum, a window with a sealed door, relays and switches - this is a list of components from which you can make a lot of things and mechanisms useful in the household.
Let's explore together the most popular homemade options from old washing machines, both conventional and automatic.
Grinder
The first thing you should pay attention to after inspecting an old home washing machine is the engine. It has enough power and speed to make a homemade sharpener. Complex modifications are not required here.
For the shaft, you need to make an adapter nozzle on which the grinding wheel will be attached. If we provide an additional "neck" for the cutting wheel at the seat, then together with the sharpener we will get a cutting machine. They can cut not only plastic pipes, but also metal (reinforcement, sheet or corner).

As you can see in the photo, the washing machine motor is attached to the frame with four brackets. The switch for him is removed from the same washing machine. As a base, a regular piece of thick board was used. The option turned out to be quite acceptable, especially considering its mobility and ease of manufacture (no welding required).

Here is another similar use of the motor for installing a grinding and cutting disc. Having put them on a common adapter, they are clamped with a nut with a left-hand thread.
Simple crafts from an old washing machine
Not everyone knows how to masterfully work with welding or a lathe. Nevertheless, even in this case, you will be able to find a worthy use for the old washing machine. Look at the window that covers the drum. This is a masterpiece of engineering and a godsend for design.
Without further ado, many use it for its intended purpose, but in a renewed context. Cut out the washer door along with a part of the body and you get an excellent "sea" porthole. It will look original in any interior.

If you love your yard guard, then be sure to decorate his booth with such a modern "facade".
In addition to the original look, this option is of practical importance: the dog, if necessary, can be easily isolated from guests without fear for their legs and clothes.

Just do not forget to make side ventilation holes in the booth (the window at the washing machine is sealed!).
Coffee table from the washing machine
Your old washing machine is an automatic machine, or rather its drum, will help to decorate the interior of the apartment. You can build an original coffee table from it. Perforated stainless steel, complemented by colored lighting, looks great.

It is not difficult to make such an unusual piece of high-tech furniture. You will need a few steel rods to attach to the washer drum. A round glass or MDF board is fixed on them.
Brazier
The body of the washing drum, made of durable and high quality "stainless steel" withstands very high temperatures. Therefore, it can be used as a barbecue.

Several pipes, half an hour of welding and a convenient barbecue grill will appear on your estate. Having made the supporting part of the structure collapsible, you can take it with you to suburban picnics.

For the manufacture of barbecue, drums from front-end machines are suitable, as well as from top-loading washing machines. In this case, you will have to cut off one of the sides of the case with a grinder, and provide it with a stable support from below.
Mobile smokehouse
Why buy an expensive smokehouse for fish and meat when an old washing machine is idle on the farm? There are many options for its use in this capacity.

We will focus only on a mobile device. It can be made from a drum removed from a top-loading washer.
To prevent smoke from escaping through the side perforated holes, they must be muffled with a thin steel sheet, wrapped and secured around the body. From above, as it should be in a real smokehouse, we make a hole for the chimney. We fix the smoking grate inside the drum (you can take it from the old gas stove).
Concrete mixer
This is a rather complex device, which, in addition to mixing concrete, must ensure its unloading. Therefore, when planning to make a concrete mixer out of an old washing machine, first weigh your locksmith skills and knowledge.
The easiest way to turn a washer-barrel into a concrete mixing device is to replace the standard activator with two-shaped blades. They can be made from 4-5 mm thick steel strip. To do this, you need to cut it to size, then bend the two blades and rotate them 90 degrees relative to each other.
Then they need to be welded to the shaft passed through the hole for the remote activator.

The drain hole, which is in every washer-barrel, must be plugged. Next, we proceed depending on how much concrete will need to be kneaded. If we are talking about 1 bucket, then you can leave the old single-phase motor.

If you need to prepare a large amount of concrete, then in place of the old motor you will have to install a more powerful one (0.75-1.2 kW) with low revolutions (1300-1500 per minute).

In addition, the "native" belt drive must be replaced by a gearbox that reduces the speed (from 1300 to 25-30) and increases the torque on the agitator blades.
Note that the best mixing quality is obtained when not the shaft with the activator rotates, but the concrete mixer body itself with the blades fixed in it. However, to create such a design, a deeper and more complex modification of the washing machine is required.
Sterilizer for conservation
Another homemade product from an old washing machine-barrel will be useful for giving and part-time farming. This is a sterilizer that can hold a dozen cans for heat treatment.
The only point that needs to be taken into account: such a device is suitable for sterilizing fruits and vegetables. For processing meat, a higher temperature is needed (above + 100C).
The sequence of rework looks like this:
- A plug is placed on the activator hole;
- A thick wire mesh for cans is mounted on the bottom;
- You need to substitute a support under the mesh;
- A hole is drilled in the body for the installation of a 2 kW electric boiler.

1. Activator plug;
2. Water level;
3. Tank from the washing machine;
4. Cover;
5. Drain hose;
6. Banks with conservation;
7. Wire mesh;
8. Electric boiler (heating element) for 2 kW;
9. Electric cable.
Juicer
Two options are possible here:
- Using an old machine with a centrifuge and a washing compartment;
- Alteration of a conventional washing machine-barrel.
Let's say right away that the first option is better, since it allows you to implement two processes in one device with minimal modifications: chopping and squeezing fruits. To do this, you will need a washer, in which the activator is located at the bottom, and not on the side wall. Replacing it with three homemade strip steel knives will create a fruit slicer.

Knife installation diagram:
1. Knife,
2. Shaft;
3. Clamping nut;
4. Washer;
5. The bottom of the tank;
6. Bearing unit with oil seal;
7. Activator pulley;
8. Locking screw.

The drain hole of the washing tank must be sealed.
There are few additional treatments for the second unit - the centrifuge. It is necessary to install a stainless steel mesh (mesh size 1.5 mm, wire thickness 0.2 mm) in it so that it covers the side surface of the centrifuge.
After thoroughly washing the centrifuge, washing tank, hoses and pump with baking soda, you can make the first bookmark.
The principle of operation of such a juicer is very simple. The fruits are washed and in small portions (1/2 -1 bucket) loaded into the washing tub (knives must be turned on). After 15-20 minutes of cutting, the engine is turned off and the crushed mass is transferred to a centrifuge (3-4 liters in portions). Turning on the centrifuge, squeeze the juice.
It is much more difficult to make a juicer from a washer-barrel or automatic machine. A homemade centrifuge can become a "stumbling block" in the barrel. Making it is half the battle, the main thing is to achieve perfectly accurate alignment. Without this, at high speeds, it begins to vibrate strongly and it will be impossible to squeeze out the juice.

Here is a drawing of a working sample. The master had to work hard to reduce the beating of the centrifuge (the engine is suspended from the washer body on 6 springs). Of these, 3 balance the engine in the horizontal plane, and 3 others press it up. The body itself rests on an old car tire, which dampens vibration.
Feathering machine
The body of an old washing machine is suitable for assembling a device with which you can remove feathers from poultry carcasses. To make it, a steel disk 3 mm thick and a diameter slightly smaller than the diameter of the tank must be installed at the bottom of the tank.
Holes are drilled in it and special rubber fingers are placed in them. They are the most expensive elements of the future design ($ 1.5-2 per piece). On average, you need 120-140 pieces. The diameter of the fingers depends on the type of bird being plucked. Consider this moment when placing your order.

All other units of the washer, including the engine, can be left unchanged. Holes are drilled in the side walls of the case for installing feather (biting) fingers. To do this, you need to step back 15 cm from the bottom of the tank.
The distance between the holes for the fingers is chosen within 3-4 cm. The lower disc is mounted on the drive shaft.
The drain hole does not need to be plugged here. It will be needed to drain the water that flows from the carcasses. After scalding the bird in boiling water, it is placed in a tank and the engine is turned on. The rubber fingers remove the feather quickly and cleanly.
A neighbor on the entrance put a washing machine on the staircase for further removal to the trash, as a repairman told him, a kirdyk came to the motor. Not only Samodelkin, not when in life, will pass by the thrown out unit without taking it for parts or at least not looking inside at the contents. I am also sick with the same, I decided to save my neighbor from hard physical work, taking the unit to the trash can and took it for spare parts to my village.
In the photo: One of the most useful parts of the inside of a washing machine.
Everything was dismantled into useful bells and whistles and it was time to check the condition of the engine.
Paragraph 1. Checking the motor.
To check the motor and upgrade the Lighting Dimmer, we need tools.
* Instrument (tester)
* Electrician's side cutters
*Dimmer
* Soldering iron
Inside there was such a collector universal motor MCA 52 \\ 64 -148 \\ KT11 390W. 13000 RPM


In the picture we see a seven-pin large connector, all single-color blue wires come out on the left (to make it more difficult for the layman to understand) and one yellow-green (ground), on the right there are wires going directly into the motor, if you look from the top, then two red (on the travel sensor ), blue for brush 1, purple for another brush 2, black (midpoint of the motor windings), orange (two stator windings).

We will clean all the outgoing blue wires for continuity with their device.

Disconnect the connector and call the tester which of the blue wires to which motor wire comes, so as not to forget, we need to write down, sketch.


For a simple start of the motor, we only need two orange, blue and purple wires, the rest can be bitten off or isolated for future homemade products.
According to this scheme, you need to connect the motor.

You can check the operation of the motor, everything works (as in most cases it does), only the bearings should be replaced.
This is how the repair specialists carry out the diagnostics, the price of such a new motor is 6000 rubles + installation work.
Point 2. Reverse.
This type of motor can be reversed, which is what the washing machine does during washing, for this you need to change the connection of the brush from one winding to another, only to do this after a complete stop and the motor is de-energized.
Scheme. Reverse with a toggle switch.

The tumbler itself.

Point 3. Regulation of revolutions by light dimmer.
You can also adjust the speed by decreasing - increasing the current, for example, using a wire rheostat of the required power or using a triac with a PWM regulator.
As the simplest and most affordable, this is a dimmer for lighting (photo below), only before the first connection you need to look at what maximum current the regulator is designed for, we need a tenfold overlap of the rated power of the motor, because the starting current of our motor jumps from 8-10A and higher, even without load.
The cheapest dimmer.

If the dimmer turned out to be like mine at 3A, then it can be modified by finding the necessary triac right on the control board of the washing machine itself, where all the parameters are just calculated for this motor.


To do this, we will trace the path from the place where the motor terminal is connected to the board and along the widest paths, one of which will definitely fit on one of the legs of the part we need (in my case, this is a BTB16 triac with three legs).

Disconnect the radiator mount and solder the part being careful not to overheat.

We solder the resulting triac together with the radiator to replace the old part in the regulator, now you can safely connect a load of 10 A and at the time of start-up even up to 16A.
Out-of-use washing machine motors can be the basis for new spinning appliances. For example, you can make an emery for sharpening knives that functions on electricity, as well as a mixer and much more. This will be discussed in the article.
Engine types
The rotation of the washing machine shaft is carried out by the motor. It has various design features. The motor can be of the collector type, asynchronous or electronic type.
Washing machine motors are removed in different ways. First of all, you should disconnect the washing machine from the power supply, sewer network and water supply. The unit must be in this state for at least 10 hours. During this time, the capacitor will be able to discharge. Only then can you start removing the motor.
How to remove an induction motor?
The wires connecting the induction motor and the capacitor should not be cut. The battery is removed with the engine. There are many types of batteries. It may look like a metal or plastic box. Typically, the battery is of a sealed design. It contains one or more capacitors, the connection between which is parallel.
The unit connection diagram is also different. The winding can be connected directly to the network. Another modification involves the passage of current through a capacitor. The existing scheme cannot be changed. It must be connected to the power supply, and the asynchronous motor will begin to rotate.
Do not touch the engine parts until the capacitor has been discharged.
How to dismantle a collector type motor?
The motor from the washing machine of the collector circuit belongs to the category of low-voltage modifications. The stator contains permanent magnets connected to constant voltage.

There is a sticker on the motor, which indicates the voltage required for operation. Connecting the motor from a washing machine with a collector configuration assumes the supply of this particular indicator.
Electronic motor
The electronic circuit is removed from the washing machine along with the control unit. The voltage indicator to which the motor should be connected is indicated on the block case. It is very important to observe the polarity as this type of motor does not imply reverse.
It happens that the connection of the motor from the washing machine is not carried out immediately. In this case, it is recommended to find other conclusions to which a zero phase or logical unit is supplied. After that, the unit will start to rotate.

How to connect the electric motor of a modern washing machine?
If you have decided what to do with the old motor, then you will probably be interested in how to connect the electric motor to a voltage in
Before proceeding with the direct connection, it is advised to familiarize yourself with the electrical diagram. First of all, pay attention to the wires coming from the engine. At first glance, there are quite a few of them, but in fact, not all of them will be needed. For work, you only need rotor and stator wires.
How to deal with wires?
If we look at the front of the block, then, as a rule, the first two wires on the left refer to the tachometer. They are responsible for the washing machine motor. You won't need these wires to work.
In different versions of washing machines, the wires will differ in color, but the principle of their connection remains unchanged. You just need to find the right ones by ringing them with a multimeter. For this purpose, the apparatus should be switched over to measuring the resistance force. One probe should touch the first wire, and the second one should look for its pair.
For a tachogenerator in working condition, the resistance indicator is 70 ohms. These wires are visible, but not needed.
Washing machine machine
How to connect the motor to the washing machine? After the required wires are found, you need to connect them.

For this purpose, one end of the stator winding should be connected to the rotor brush. It will be better to make a jumper and insulate it. This leaves the end of the rotor winding and the wire that leads to the brush. These two ends are connected to the network. As soon as voltage is applied to these wires, the motor will begin to rotate.
Washing machine motors have a high level of power, so you should be careful not to injure yourself. It is advised to mount the motor on a flat surface.
If you want the direction of rotation of the motor to change, then you should put a jumper on the other contacts and change the wires of the rotor brushes.
If everything is done correctly, the motor will start rotating. If this does not happen, then you should check the operating condition of the engine and only after that make any conclusions.
It is not difficult to connect the motor of a modern washing machine, which cannot be said about old models. Their scheme is different.
How to connect the motor of the old unit?
Motors from washing machines that have served for many years are more difficult to connect. To locate the wires, ring all the motor windings. This is how you find pairs.
The multimeter is in the mode One end should touch the first wire, and the second one should look for its pair in turn. It is advisable to write down the winding resistance indicators. You will need them.
Further, by a similar method, the second pair of wires is found and the resistance indicator is recorded. There are two windings available with different resistance values. It should be determined which of them is the working winding, and which is the starting winding. The clue is the resistance indicator. The winding with the smaller one is the working one.
Many believe that starting such a motor is carried out by means of a capacitor. This is a wrong opinion, since the capacitor is used in motors of another modification, in which there is no starting winding. In this case, it can contribute to the combustion of the motor while it is running.
To start this type of engine, you need a button or relay to start. The button must be equipped with a non-latching contact. You can use the button from the doorbell.
From the washing machine it looks like this: 220 V is supplied to the excitation winding (OV). The same voltage is supplied to the starting circuit (PO), only for the purpose of starting the engine for a short period of time. To turn it off, use the (SB) button.

After all the manipulations, it is enough to start the engine. For this purpose, the SB button is pressed and, as soon as the motor starts rotating, it is released.
To ensure reverse (rotation of the motor in the opposite direction), the winding contacts should be reversed.
Is it possible to give the motor of an old washing machine a second life?
Many are wondering what to make of a washing machine engine. The working motor of the collector circuit is suitable for the construction of a variety of devices. Some of them will be covered in this article.

Grinder
It can be made by any man if he has a motor from a washing machine, an Indesit, Ariston and any other model.
When attaching the sharpening stone to the engine, the manufacturer may face a problem: the diameter of the stone hole does not match the diameter of the motor shaft. It is advised to use an additional part that is turned on a lathe. The manufacture of such an adapter is not difficult. The main thing is to know the indicator of the shaft diameter. Not only an adapter should be available. You also need to prepare a nut, washer and a special bolt.
The thread on the nut is cut depending on which direction the motor will rotate in. For clockwise rotation, a left-hand thread is made, and counterclockwise - a right-hand thread. If you do not adhere to this rule, then the stone will begin to fly off, as the process will go to unwinding.
If there is a nut with a wrong thread, the direction of rotation can be reversed. For this purpose, the winding wires are interchanged.
It is possible to set the motor to reverse rotation without using a capacitor. After the working winding is connected to a voltage of 220 V, the stone scrolls sharply in the right direction.
The speed indicator should not exceed 3000 per minute. Otherwise, the stone will burst.
When using such a unit at home, experts advise using a motor with a frequency of 1000 rpm.
Made by hand, you need to equip with additional elements. They will serve as protection from dust and stone fragments during operation.
A piece of metal about 2 mm thick can be used as a casing.
How to make a vibrating table?
Using an engine from a washing machine, an automatic machine from Ariston, Ardo, etc., you can make a vibrating table. It is needed for the production of tiles for laying out garden paths.

The design of the vibrating table is not complicated. It includes a flat plate, fastened to the base with movable joints. The work of the collector motor sets the plate in motion. As a result, air is pumped out of the concrete, which makes the tile quality higher.
The position of the collector motor is set in accordance with the diagram. If it is installed in the wrong place, then the table will not function properly, and the production of quality tiles will not work.
How to make a concrete mixer?
The motor from an old washing machine can also be used to create a concrete mixer. This product is not intended for industrial volumes, but it is quite suitable for household needs.
To make a concrete mixer from an old washing machine, you need not only a motor, but also a tank. A pair of blades, which look like the letter "P", are inserted into the container of the tank with the activator. The standard activator must first be removed from the tank. Making the details is easy. For this purpose, a strip of steel with a thickness of about 5 mm is taken. The required amount of material is cut from it, which is bent. The two blades are positioned so that they form a right angle. They are connected to the tank through the hole where the activator was located.
The opening in the tank through which the water is drained must be closed. With the correct assembly of the structure, you can connect the motor.
Depending on how much concrete you are going to mix, the engine power indicator is selected. With a small volume, you can mount a single-phase motor. If concrete mixing of large volumes is supposed, then a more powerful unit is installed
You should also remember about the temporary transfer. It must be replaced with a gearbox. It will reduce the engine speed.
No matter how good a thing in the house is, it eventually deteriorates. People throw them away so that these things do not gather dust at home and do not take up space. From old furniture or various electrical appliances, you can make many different crafts that will always come in handy on the farm. This can be attributed to the washing machine as well. And if the washing machine is old, then do not rush to send it to the landfill. Better to disassemble this car in detail. Any detail will fit for creating a homemade product. And if the electric motor is in order, then a pretty decent sharpener will come out of it for sharpening the tool.
Removing electrical equipment from the washing machine
So, for the manufacture of a sharpening machine we use electric motor AD-180-4 / 71S1U4 from the washing machine. Its power is 180 watts. We remove this engine very carefully. We remember how the electrical wiring is connected. After all, the motors used in them are single-phase. They have a working and starting winding and are started through a capacitor. So, the recommendation to remember the connection of the wires is not at all superfluous, it would be even better to mark them in order to know how to connect later. Otherwise, it will be a pity for the stupidly burned electric motor.
Dismantling the engine and adding grease to the bearings
We also disassemble the engine. When disassembling, it is advisable to use pullers. After the rotor has been removed, it is advisable to remove and check the condition of the bearings. If they are unsuitable, then we simply replace them with new ones. And if their condition is normal, then we rinse them, and put fresh lubricant there. Lubricants work well Tsiatim 221, Tsiatim 201 and Litol 24.
Shaft shank rework
Before assembly, it is necessary to cut the M12 thread on the shaft shank with a pitch of 1.25. It is advisable to do this on a lathe in order to avoid unwanted beating of working tools. This is necessary for screwing and fixing on the shank of a standard chuck used for a drill. And he just has such landing parameters. The chuck clamp is designed for a diameter of 12 mm. Having such a chuck, we provide an easy replacement of tools used during work.
Assembling the motor

Install on the engine special connector block for a secure connection of wires.
Working on a sharpener, we get dust and dirt. To prevent it from getting into the engine, it is necessary to install a protective washer on the engine from the side of the working tool. We leave a small gap between the motor and the washer. It is necessary for the free passage of air, which cools the motor windings.
Installing the motor on the bed
Now, the electric motor needs to be secured to the bed. To do this, take the corners measuring 50 by 50 mm. We fix them to the bed with M6 bolted connections. And to the corners we attach the engine to the native M10 bolts. The axis of the shaft from the bed is at a height of 140 mm. This allows you to use various tools for processing and sharpening products. Such as sharpening stones, discs.
All homemade covered with a casing... It is made of sheet metal. It is going on rivets. For access to homemade parts, the rear wall of the casing is removable. For good ventilation, which is needed to cool the homemade motor, holes are drilled in the back wall. The homemade casing is attached to the bed with self-tapping screws. We mount a switch on the side of the casing.
To expand the capabilities of the sharpener, we independently manufacture some tool attachments or buy from the retail network.
So, the very mechanics sharpened, ready.
Connecting an electric motor to a 220 V network
 Now it is necessary to carry out the correct connection of the motor from the washing machine. It is very good if wires are marked... Then there should be no problem. Everything is connected as it was connected before disassembly. We fasten the capacitor to the frame with clamps and fix them with M5 bolts. It would be nice to bring the conclusions from the engine directly to the block. But if the marking of the wires was not done and while they were engaged in mechanics, all the connections were forgotten, then you have to work a little and remember electromechanics.
So, we know the engine. This is AD-180-4 / 71S1U4, 180 W. He has four conclusions. It is a single-phase motor that has two windings. One is working and the other is launcher. In order to find out where we have a working and starting winding, we take a tester. We install it on an ohmmeter and measure the resistance of these two windings. In which the winding resistance is greater, then the starting one, and less - then the working one.
Let's designate the conclusions of the windings of our electric motor. The beginning of the working winding is denoted by C1, and the end by C2. The beginning of the starting motor winding is P1, and the end is P2. Now, you need to check insulation quality winding wires. A 500V megohmmeter is required to do this job. We measure the insulation resistance, it should be 0.5 mΩ or more.
We draw up a circuit where the working winding, through a toggle switch, is connected directly to the network. The starting winding is connected through a capacitor (not an electrolyte). Since our sharpener has a small starting torque, no additional capacitor installation is required at the time of starting. Having completed the marking of the terminals, we proceed to the assembly of the engine starting circuit. We also mark the terminals on the block. The upper row of terminals is designated from left to right, 1,2,3,4. We mark the bottom row from right to left, 5,6,7,8. We connect the leads from the windings to the terminals of the block as follows:
- The conclusions from the working winding C1 and C2 are connected respectively to the terminals marked 1 and 2.
- Conclusions from the starting winding P1 and P2, respectively, to terminals 3 and 4.
- We connect with a wire from terminal 8 of the block to one of the toggle switch terminals.
Now we take a two-core network wire. On one side of the cable, we connect one end to terminal 7, and the other to the toggle switch terminal. On the other hand, the cable ends are connected with an electrical plug.
Now, it is necessary to connect in series to the starting winding of the motor, a capacitor installed on the frame. To do this, we connect the soldered wires from the capacitor to the terminals pads 4 and 5... To complete the connection process, do the following.
Jumpers among themselves the following terminal blocks:

The connection is complete.
The sharpener is ready for use.
Today it is not customary to throw away old household appliances immediately when they fail. For example, from an engine borrowed from a washing machine, you can make very interesting homemade products. Among others, we should highlight feed cutters, generators, and lawn mowers. The latter quite firmly entered the everyday life of modern man and replaced the braid.
With the help of a lawn mower, you can keep your garden in perfect condition. In stores, such equipment is offered at a rather high cost, so it is better to start making it yourself.
Lawn mower manufacturing technology
The most popular homemade products from a washing machine engine are lawn mowers. You can pick up the components for such a device without visiting the store. In each shed, you can find a chassis from a cart or stroller by installing a metal sheet platform on top. If one was not available, then a frame must be made from a metal square corner, at the corners of which the wheel stands are welded.
Pipes can be used to create a handle, but the height should be adjusted to suit your height. It is attached to the platform by welding. When such homemade products are made from the engine from a washing machine, it is better to be guided by technology. In the described case, at the next stage, it involves the preparation of holes in the platform for installing the motor shaft. A mild steel grill or roll bar should be installed at the front of the frame.
The first option is more preferable, since it will extinguish the energy of the knife when it breaks. The lower and upper grille strips are bolted down, and wire can be welded to them. Such a lattice should have a 1 cm gap at the bottom and a 2 cm gap at the top.
The motor will be positioned on the platform and will pass through the prepared hole. A knife is installed on the shaft, and a hole must be drilled in the center, this will ensure the balance of the knife. You can check this feature by twisting the knife by hand; there should be no distortions. The motor is covered with a cover to protect it from the effects of grass. However, it must cool during operation, this indicates the need to make holes in the casing.

Such homemade products from the engine from the washing machine will effectively take care of the garden. However, it is important to follow the rules for assembling equipment. Thus, the cable is connected to the motor, but the cut with the plug and the switch is fixed on the handle.
When using the equipment, it is important to ensure that the drive is not damaged, otherwise the operator may be electrocuted. In order to protect yourself, the metal handle should be protected with a rubber casing.
Making a feed cutter

Homemade products from the engine from the washing machine have become quite common in recent years. Feeders, for example, are often made by DIYers. It is also necessary to borrow a drum from a washing machine, in the back wall of which a hole is made with a diameter corresponding to the motor shaft.
Drill four holes around the edges to fit the bolts. A hole is made in one of the walls through which the finished raw material will be fed. The cutting part must be fixed to the shaft with bolts. For such a design, you will need two knives, the first of which will look like a propeller with curved blades. It must be positioned as close to the bottom of the drum as possible, it will throw feed and push its particles out.
Method of work

When the described homemade products are performed from the engine from the automatic washing machine, it is important to make a second knife as well, it will be the main tool. It is usually formed from an old saw blade, the end should be tilted towards the bottom, this will increase the performance of the device. Sharpening must be done on both sides.
The unit should be placed on a metal supporting surface, which should look like a stool. The elements are fastened to each other with bolts. In order for the feed not to fly in different directions during the operation of the device, a cover will be needed in which a hole is made to feed the raw material.
Generator making

You can also do some homemade work. A 12V generator from a washing machine engine would be an excellent solution. The work will need neodymium magnets, the size of which will be 20 x 10 x 5 mm. They will be needed in the amount of 32 pieces.
The alteration consists in removing the core layer. Magnets are installed in the recess. On a lathe, you need to remove a 2-mm core, a 5-mm depression is made under the neodymium magnets. If you measure the circumference of the rotor, you can determine the dimensions of the template in the form of a strip of tin. With its use, the rotor can be divided into equal parts, and magnets should be glued between the discs.
When such homemade products are made from a motor from a washing machine, 8 magnets must be used per pole. The rotor will have 4 poles. You can glue the magnets to the surface with superglue, but this task will be painstaking. The poles should be filled with epoxy, for which they should be wrapped in several layers of paper, which is fixed with tape.
To achieve additional sealing, cover the surface with plasticine. Around the hole cut out in the shell, you need to make a neck of plasticine, where the epoxy resin will be poured. When making such homemade products from the asynchronous motor of the washing machine, you need to wait for the resin to solidify, only after the shell is removed. The rotor is clamped into the chuck of the machine for processing. In this case, you need to use medium-grain sandpaper.

In the first step, you should have noticed that four wires were coming out of the electric motor. It is important to find a working winding, and then cut off the old wires. Next, the master needs to install new bearings, because the old ones can rotate rather tightly.
The rectifier is assembled on diodes, and "SOLAR" is used as a controller. In order to charge the battery, only a few turns of the generator will be enough. At maximum speed of the drill, it will be possible to squeeze out 273 watts. In this case, sticking will turn out to be pretty decent, so there is no point in installing such a device on a windmill.
Conclusion
Using a washing machine motor in homemade products has many advantages. Firstly, you do not have to spend money, and secondly, the products can always be disassembled. Thirdly, the device, assembled with your own hands, you can easily repair.
You will also be interested in:
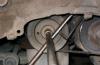
Why are special technological holes made in the pulleys? In auto repair shops to fix ...

Even the most careful drivers sometimes find themselves in unpleasant situations. If you are leaving ...

Well, finally, I decided to pay attention to this important aspect of the game, in fact ...

No? But in vain! After all, it is the name that characterizes the game. And it translates as follows: ...

Tuning mod for GTA San Andreas will add to the game new options for upgrading cars, ...

