


I have seen enough of the YouTube series, about the "easy" (and beautiful) restoration of headlights with the help of "some" chemistry (removal of haze and yellowness).
Details of the experiment :)
My headlights, in fact, do not need reanimation yet - I decided to buy it to have fun here on Muska :) The tool seems to be moderately expensive, but you can get a lot of pleasure from "research" (and comments)! I decided it was worth it;)
Finding it, by the way, turned out to be not quite and easy (not a very popular tool).
The sellers categorically refused to give the product a review, they probably know WHAT they are selling;) They answered in the style of “the product does not need advertising!” :) Well, let's check it out? The main thing is not to screw up the headlights on the car :)
A little about the tool ...
Edited product "advertisement" ...Plastic headlamps turn yellow over time, reducing the brightness and distribution of light, and new headlights can be quite expensive.
The restoration kit helps restore the transparency of the plastic, removing haze and yellowness. Provides deep cleaning of yellowed headlights using specially formulated varnish and sealant. The kit is designed to restore two headlights. The method allows for enlightenment and restoration of plastic glass (including rear lights, fog lights and floodlights). By restoring the transparency of the headlamp lens, the headlight performance and the car's appearance are improved.
Earlier I met solutions for polishing headlights mechanically, but here everything is more curious! The set includes a pair of bottles with a liquid unknown to science and a car electric "coffee maker", or rather a heated mug (declared as much as 60W power) In case of failure, at least the mug will remain (if I can wash it :) .
Of course, it was possible to use something homemade for heating (separately, the liquid for recovery is sold much cheaper), but decided to follow "strictly technologies"! Whatever was presented, like "the whole thing was in the circle!" ;)
Although there is still an excuse! The seller has published a list of compatibility with cars
This part is compatible with 2660 vehicles.(and further the list ...)
But my car is missing :(, what can I do if it is "rare" ?! Not from a neighbor, ask for an experiment ...
A very beautiful result of using this "pribluda" on product advertising - just a fairy tale! :) Although sellers selling other means (with a different way of processing headlights) use the same photos (i.e. either there were no real ones, or there is no difference :)
Maybe the dust and dirt just washed away after years of storage in the garage? 
By the way, not only bottles with the product are sold separately, but also a mug! There were reviews (who bought a mug) that the type of water vapor does not work - obviously there were experimenters before me, but they used a more environmentally friendly composition, tried to restore the coating using plain water :)
I came across a very funny lot (), in which there was a set of different sandpaper, polishing wheels (with paste, including), but this "ill-fated" mug was also included in the set. What was meant in it to make a mug, I fig knows it, probably warm up the coffee in the process :)
To make it clearer, the headlights are "treated" when a special agent is heated, heated in a mug to a state of soaring. These vapors are used to "restore" the headlights. As I understand it, the idea is to apply a thin layer of varnish, or dissolve the previously applied protective factory coating, to a smooth, uniform surface.
Something similar happens when any liquid is applied to a matte surface, it becomes more transparent by filling in small scratches and reducing the refraction of the light flux.
Set contents

more details
Cigarette lighter heated mug 

below on the circle (I do not know why) there is a thread. This mug can be screwed into something, possibly protection against falling while driving.
At the bottom there is a layer of foam material, so that nothing "burns" during heating. 

The cable is short enough for use outside the car, which means that it was originally intended for "peaceful" purposes in the cabin :) 
Two lids / funnels per mug 

Liquid in two bottles (glass with spraying). 

Before starting the actual experiment, I decided to "check" the mug (just out of curiosity). As I understand it, it can be used not only to restore headlights :)
Mug testing
I connected it to 12.5v and decided to see "what it can do."
Not Xiaomi, of course, and not smart (I would say just stupid or stupid mug and that's it :)
The power practically corresponds to the declared one. 
Poured a third of a mug of water, starting room temperature 
after 5 minutes 
in 10 minutes 
after ... in short, after 15 minutes it became clear that if the mug was not covered from above, the water would not boil. I covered it with a cardboard and almost immediately began a white boil 
 When removing the cardboard, the temperature instantly drops down
The seller has instructions for using the kit, however
in Basurmanskiy
Instructions:Rated voltage: 12V
1, the dedicated supporting the electromagnetic atomization tool to open, the syrup to join 30-60ml, cover the lid after the steam tube inserted;
2, plug in the power to start heating, about 5-6 minutes that steam emerge, this time can be used dark tube test whether the nozzle vent, if you can begin to atomize;
3, with masks begin to atomization, in order from the bottom up on the surface of the lamp one by one to complete the atomization coating process, pay attention to the nozzle must be upward, can not bend down to prevent steam to become water droplets ;
4, the atomization process control in two or three minutes to complete, uniform thickness uniform light surface can be, do not repeatedly spray, too thick into a water effect also increases the drying time;
5, after the completion of the fog coating 10 minutes to dry and do not sticky dust, but can not scratch, let it be cured after a few hours to use natural;
6, the fog coating time period before noon, because the evening headlight when there are several hours of hardening time, afternoon or evening operation due to leave the light time is too short, the surface hardness of the lampshade, open the heat after the heat expansion Different degrees of shrinkage, the effect of natural poor.
Precautions:
1. Please use the cup before dry cleaning, the cup can be washed
2. Only use the specified 12V power supply
3. Do not dry
4. Liquid into the cup about 30ml
5. Do not close to heat, not violent impact
6. Do not touch the child, so as not to burn
Input power: 60W
Capacity: 500ML
Capacity: 30ML
Google translation (corrected)
1, Pour 30-60 ml of the product into a mug, close with a lid with a steam outlet pipe;
2.Turn on the power to start heating. Steam should appear in 5-6 minutes. You can use a dark tube to check. If evaporation occurs, you can start work
3, Make a mask around the headlight (paint protection) and spray the product from the bottom up over the surface, pay attention to the fact that the nozzle should be directed upwards so that the steam does not turn into droplets, which can flow down the result;
4, The spraying process is necessary for two or three minutes, resulting in a uniform, uniform smooth surface. Too thick layer can form drips and increase drying time;
5, After finishing the coating, it needs 10 minutes to dry and no dust adhered. For the surface to become scratch-resistant, it takes several hours of natural drying;
6, It is advisable to perform the work in the morning, so that there is enough time for hardening. In the evening, due to a drop in temperature, deformations of the unhardened surface can occur, with the appearance of small chips and other surface defects.
Precautions:
1. Please use dry cleaning of the cup before use (the cup can be washed)
2. Use only specified 12V power supply
3. Do not dry (applied layer)
4. Volume of liquid used, pour about 30 ml
5. Do not block the vapor opening.
6. Do not let the child touch, so as not to burn yourself
Experience of use
I thought that the state of my optics might not allow making unambiguous conclusions - everything is not so bad yet. Therefore, let's start, perhaps, with a simpler test subject (just by chance, a solar-powered street lamp caught my eye). He is many years old, the plastic is yellowed and cloudy - just what "doKhtor ordered";)
On the Internet, I came across a different interpretation of the use of the kit (depending on the configuration). It is not clear that the product is used INSTEAD or AFTER grinding / polishing (although in this case, the meaning of its use is not very clear).
For greater clarity of the experiment, we will grind half of the glass with a fine sandpaper. 

From the very receipt of the set, I was tormented by the question of what could be mixed into the bubbles. I tried to determine by smell (carefully, and not very much). At first it seemed something vaguely similar to caustic soda, but not so sharp. The second attempt gave a completely different smell, a faint smell of solvent? .. There was no certainty (at least try the taste!). Some VERY suspicious bottles! Straight "newbie" of some kind;)
When it came to the experiment, I decided to try a drop on the sanded place in order to see the reaction and catch the smell more clearly. It's funny, but I could not identify the smell, it is very weak ... But the plastic dissolves "with a bang"
The drip of a drop of the product with an "etched" hole in the place of the drop 
We prepare everything for the experiment. The power cord of the mug is short, so we will take an external "power bank" as a power supply, which is called a margin! ;) 
"Laboratory"… 
Pour in the liquid ... It turned out to be bright blue (and almost odorless). 
We turn on the power of our miracle device, and wait for the appearance (no, not the smell of coffee) - until it starts to soar from the spout of the funnel.
We time out, everything is strictly according to Feng Shui;) 
Curiously, I didn't have to wait long! Not even a minute had passed when the sound of boiling appeared inside and from the spout came not so much steam, but obvious vapors of "something". Trying on a lantern ... 
The result is unexpected!
The sanded part of the glass quickly became transparent. The untreated part remained practically unchanged in appearance, even after prolonged "steaming".
On the bottom of the glass you can see a "hole" - this is a trace from a drop of the product.

After the treatment, the coating of the solar battery improved noticeably - it was very cloudy with a white bloom. Partially, it was also processed with sandpaper, the difference is visible in the photo. 
Perhaps you still need preliminary processing? Here is an example (from some vendor) of use on a clearly brushed headlamp. I have nothing to polish the headlamp with, and it’s somehow pathetic… or what, the headlights are normal! 
Well, let's risk the car? ;) We will not grind / polish!
We make a "mask" around the headlight. This is what the headlight looked like BEFORE processing. 

It began to look AFTER. 
In fact, the result is noticeable, but somehow "in places" there were turbidity - apparently, pre-treatment is still desirable.
Two headlights (the right one was not processed), the difference in the photo is very poor. With the eyes, the difference is quite noticeable.
How long is another question? :) 
Remains of chemistry in a mug 
I wanted to try to wash it, and pretty much regretted it. What disgusting, it is not clear - but hands are not washed from it! Soaps and solvents don't help. 
I wanted to end the review with the words that not a single animal was harmed during the experiments, but it did not work :(
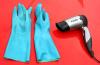
Suffered ...
crocodiles!
The end of the experiment ended with fireworks! The terminal jumped off the cigarette lighter socket, but it is inconvenient to work and remove at the same time without an assistant ... 
Experiment Results: It still turns! :)
Of course, there is no difference BEFORE and AFTER, but the wretchedness of the instructions for use pretty much spoils everything (whether preliminary polishing / grinding is needed or not).
I have nothing to pre-polish the headlights (in order to test), but you can of course resort to the services of a "specialist", and then "fix" the result with this means - is there any point in steaming the headlight after polishing !?
The agent does not remove yellowness (it seems) at all, but it noticeably increases the transparency of clouded (worn) headlights, even without preliminary treatment. It is not necessary to buy a mug as part of a kit (auto shops are full of similar ones, or use other methods of heating the liquid), it is enough to buy only a product if someone wants to repeat the experiment "on himself" :).
For now, I'll leave only one headlamp treated with chemistry, and see what happens next. In a couple of months, I will supplement the review by observing the condition of this coating in comparison with the untreated one.
UPD A month has already passed since the review was written (I don't know how long it will lie before publication). Over the past month, the appearance has changed slightly. The impression is that there is a slight mesh in places of too intensive steaming (thick layer). Perhaps overdone it. Let's see further ... :)
I'll probably steam off the second headlight later. Or first, I will polish both of them first ... while in thought.
A friend from work liked the idea, his headlights were cloudy, he ordered only a steaming agent. As soon as he arrives, we will probably steam him and there will be more visual photos.
UPD2 I gave my comrade the chemistry that had arrived and "my" magic mug, what does he steam there on his car? :) Now he will throw off the photos of the results before and after (if they are;) - let's see
photo from a friend BEFORE steaming

AFTER steaming 
The photos, of course, were taken in different lighting conditions, but you can see that the headlight really became more transparent and. oddly enough, on this headlight and yellowness has noticeably decreased.
So that in principle, chemistry works - my "steamed" headlight, too, is still noticeably different from the untreated one.
If anyone wants to ditch the headlights of the experiment, then this is the seller from whom he bought the kit :) - the price tag is about $ 21
And this is from another seller, $ 9 - I bought it for a friend.
Good luck to all! Get in on the review;)  Add to favourites
Liked
+187
+298
Add to favourites
Liked
+187
+298
The condition of the transparent plastic of the headlights is an important safety requirement. The restoration of damaged headlights is a demanded service in most car services. With insufficient lighting, the driver may not notice an obstacle on the road and react in a timely manner to its appearance. The quality of work of lighting devices in cloudy weather and at night becomes especially important. Grinding and polishing are the main stages of this service. But is it possible to restore the glass of a car headlight without polishing?
The conditions in which the car is operated are far from ideal. Small stones, sand, reagents that are used on our roads in winter, all these factors gradually have a destructive effect on the outer layer of plastic. But even if the headlight has a glass front, clouding cannot be avoided. It's just a matter of time. Over time, the shine disappears and the dimness of the surface of the headlights appears more, which you want to restore or clean them without polishing.
In addition to the obvious reasons, there is one more - car owners, by their actions, are gradually speeding up this process. This happens at the moment when, dissatisfied with the quality of the road lighting, the driver wipes the plastic surface with rags or other materials. The smallest particles of sand, dirt and other components transform this process into surface treatment with abrasives that destroy the protective layer. How to restore the headlight cover of a car and can it be done at home or in a small workshop?
To restore the clouded plastic of the headlight to its original shine, it is necessary to get rid of all defects that appeared on it during operation. Clouded headlights can be repaired using the following tools and materials:
- grinding machine or drill;
- nozzles of various sizes;
- clear varnish (for example, two-component Delta Kits)
- cotton pads or non-woven wipes;
- technical alcohol;
- solutions of alcohol and soap (it is more convenient to use in a spray bottle).
To carry out the restoration of plastic headlights, you will need to work in several stages.
Any restoration work begins with cleaning and removing surface defects. Before restoring the headlamp from cloudiness, it is thoroughly rinsed with running water. After removing all dirt, you can start leveling. To restore the surface, glass or plastic is used with nozzles or sandpaper with a different grain size. The most convenient in the work were the nozzles of the 3M company. Mandatory requirement - materials must be moisture resistant. This is due to the need for constant cooling of the headlamp surface with water.
If the temperature is not monitored, there is a danger of overheating the material. This may cause it to melt or shrink. It will be almost impossible to eliminate such a defect. And, most likely, restoration of shine and transparency will fail and you will have to buy a new headlight.
The grinding process must be carried out sequentially, starting with the wheel with the largest grain size, ending with the smallest particle size. At the end of the treatment, the surface is washed again with water. This is usually followed by a polishing process. But there are good reasons to exclude this stage of car headlight restoration.
Modern manufacturers use special varnishes and other coatings as a topcoat, the function of which is to preserve the transparency of plastic headlights. Many of them can be bought in stores and applied at home. Delta Kits two-component varnish is very popular for these purposes. Its use does not require special production conditions and allows the headlights to shine for a long time.
One of the important conditions for good adhesion of varnish to the plastic surface is the presence of microscopic irregularities on it. That is why it is better to restore the headlights without polishing. In this case, there is a high probability of the varnish peeling off. In some cases, special anti-gravel films are used to further protect the headlights from clouding.
Of course, it is possible to restore the transparency of the headlights of the car, but for its greater safety, it is worth following certain rules for care.
After a certain period of car operation, every motorist has a problem associated with wear on the outer surface of the headlights. And this is not surprising, because the headlights are located on the front of your car and, first of all, take on any negative external influences. The following factors can play a role here:
- pebbles from under the wheels of passing vehicles;
- dust, sand;
- shrubs and tree branches;
- ultraviolet radiation;
- harsh chemicals on the road;
- atmospheric factors: snow, rain, etc.
 Blurred car headlights
 As a result, the headlights can become cloudy and yellow. Chips, scratches and other defects appear on their surface. All this significantly reduces the efficiency of their work and impairs the quality of the road view.
Considering that your safety directly depends on the efficiency of the headlights on the car, the problem requires a prompt solution.
The appearance of such defects is not yet a reason for replacing headlights. They can be simply cleaned and damaged. To do this, you can either go to a service station or clean the headlights yourself. This is a job that does not require special knowledge and skills - anyone who knows how to do the job conscientiously and accurately can handle it.
The headlights are cleaned using special abrasive pastes. The principle of operation is that we remove a layer of material equal to the thickness of the damage, and then carefully polish the surface.
 The result of cleaning the car headlights
 The headlights on your car can be either glass or plastic. Basically, the cleaning method is independent of the material - in both cases it is the same. It's just that glass is much harder, so the work will require more time and accuracy.
One of the means to clean the glass or plastic of your car's headlights can be regular toothpaste or tooth powder. Experts claim that it is much more effective than many proprietary polishing pastes. Let's see how you can use toothpaste to return your car headlights to their previous efficiency and attractiveness.
What you need to work
Before starting work, you need to stock up on everything you need. We need the following tools and materials:
- toothpaste or a tube of toothpaste;
- clean towels;
- white Spirit;
- water and detergent;
- grinder or electric drill;
- nozzles;
- scotch;
- brush.
Before starting work, we recommend removing the headlights from your car to make it easier to work. We glue everything except the surface to be treated with foil and tape to avoid the ingress of paste and other foreign substances. Now we can get to work.
 Cleaning headlights with toothpaste
 Cleaning your car headlights with toothpaste
Now let's go through the whole process of working with the lights of your car step by step:
- We clean the lanterns from dirt and dust, wash them thoroughly.
- We wipe dry.
- Degrease the surface with white spirit.
- manually or with a power tool. We squeeze out a pea of \u200b\u200btoothpaste and rub it with a towel or grinder on the surface in a circular motion. If we use the manual method, the movements should be uniform and circular. If we use a power tool, we monitor the heating temperature of the surface. If the temperature is too high, the glass may burst and the plastic may deform - check the degree of heating by hand and take breaks to cool down. We do not press on the surface to be treated with a grinder or electric drill - here it is important to have a uniform low effort and number of revolutions.
 Headlight polishing with a power tool
 - We continue the polishing process until all chips and scratches have disappeared. It is important here not to rush, be careful and remember that it is impossible to speed up the process. Attempting to force events will result in you ruining the headlight.
- After getting rid of scratches and chips, we polish with a polishing wheel already without toothpaste. You can use a finishing polish to add shine to your car headlights and provide additional protection against negative external influences.
- We install lights on the car and enjoy the ride with clean remanufactured headlights.
As you can see, the job is simple enough. The main thing here is not to rush, to monitor the heating temperature of the surface and to ensure that the processing is carried out evenly.
 Car headlight polishing result
 Conclusion
Cleaning your headlights with tooth powder or toothpaste is one of the common methods to restore them to their former efficiency and get rid of damage. Thus, we remove scratches, chips, haze and yellowness, restoring the original shine.
Make sure that your car's headlights are in perfect condition. Check them periodically, if necessary, take care of their serviceability and correct functioning in time - this is one of the most important guarantors of your safety on the road.
A common problem with many cars is cloudy glass on the headlight... How to restore glass transparency and make the headlights bright and shiny again?
Option one: if you are in Nevinnomyssk or nearby - come to AutoMax Service, where you will quickly, efficiently and restore the transparency of the headlights to their original appearance or even better. Call in advance at +7 928 300-05-14 so as not to wait in line.
Option two: for those who are not looking for easy ways and are ready to overcome the haze of headlights do it yourself - read the instructions below.
So, what tools need to be prepared to make the cloudy glass transparent again:
- Scotch
- Paper (newspaper)
- UV varnish for headlights
- Several small pieces of medium grit, fine to very fine sanding paper for final sanding
- A plastic spray bottle filled with plain water
It will take you about 30 minutes to restore transparency for one headlight. The repairs performed should be enough for 3 - 4 years of vehicle operation. And if the headlights are polished and covered with an armor film on AutoMax Service, then nothing will happen to the headlights in the next 10-15 years. They will no longer become cloudy and will be reliably protected from chips and cracks.
Step one: preparation.
Thoroughly rinse the headlights from dirt and sand, dry and cover the body around the headlights with paper and tape.

Step two: sanding.
Wet the headlamp glass with water from a spray bottle and gently sand the entire surface with coarser sandpaper, then medium and then the finest. Always wet the surface to be treated with water while sanding.
When you're done sanding the glass, wipe it well with a lint-free cloth.

Step three: varnishing.
Apply UV headlamp varnish evenly from a distance of 20 - 30 centimeters to the dry surface of the headlamp. Do not get carried away so that streaks do not form. Look in the instructions for the setting time of the varnish and apply several layers of your product on the headlamp at the indicated intervals.
Do not touch the surface and make sure that no debris or dust adheres to the drying headlights.

Step four: cleaning.
As soon as the varnish dries (which is about 15 minutes, if your varnish does not specify a different drying time), you can carefully remove the tape and paper.
That's it, the repair is over, now you can enjoy the beauty of your car and your own coolness!

During the operation of the car, reflectors on the headlights often fail. These elements are the most vulnerable of all optical parts. The reflector fades and fades over time. Wherever and by whatever manufacturer a reflector is made, it is equally exposed to heating that is fatal for it, as a result of which it requires repair. Restoration of the headlight reflector can be done in a garage with your own hands. Let's see how to do this.
When the reflector is in an unsatisfactory condition, this leads to a significant decrease in the efficiency of the headlamp due to the nature of its design. This circumstance cannot be ignored, because safety depends on it. Moreover, it is almost impossible to find a separate reflector for replacement on sale. And to purchase a new set of optics for the sake of one reflector is very expensive.
Types of reflectors for headlights
There are several types of reflectors:
- The first type - a parabolic reflector, forms a fairly clear and fairly strong light flux parallel to the axis of the optics. In this case, the strength of the luminous flux is unchanged. The losses are very small. This is the light that diverges in different directions. The main beam is directed along the axis. And with increasing distance from the axis, the brightness and the strength of the flux decreases. A lamp with a special screen is used for the dipped beam. The beams of this headlamp are directed only to the upper sector of the parabolic reflector.
- Bifocal reflectors have two parts. Their focal lengths are different and sometimes very different. This allows the optics to perform the functions assigned to it. For example, lighting the nearest part of the road. The disadvantage of this type of reflector is that it can only be installed in optics with one filament. This means that the car must be equipped with four-element headlights.
- Focused reflectors are blocks that are additionally divided into sections. The main feature and working condition is the coincidence of the focal lengths of each element, which gives a particularly bright and strong luminous flux. At the same time, the focal length is short. Such reflectors are used together with lamps equipped with two filaments. The main beam is formed by the main section. Middle - due to additional parts. The design itself is quite compact.
- The polyellipsoidal reflector is a whole complex of elements with a protective shield. Due to its versatility, a powerful and directional luminous flux is formed, which is capable of taking different forms and has clear boundaries. To create such optics, computer programs are used. Working surface - no more than 30 sq. see This optics works in conjunction with lamps where there is only one filament.
Reasons for the failure of reflectors
In terms of operation and equipment, these devices are the same. They perform the same task - they direct the light flux from the rays that the lamp forms. To do this, the inside of the reflector should be as smooth as possible, and ideally mirrored.

During the operation of the car, this surface is destroyed. Often, the destruction is caused by physical impact, violation of the tightness of the headlight, sharp and large temperature changes.
What spoils the headlight?
It is not recommended to install lamps in optics, the power of which exceeds the permitted capabilities. If the manufacturer's requirements are not followed, then the mirror layer will burn out and the reflector will no longer be able to perform its functions. The light will not be directed and generate the required power.
In such a situation, it is much more profitable to replace the element. But as already mentioned above, it is extremely difficult to find it on sale. The best option is to restore the headlight reflector to increase the life of the optics.
Self-recovery methods
You can restore the reflector with your own hands almost in a garage. Of course, if you use these methods, the reflector will not work as it did from the factory. But at least the headlight will live.

Do-it-yourself restoration of the headlamp reflector is possible with the help of metallized tape, with the help of glue and foil or mirror film. A method of coloring the reflector with chrome is also being considered.
Dismantling and preparatory work
The first step is to gain access to the reflector. To do this, remove and disassemble the headlight. The work requires accuracy and precision, since the optics consists of a large number of small elements.

Consider dismantling using the example of the VAZ-2114. First, remove the cover over the radiator. Then the bolts are unscrewed near the bumper and radiator. Next, the electrical connectors, the optics themselves and the hydraulic corrector are disconnected. The corrector is also removed from its socket. Next, you need to unscrew the bolts at the back of the headlight, remove it and remove it from the mount.
After successful dismantling, the headlight reflector restoration process begins. There are many ways to do this. It is enough to choose the one that suits the most.
Method number 1 with metallized tape
Using this method, the reflectivity of the reflector can be easily restored. The method is inexpensive, but a huge number of motorists have experienced it. This regenerative technology is based on the use of metallized tape. The previously dismantled headlamp must be disassembled and thoroughly cleaned. When disassembling optics, it must be borne in mind that the factory sealant can hold the parts well. To neutralize the effect of the sealant, you need to heat the headlight, and then everything will easily come apart. You can do this in the oven. A construction hairdryer is also suitable.

The reflector can be easily pulled out by poking it with a knife. Next, the headlamp is washed, cleaned and dried well. Then the necessary pieces of pre-prepared scotch tape are measured and cut off. Be sure to degrease the bottom of the headlight, otherwise the tape will not stick. The tape is carefully applied to the damaged reflector.
This method is really working. The restoration of the cover of the headlight reflector using this technology has already been tested many times.
Method number 2 with glue and foil
Buy foil and glue. Before gluing, the headlight is thoroughly cleaned and then degreased. Next, they make patterns, first from paper - at this stage, you should show all possible care and accuracy. The paper is applied to the inside of the headlamp and the blanks are marked. Then the elements are cut according to the template already from the foil. It remains now to coat the elements with glue, glue and level the pieces. When the glue is dry, the restoration of the headlight reflector is complete. You can test the result.
Method number 3 with film
This technology is similar to the first method. The difference between them is that different, more professional material is used here. In this case, a mirror film will be used, the choice of varieties of which on the market is huge. The product Oracal 351 or 352 is especially suitable for these purposes.

Restoration of the mirror coating of the headlamp reflector is performed as follows. The headlight is dismantled and cleaned. Degrease the reflector. With the help of construction tape, patterns are made. Then the parts are cut out from the film. It remains to stick the prepared elements onto the reflector. The surface is heated with a hairdryer.
If there are corrugated parts, then chrome paint is better for restoring headlight reflectors. The elements are carefully painted from a spray can, and then allowed to dry.
Method number 4 - with paint
This is the latest reflector restoration technology available at home. The difference between this method is simplicity. All you need is a can of paint. You can buy chrome paint in any car store. Restoring the chrome of the headlight reflectors in this way is a simple spraying of paint onto a degreased reflector. Minus - low durability.

Acrylic and alkyd paints show themselves excellently. You can even find special headlight products on the market. They are more expensive than chrome in a spray can, but the product will eliminate the problem for a long time.
Restoring the headlight reflector with paints has a significant drawback - the optics will not shine so brightly. This can be explained by the fact that the paint is not distinguished by high reflective methods. But this is the easiest recovery method.
Outcome
So, we figured out how to repair optics at home. Naturally, you need to understand that all these methods are not vacuum restoration of headlight reflectors, which is done at the factory. These are ways to simply use the headlamp for its intended purpose. Therefore, miracles should not be expected.
You will also be interested in:
Why are special technological holes made in the pulleys? In auto repair shops to fix ...
Even the most careful drivers sometimes find themselves in unpleasant situations. If you are leaving ...

Well, finally, I decided to pay attention to this important aspect of the game, in fact ...

No? But in vain! After all, it is the name that characterizes the game. And it translates as follows: ...

Tuning mod for GTA San Andreas will add to the game new options for upgrading cars, ...

