


12
18
..


 62
63
64
65
66
67
68
69
..
62
63
64
65
66
67
68
69
..
The ignition timing coin is installed on motorcycles K-750M, MV-750, K-S50 and MV-750M and is designed for early or late ignition. The position of the coin should correspond to the engine operating mode.
ELECTRICAL EQUIPMENT OF THE K-750M MOTORCYCLE
In fig. 33 shows a diagram of the electrical equipment of the K-750M motorcycle. The diagram gives an idea of \u200b\u200bthe principle of interaction between electrical units and the installation of drives. The electrical network is made according to a single-wire scheme, that is, consumers are supplied from electricity sources through one wire (from the positive terminal of the battery and generator), and the second wire is the motorcycle body and the instruments themselves ("mass"). There may be some changes in the electrical equipment diagram associated with a change in the design of electrical units.
Generator and relay-regulator... Generator direct current type. G414 parallel excitation is designed to work together with a relay-regulator. On its body there are two output terminals - Ш and Я. The minus brush is connected to ground.
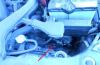
The generator on a motorcycle is the main source of power for all consumers of electricity, serves to recharge the battery while the motorcycle is in motion and is driven by the camshaft gears with a gear ratio of 1: 3.
In the absence of a load, the generator develops a voltage of 6.5 V, sufficient to turn it on through a relay into a common network (the number of armature revolutions is not more than 1450 rpm). At a rated load of 10 °, the generator gives a voltage of 6.5 V (the number of armature revolutions is not more than 2200 rpm). Thus, after starting the engine, when the latter switches to operating speed, the generator generates enough electricity to power consumers, and is connected to the network. The generator is disconnected from the mains when its voltage falls below the voltage battery and current from the battery begins to flow through it. The amount of reverse current at which the generator is disconnected from the network is 0.5-3.5 A.
Relay-regulator type PP302 consists of two electromagnetic devices: a reverse current relay and a voltage regulator. They are in a common box and are intended for automatic activation and disconnecting the generator from the network, as well as for automatic regulation of the generator voltage and its protection against overload. In addition, the regulator relay limits the charging current of the battery.
The reverse current relay is an electromagnetic "switch, which operates in parallel operation of a generator with a battery, and serves to automatic connection the battery to the generator, if its voltage is higher than the voltage of the battery, and for its automatic shutdown if the generator voltage drops and falls below the battery voltage.
The voltage regulator is an electromagnetic device of a vibration type, which periodically turns on additional resistance in the generator excitation winding circuit, thereby maintaining the voltage at its terminals at a certain constant average level. The regulator reacts not only to the voltage value, but also to the generator load value, preventing its excessive increase. This is achieved by decreasing the regulated voltage as the generator load increases.
The regulator relay is factory-adjusted and does not require any maintenance. It is forbidden to violate the factory settings or open the relay-regulator. Its body is sealed and in case of removing the seal, complaints about its malfunction will not be accepted.
When installing a relay-regulator on a motorcycle, make sure that it is reliably connected to ground.
The "mass" is the body of the device itself with a special terminal, which is connected to the "mass" of the motorcycle by the screws that secure the relay-regulator.
Rice, 33. Electrical circuit of the motorcycle K-750M:
1 - lamp of high and low beam; 2 - key; 5- fuse; 4 - headlight; 5 - central switch; 6 - wire-mass; 7 - high voltage wire; 8 - candles; 9 - high voltage wire; 10 - ignition coil; 11 - front light of the sidecar; 12 - signal; 13 - wire of the stroller's front light; 14 - rear light of a stroller; 15 - motorcycle rear light; 16 - brake light sensor; 17 - relay regulator; 18 - DC generator; 19 - storage battery; 20 - a bundle of low voltage wires; 21 - battery wire - weight; 22 - breaker; 23 - distributor; 24 - high voltage wire; 25 - signal button; 26 - signal wire; 27 - ignition timing shifter; 28 - high and low beam switch cable; 29 - switch for main beam and parking light; 30 - control lamp; 31 - parking light lamp; 32 - speedometer backlight lamp; 33 - wire connector; 34 - sidecar lantern wire; 35 - wire from the sensor to the brake light lamps; 36 - wire from the connector to the license plate lamp
The generator is installed in the upper part of the engine crankcase in a special seat and is secured with a tie strap. A special stop protects the generator from axial movement.
The gap in the gear teeth is adjusted by turning the generator. The clearance should be such that after starting the engine there is no increased noise, gear knocking and teeth jamming.
If the strap is accidentally loosened, the generator housing can rotate.
To prevent the teeth from jamming, the generator is installed in the seat so that the gear is to the right of the housing axis, when viewed from the side opposite to the drive.
The gear wheel of the generator is attached to the armature shaft with a key and with its rim rests against the inner race of the ball bearing. With a tight fit of the gear on the shaft, remove the bearing cover 5 (Fig. 34); generator shaft (with
side of the collector) to place on a stop and fit the gear with a light blow of a hammer.
Every 4000 km of run, it is necessary to check the condition of the brushes and the collector. To do this, remove the protective tape 6, raise the spring of the brushes and check whether the brushes move easily in the brush holders and whether they are too worn out. The smallest brush height that provides normal work generator - 10 mm. If the brush is jammed, wipe it and the brush holder with a cloth soaked in gasoline. If the brushes are badly worn out, then they need to be replaced with new ones, having previously been lapped with glass cloth along the collector arc. In case of contamination or oily contamination,
The electrical equipment of the K-750 motorcycle consists of a generator - G-11A, a relay-regulator RR-31, an induction coil, a PM-05 breaker-distributor, a PM-11A breaker, a headlight, connecting wires and switches.
Generator G-11A
The G-11A generator, the device of which is shown in the figure, is installed on the K-750, M-72, M-52 and M-61. This generator is a single-pole, shunt-excited DC electric machine. Provides power for the electrical equipment of the K-750 motorcycle.
The power of the generator is 45W at a rated voltage of 6V. It works in conjunction with a relay-regulator and a storage battery. Installed in the upper part of the engine crankcase in a special bore.
The generator is driven by the engine camshaft via a pair of gears. The clearance in the gear teeth is adjusted by turning the generator housing in the bore of the engine crankcase. At 900 rpm. armature voltage reaches 6.5 V.
The relay-regulator RR-31 consists of a reverse current relay 5 and a voltage regulator 13, mounted in a common housing 7.
The reverse current relay includes a steel core with two windings (parallel and series), a yoke 5, a steel armature 2 with a movable contact, a post 4 with a fixed contact and an armature spring 21.
The parallel (shunt) winding is made of insulated copper wire with a diameter of 0.17 mm and has 1200 turns. The serial (series) winding has 15 turns made of a similar wire with a diameter of 1.81 mm.
The voltage regulator includes a steel core with three windings (parallel, equalizing and correcting), a yoke 16, a steel armature 12 with contacts fixed at the ends of plates 10 and 11, an armature spring 17 with an adjusting nut 18, a limit bar 9, a magnetic shunt and additional resistances 19 (wire) and 20 (coal).
The parallel winding has 990 turns of insulated copper wire with a diameter of 0.62 mm, and the equalizing and correcting windings have 37 and 11 turns, respectively, made of a similar wire with a diameter of 0.86 and 1.74 mm.
The relay-regulator RR-31 has three clamps: Ш, Я and B, which must be connected respectively to the terminals Ш and Я of the generator and to the terminal of the ignition switch. The relay is attached to the motorcycle frame under the driver's seat on the right side of the motorcycle.
Ignition coil B-2B or IG-4085 and B-201
The ignition coil B-2B or IG-4085 serves to convert low voltage current (6 V) into high voltage current (12-15 thousand V) and consists of core 3, primary 7 and secondary 4 windings, housing 8 and carbolite insulator 2 with output terminals 1 and 9.
The secondary winding has 12-13 thousand turns of wire with a diameter of 0.07-0.1 mm. The secondary resistance is 4000 ohms.
The primary winding has 250 turns, made of wire with a diameter of 0.8 mm. The primary resistance is about 1.5 ohms.
The ignition coil draws 4 amperes at 6 volts. The coil must ensure uninterrupted neoplasm with 6000 interruptions of current in the primary circuit and with a spark gap of 7 mm on a three-electrode spark gap.
The B-201 ignition coil is mounted on the front cover of the engine and consists of an iron core, one primary and two secondary windings, two output terminals from the secondary windings and two insulators with primary winding terminals.
A high voltage current is simultaneously supplied to the spark plugs of both engine cylinders. In this case, the spark pulse is used on the spark plug of one cylinder (compression stroke), and on the spark plug of the other cylinder is not used (exhaust gas release).
The PM-05 switch-distributor consists of a switch with a rotary base and a high voltage current distributor. The breaker consists of a housing in which a rotary disk 13 is installed, which has annular grooves. Screws with springs pass down through the grooves, with the help of which the disc is pressed against the body.
The parts of the breaker are attached to the rotary disk: a fixed contact 14, with a locking screw 12 and a screw with an eccentric head 10, as well as a hammer 4, isolated from the ground and connected to the contact rack through a flat spring.
A capacitor 1 with a capacitance of 0.15 microfarads is connected in parallel with the contacts of the breaker. The distributor rotor 18 has a central contact and a side contact plate located along the radius of the rotor flange; in this case, both contacts are interconnected.
The rotor also has a metal bushing and a nut with a screw, with which it is attached to the end of the camshaft. The crack is placed inside the shaft, and the screw goes through a slot in it, so that the rotor is always fixed in a certain position relative to the engine camshaft.
The rotor is closed with a distributor cover with three high voltage terminals located on it: two extreme terminals are for connecting wires from the glow plugs, and the middle one is for the central terminal of the induction coil.
Three carbon contacts are installed on the inner surface of the cover, two of which (outermost) 23 have spring ejectors. In the center of the cover there is a central contact 22, which, when the cover is installed on the breaker housing, is connected to the central contact of the rotor 19, supplying a high voltage current from the ignition coil to the side contact plate of the rotor.
The extreme carbon contacts, sliding along the rotor flange, alternately close with the plate, directing the high voltage current to one or the other of the engine cylinder plug. In one revolution of the engine camshaft, the breaker contacts open twice (after 180 °), forming two sparks: one ignites the mixture in one cylinder, and the second in the other.
The breaker serves to interrupt the current in the primary winding circuit of the ignition coil and consists of a body 14, a hammer 4 with a spring, an anvil 3, an adjusting screw 11, a low voltage current terminal and a capacitor 13.
Since 1963, motorcycles have been using breakers of the P M-11 A type with an automatic ignition timing and a B-201 double-spark ignition coil. In this case, a high voltage current is supplied to the spark plugs directly from the ignition coil.
Thanks to this, the design of the breaker is simplified: it does not have a mechanism for the manual adjustment of the ignition timing, and the hammer with contacts rotates automatically, thus increasing the reliability of the engine.
The advancing machine is installed at the end of the engine camshaft and consists of a base with a flange, an ignition cam 10, weights 6 and springs 8.
The machine works as follows. Weights rotating with camshaft, under the action of centrifugal force, they diverge, and the leashes of the weights, moving along the grooves, turn the cam at a certain angle towards the textolite heel of the breaker hammer. In this case, the rise of the hammer and the break of the breaker contacts occur earlier, and the ignition timing increases.
Headlight FG-6A
The headlight FG-6 A of the K-750 motorcycle consists of a body 1, a reflector 3 with a two-filament lamp 5, a diffuser 2 and a parking lamp 4. A central switch 6, a speedometer 9, a control lamp and a fuse are installed in the headlight housing. The central switch is turned on with the key 7.
General scheme electrical equipment K-750 is shown in the figure below.
62
63
64
65
66
67
68
69
..
Central switch and ignition lock motorcycle K-750M, MV-750, K-650, MT-9
On motorcycles K-750M, MV-750, K-650, MT-9 and MV-750M, a central switch is installed, made at the same time with the ignition lock, having common parts with it and mounted in the headlight of the motorcycle.
The central switch (fig. 96) is used to turn on the ignition circuit, signal and lighting circuit of the motorcycle.
The central switch is attached to the inside of the headlamp by three screws, screwed from the outside into the switch housing, and consists of a base on which the housing, moving contact and terminals are mounted.
The hole for the ignition key in the switch cover is closed with a slider to prevent moisture from entering during precipitation.
Next to the switch, in the headlight, there is a warning lamp and a 15 amp central fuse.
During the operation of motorcycles, it is sometimes necessary to replace a blown central fuse or a headlight warning lamp.
To replace the fuse, unscrew the holder located on the right side of the headlight with a screwdriver. The control lamp is replaced from the inside of the headlamp, for which the rim with the diffuser and the reflector is first separated from the headlamp housing.
The MV-650 motorcycle has a central switch of the VK-857 type (Fig. 97), mounted on the instrument panel, made at the same time with the ignition switch and having common parts with it.
The MV-650 ignition lock consists of a housing 1, which has a locking cylinder 2, with an automobile ignition key 3. In the lower part of the case there are seven terminals to which they are connected: plus from the power source (terminals 1-1), ignition (terminals 2-2),
motorcycle side lights (terminals 3-3) and headlight (terminal 4).
When you turn the ignition key, the locking cylinder turns and with it a movable contact connecting the terminals in various combinations (Fig. 98):
0 - the key is inserted all the way - all devices are turned off;
I - the key is inserted all the way and turned counterclockwise - the ignition, the side lights of the motorcycle and the parking light lamp in the headlight are on (the parking light continues to burn when the ignition key is removed in this position);
II - the key is inserted as far as it will go and turned clockwise to the first fixed position - the ignition, headlamp and side lights are on (driving at night);
III - the key is inserted all the way and turned clockwise to the second fixed position - the ignition, parking lights and direction indicators are on.
The warning lamps and instruments of the motorcycle are included in all three positions of the ignition key, except for “0”.
The motorcycle control mechanism (Fig. 68) includes the steering wheel and control cables, as well as the drive rear brake.
HANDLEBAR AND CONTROL CABLES
The steering wheel is used to change the direction of the motorcycle.
On the handlebars 12 (Fig. 68) on the right are the handle 7 for controlling the chokes of the carburetors, the lever 5 for controlling the front brake and the switch 6 for direction indicators (for MT-9 and MV-650 motorcycles).
When the handle 7 is turned towards itself, the carburetor throttles rise, the amount of the combustible mixture entering the cylinders increases and the engine speed increases. When you turn the handle away from you, the process is reversed. The throttle lift at a non-rolled motor is limited by stops.
The front brake control lever 5 is installed on the steering wheel in the bracket. Pressing the lever activates the brake front wheel motorcycle.
The switch 6 of the direction indicators has three positions: neutral (middle), at which the direction indicators are off, the far right indicates a turn to the right, the far left indicates a turn to the left.
On the left handlebar are located the clutch control lever 13, the ignition timing coin 14, the high and low beam switch lever and the signal button 16.
The clutch control lever 13 is used when starting the motorcycle, when shifting gears and when braking.
When the lever is pressed, the clutch discs are disengaged and crankshaft the engine is disconnected from the transmission input shaft. When you return the lever to the first starting position the clutch engages.
| Figure: 68. Steering motorcycle: 1 - central switch; 2 - control lamp for emergency oil pressure; 3 - speedometer; 4 - steering damper; 5 - hand brake lever; 6 - turn signal switch; 7 - throttle control handle; 8 - foot brake pedal; 9 - reverse gear handle (for motorcycles K-750M, MV-750, K-650 - manual gear shift lever); 10 - battery charging control lamp; 11 - indicator lamp for neutral of MT-801 gearbox; 12 - steering wheel; 13 - clutch control lever; 14 - ignition timing coin; 15 - lever switch for high and low beam; 16 - signal button; 17 - foot pedal for gear shifting; 18 - trigger lever |
When starting at low speeds when the engine is overloaded, the coin lever should be set to the late ignition position. With an increase in the number of revolutions, the ignition timing must be increased by moving the lever to the "Early" position.
The signal button 16 is installed on the body of the coin and is designed to give a sound signal.
The lever 15 of the switch for high and low beam is connected with a cable to the switch slider in the headlight. Moving the engine from one extreme position to another, turn on the high or low beam of a large headlight lamp.
The shock absorber 4 of the handlebars is designed to reduce the lateral vibrations of the front wheel and make it easier to control the motorcycle.
On the left side of the motorcycle, at the bottom, there is a two-shoulder gearshift pedal 17 and a trigger lever 18.
The pedal 17 of the foot switch has two support platforms. When the pedal is pressed with the toe, the gears are switched from higher to lower, when pressed with the heel, from lower to higher. Each time the pedal is pressed, it automatically returns to its original position. Pedal 17 is mounted on the gearbox housing.
A trigger lever 18 is also installed on the gearbox housing for starting the engine.
On the right side of the motorcycle, at the bottom, there are foot brake pedal 8 and hand lever 9. In K-750M, MV-750 and K-650, which use the 6204 gearbox, lever 9 is used for manual gear shifting and setting the neutral position. For MT-9, M6-750M and MV-650 motorcycles, on which the MT-804 gearbox is installed, lever 9 is the reverse gear lever, and the neutral position is set with the foot pedal 17. When setting the main neutral position of the shifting mechanism (between I and 2nd gear) on the headlamp the neutral indicator lamp lights up.
On these motorcycles, the lever 9 for engaging the reverse gear, located on the gearbox on the right side, has two positions: forward - the gear is on, reverse - the gear is off.
The foot brake pedal 5 is located on the right side of the motorcycle frame. Depressing the pedal slows down rear wheel, when the pedal is returned to its original position, braking stops.
On MV-750 motorcycles on the right side there is also a lock engaging lever, designed to turn on and off the differential lock clutch of the main transmission.
On the headlight of the motorcycle there is a central switch 1, with an ignition switch, built into the headlight and designed to turn on the ignition and control the lighting devices.
The central switch, mounted in the headlamp, is installed on the K-750M, MV-750, K-650, MT-9 and MV-750M motorcycles. On the MV-650 motorcycle, a VK-857 automotive-type switch is installed, mounted not in the headlight, but on the motorcycle instrument panel.
The central switch in the headlamp can have positions:
1. The ignition key is removed, the switch is in the middle position - all devices are off (parking during the day).
2. The key is fully inserted, the switch is in the middle position, the control lamp 10 is on, the ignition is on, the sound signal and the brake light are on. On the MT-9 motorcycle, the warning lamp 2 of the emergency oil pressure is on and the direction indicators are on.
3. The key is fully inserted and the switch is turned to the right - the ignition, sound signal and brake light are on, and on the MT-9 motorcycle - direction indicators, side lights, speedometer lighting and parking lights are on.
4. The key is fully inserted and the switch is turned to the left - the ignition, sound signal and brake light are on, and on the MT-9 motorcycle - direction indicators, side lamp lamps, a speedometer lamp, high or low beam headlights are on (depending on the position of the lever fifteen),
5. The key is removed, the central switch is turned to the right. In this case, the ignition, sound signal and brake light are turned off, the lamps are on rear light motorcycle, sidecar front and rear lights, speedometer lighting and parking light (parking light at night).
The 11 gearbox neutral indicator lamp lights up only in the main neutral position (between 1st and 2nd gears) of the gearshift mechanism, regardless of engine operation and central shift position.
MOTORCYCLE STEERING DEVICE
The steering wheel (fig. 69) is made of steel pipe and is connected to the front fork by means of two brackets 4, fixed in the holes of the front fork cross member.
On the right side, at the end of the rudder, a tube with a rubber handle 18 pressed onto it is loosely fitted, an eyelet with a through groove is welded to the tube. The groove includes a chain 9, which is attached with a pin. At the second end of the chain, a slider 10 is attached. On the upper part of the slider, two grooves are made, into which the ends of the cables with tips are placed. From axial movement along the rudder tube, the tube is held by the housing 7, with which it is jointly attached to the steering wheel by a locking screw 19 with a lock nut, the housing is closed with a cover 8.
The body 7 has a longitudinal groove along which the slider slides with the ends of the carburetor choke control cables fixed in it. The free cavity of the longitudinal groove is filled with grease (lithol or US-2).
The opposite ends of the cables are fixed directly in the throttle valves of the carburetors. To fix the throttle control knob in a given position, a spring 12 and an adjusting screw 11 with a lock nut are attached to the handle body.
The length of the throttle control drive cables, and, consequently, the timing of the throttle lift are adjusted using adjusting fittings 5 \u200b\u200b(Fig. 26) installed on the carburetor housing covers.

Figure: 69. Handlebars of motorcycles K-750M, MV-750, K-650 and MV-750M:
1 - left arm assembly; 2 - combined coin P45; 3 - steering tube; 4 - steering wheel brackets; 5 - throttle control knob assembly; 6 - right arm assembly; 7 - body of the throttle control handle; 8 - housing cover; 9 - complete chain; 10 - slider; 11 - throttle handle adjusting screw; 12 - spring; 13 - choke cables assembled; 14 - rope front brake assembled; 15 - front brake cable bracket; 16 - ignition timing cable assembly; 17 - safety tube; 18 - rudder handle; 19 - locking screw; 20 - arm bracket; 21 - lever axis; 22 - adjusting screw; 23 - clutch cable; 24 - adjusting fitting; 25 - safety clutches; 26 - coin body; 27 - ignition timing lever; 28 - signal button; 29 - lever for switching high and low beam
Lever 1 (Fig. 69) clutch control is attached to the left side of the steering wheel. Its support is a bracket 20, which is attached to the steering tube with a bolt. The axis 21 of rotation of the lever is a screw screwed into the base of the lever. The bracket has a hole that serves as a stop for the cable sheath. There is also a hole in the lever itself, where the cable tip enters. The clutch control lever is connected to the lever of the clutch release mechanism by means of a cable 23. The lower stop of the shell tube is a bracket with a lining attached to the upper right pin securing the gearbox to the engine. The tension of the cable, and therefore the free play of the clutch release levers, is adjusted using the adjusting screw 22 or by moving the safety tube 17 in the bracket.
The front brake control lever 6 is installed on the steering wheel on the right in a bracket mounted on the steering tube. The device and its fastening are similar to the device and fastening of the clutch control lever. The front brake control lever is connected to the lever 4 (Fig. 56) of the front brake with a cable 14.
The tension of the cable, and, consequently, the free play of the front brake control drive lever are adjusted using the adjusting nipple 24 (Fig. 69) screwed into the front brake disc.
All motorcycle control drives (except for the foot brake rods) are flexible. They are steel cables enclosed in twisted steel sheaths, covered with a braid that protects both the sheath and the rope from corrosion.
On both sides of the cables, metal tips are soldered, one of which is fixed in the control lever, and the other in the parts of the controlled unit or unit. The sheaths of the cables in the places of their contact with the metal parts of the motorcycle are protected from damage by rubber couplings 25.
The combined coin (fig. 69) is installed on the handlebars of motorcycles K-750M, MV-750, K: 650 and MV-750M between the left handle and bracket 20 of the clutch control lever.
The body of the coin is a sleeve on which the ignition timing lever 27, the signal button 28 and the lever 29 of the high and low beam switch are mounted.
The ignition timing lever is connected to the movable disc of the breaker by means of a cable 16. When the lever of the coin is turned towards itself, the movable disc of the breaker turns in the direction of rotation of the cam. This position corresponds to the late ignition time. When you turn the lever of the coin away from you, the movable disk of the breaker turns in the direction opposite to the direction of rotation of the cam. In this case, the ignition timing is increased.
The ignition advance is regulated by the disc within the angle from 34 ± 2º to vmt. ( early ignition) up to 6 ± 2 ° to v.m.t. (late ignition) at the MT-801 engine.
For the K-750 engine - respectively, within the angle from 30 ± 2 ° to v.m.t. (early ignition) up to 2 ± 2 ° to a.m.t. (late ignition).
The light switch lever is connected by a cable to the switch lever in the headlight. By moving the engine, turn on the high beam or low beam headlights.
The sound signal button has contacts - movable and fixed, disconnected from the ground. The fixed contact of the button is wired to one of the signal terminals. When you press the signal button, its contacts are closed, and therefore the signal circuit is closed.
The KMZ-8.151.14 steering wheel, installed on MT-9 and MV-650 motorcycles (Fig. 70), differs from the one described above in that a turn indicator switch is installed on the right side of the steering wheel, and instead of a combined ignition timing coin, a toggle switch with a short-range switch is installed. and high beam and the horn button. The rest of the steering wheel parts are the same as for the 75011001 handlebars.

Figure: 70. Handlebar of MT-9 and MV-650 motorcycles:
1 - left arm assembly; 2 - switch for low and high beam with a signal button; 3 - steering tube; 4 - steering wheel brackets; 5 - throttle control knob assembly; 6 - right lever assembly; 7 - body of the throttle control handle; 8 - housing cover; 9 - complete chain; 10 - slider; 11 - throttle handle adjusting screw; 12 - spring; 13 - choke cables assembled; 14 - front brake cable assembly; 15 - front brake cable bracket; 16 - turn signal switch; 17 - safety tube
REAR BRAKE DRIVE
On motorcycles K-750M and MV-750, a rear brake drive (Fig. 71) of the simplest design is installed.
At the base of the right center post of the frame, bracket 1 is welded, on which the rear brake pedal and brake light sensor are mounted.
The forged rear brake pedal 2 has a notched support pad to prevent the foot from slipping at one end and a hole at the other where the pedal axle is pressed into and welded. On the smooth surface of the axle there is a cam against which the pusher of the brake light sensor abuts. At the end of the pedal axis, slots are made on which the rear brake lever 4 sits, secured with a nut.
AT upper end the lever made a hole for the pin 5 of the adjusting fork 6 of the brake rod. The bottom of the rear brake lever is curved and has a hook that engages the spring. At the end of the brake rod, an axle 7 of the brake lever is installed and a nut 8 is screwed on.
When the pedal is depressed, the pedal axis rotates in the bracket, dragging the rear brake lever with it, which, by moving the brake rod forward, stretches the spring of lever 4. Moving forward, the brake rod moves the lever located on the brake disc, turning the fist and equalizer and pushing the brake pads ... When you stop pressing the pedal, all parts of the brake return to their initial position under the action of the spring of the brake lever and the braking stops.
A brake light sensor is associated with the action of the brake pedal. The brake light sensor is screwed into a threaded hole in the rear brake pedal shaft bracket. There are two wires from the sensor; some - from the sensor terminal to the motorcycle lamp, to the upper terminal of the brake light, the other to the relay terminal.
When you press the brake pedal, the sensor pusher under the action of a spring slides along the cam on the brake pedal axis and falls down, closing the sensor contacts. At this moment, the brake light comes on.
The sensor should be installed and adjusted as follows. Screw in the sensor body about 2/3 of the thread length and press the foot brake pedal, while the lamp should light up. Fix the wires, put on the cap and check the operation of the sensor. When the brake pedal is moved 10-15 mm, the warning lamp should light up. With further pressing of the pedal, the lamp should burn steadily. If the lamp comes on too late (with a large brake pedal stroke), it is necessary to slightly unscrew the sensor. If the lamp ignites too early (at the slightest touch of the pedal), the sensor must be screwed in a little. After adjustment, the sensor body should be locked with a nut, the terminals should be lubricated with US-2 grease and a rubber cap should be put on.
The design described above was used in the K-750M and MV-750 motorcycles and needed frequent adjustments. The motorcycles K-650, MV-750M, MT-9 and MV-650 use a more advanced design of the rear brake drive (Fig. 72). It consists of a pedal lever 2, a pedal hinge 3, a brake signal switch 4, a front link 5, an intermediate lever 6 with a spring, an intermediate lever hinge 7, a rear link 8, a lever axis 9 and a nut 11 connected to the brake knuckle lever 10.
When you press the pedal, the pedal axis rotates in the hinge 3, dragging the front rod 5, which moves the intermediate lever 6. The spring of the intermediate lever is compressed and turns it in the hinge 7, dragging the rear rod 5, which, by moving the brake knuckle lever, spreads the brake pads. When you stop pressing the pedal, all parts of the rear brake drive are returned to their initial position by the spring of the intermediate lever.
As a brake signal sensor on the above motorcycles is used
switch 4 (VK854). The brake signal sensor, housed in a protective rubber cap, is attached with two screws to a bracket welded to the lower right side tube of the frame.
The terminals are protected from moisture and dirt with a rubber cap.
The switch rod is connected by a spring to the upper arm of the foot brake pedal. When braking, the spring is tensioned and moves the stem, which closes the contacts. This will illuminate the red light of the rear lights of the motorcycle and sidecar. Opening is carried out by the return spring of the circuit breaker, and the accelerated opening of its contacts is performed by an additional spring. The full stroke of the switch is 10.5 mm. During operation, the switch cannot be repaired and in case of failure it is replaced with a new one.
CONTROL MECHANISM ADJUSTMENT AND MAINTENANCE
Correct adjustment of the control mechanism should ensure:
1. With the control levers freely released:
For clutch - full engagement; it is controlled by the free play of the end of the clutch control lever for motorcycles K-750M, MV-750 and K-650. The free play of the lever end should be 5-8 mm. On motorcycles MV-750M, MT-9 and MV-650, where an automatic clutch release mechanism is installed, the free play of the end of the clutch control lever is not controlled, but the free play of the upper head of the clutch release lever on the gearbox is checked, which should not exceed 1 mm. Free travel of the front shoulder of the gear shift pedal when swinging it should be 10 mm;
For brakes - there is a gap of 0.2-0.4 mm between brake pads and brake drums; it is controlled at the front brake by the free play of the end of the control lever, which should be 5-10 mm, and for the rear brake - by the free play of the brake pedal, which should be 20-25 mm for motorcycles K-750M and MV-750 and 10-15 mm for motorcycles K-650, MV-750M, MT-9 and MV-650;
The interrupter-distributor PM-05 on motorcycles K-750M, MV-750, K-650 and MV-750M should not have a free wheeling of the ignition timing drive when the position of the movable disk of the interrupter-distributor corresponds to early ignition;
For carburetors, the simultaneous start of movement and the rise of the chokes to the same height must be provided; at any position of the control handle of the cables there should be no free play.
2. With the control levers fully depressed:
For clutch - completely disengaging the clutch. A sign of good adjustment of the drive is silent gear shifting, and when the gear is engaged, the clutch should not lead;
For brakes, effectively braking the motorcycle with both brakes. The braking distance at a speed of 60 km / h on an asphalt dry highway should not exceed 32 m;
At the PM-05 interrupter-distributor - the position of the movable disk corresponding to the late ignition;
For carburetors - raising the throttles to the maximum and the same height, a sign of which is the synchronous operation of the cylinders, which is checked by alternately removing the caps from the spark plugs. In this case, the speedometer readings should not change at the same position of the throttle control knob.
Maintenance of control drives is as follows.
During the control examination, check the action of the levers and drives of the control mechanisms.
During daily maintenance check the condition and fastening of the control rods and cables and their effectiveness.
For maintenance No. 1, carry out the work prescribed for the daily maintenance, and additionally:
Check the adjustment of the automatic clutch release mechanism (for motorcycles MV-750M, MT-9, MV-650) and, if necessary, adjust;
Lubricate the axles of the clutch and handbrake control levers, the upper ends of the cables, the foot brake drive joints. Lubricant - lithol 24 (TU 3810439-71), grease US-2 GOST 1033-73 is allowed.
After 8000 km of run during the next maintenance service No. 2, perform the works provided for maintenance No. 1, and additionally lubricate the mechanism of the throttle control handle.
After the guaranteed mileage of 15,000 km, lubricate the speedometer drive cable with AC-8 oil.
FAULTS OF THE CONTROL MECHANISM AND METHODS OF THEIR ELIMINATION
| The nature of the malfunction | Possible reason | Method of determination | Remedy |
| Throttle control knob turns tight | Slider sticks Crumpled sheath or damaged cable | Remove grease and check rotation Check by inspection | Remove the handle, clean and lubricate again Replace damaged parts |
| The throttle does not move when the handle is rotated | Rotates the rubber handle on the tube Broken cable | Inspection from the end of the handle Inspection | Replace the handle Replace the cable |
| The throttle grip turns when the hand is removed | The adjusting screw is turned off Broken spring braking the handle | When tightening the screw, the When tightening the screw, it is not eliminated | Lock the screw Remove the handle and replace the spring |
| The advance lever rotates tightly | The sheath is crumpled or the rope veins are torn Lever screw over-tightened | Check by inspection Loosen the screw | Replace sheath or cable Adjust screw |
| The ignition timing lever moves arbitrarily to the "Early" position | Broken or loose lever spring washer | Tighten the screw; if the arm rotates easily, check the spring washer for elasticity | Replace the spring washer |
Chapter six
ELECTRICAL EQUIPMENT OF MOTORCYCLES
The electrical equipment of KMZ motorcycles consists of the following groups.
1. Sources of electricity - storage battery and generator.
2. Ignition devices - ignition coil, interrupter-distributor, spark plugs and ignition switch.
3. Electricity consumers - lighting devices, sound and light alarms.
4. Switchgear and wiring - center switch, brake light sensor and connecting wires.
The electrical network of motorcycles is a single-wire system. Power from sources of electrical energy is supplied to consumers through one wire connected to the negative terminals of the storage battery and generator (minus terminals), and the frame and all metal parts of the motorcycle (“mass”), connected to the positive terminals of the battery (positive terminal).
Depending on the motorcycle model, the electrical circuit has certain changes and differences, which boil down to three options:
6-volt circuit with a 65 W DC generator G-414, a ZMT-12 battery and manual ignition timing, mounted on motorcycles K-750M, MV-750, K-650 and MV-750M (Fig. 73) ;
6-volt circuit with a 65 W DC generator G-414, a ZMT-12 rechargeable battery and automatic ignition timing, mounted on an MT-9 motorcycle (Fig. 74);
12-volt circuit with a G-424 alternator, 150 W, a 6MTS-9 rechargeable battery (or paired ZMT-6 batteries) and automatic ignition timing, mounted on a MV-650 (MT-10) motorcycle (Fig. 75 ).

Figure: 73. Diagram of the motorcycle electrical equipment used for motorcycles K-750M, MV-750, K-650 and MV-750M:
1 - lamp of low and high beam A6-32 + 32; 2 - key; 3 - fuse; 4 - headlight FG-116; 5 - central switch; 6 - ground wire; 7 - high voltage wire; 8 - candle tip; 9 - ignition lights A8U; 10 - high voltage wire; 11 - B2B ignition coil; 12 - marker lamp; 13 - front light of the PF-200 sidecar; 14 - sound signal S-37A; 15 - a wire of the stroller's front light; 16 - wire connector; 17 - FP-220 rear light; 18 - lamp "Stop" A6-15 brake signal; 19 - marker lamp of the rear lamp A6-3; 20 - stroller lantern wire; 21 - wire brake signal switch lamp; 22 - a wire to the license plate lamp; 23 - brake light sensor; 24 - relay regulator; 25 - DC generator G-414; 26 - portable lamp PLTM (only for motorcycles MV-750 and MV-750M); 27 - socket 47K (only for MV-750 and MV-750M); 28 - wire to the outlet; 29 - battery wire - "mass"; 30 - rechargeable battery ZMT-12; 31 - interrupter-distributor PM-05; 32 - signal button; 33 - signal wire; 34 - ignition timing coin; 35 - speedometer backlight lamp; 36 - control lamp for turning on the generator A6-0.25; 37 - light switch cable; 38 - switch for high and low beam; 39 - parking light lamp A6-2

Figure: 74. Scheme of electrical equipment with automatic adjustment of the ignition timing used for the MT-9 motorcycle:
1 - lamp for high and low beam A6-32 + 32; 2 - lamp A6-15; 3 - UP-223 direction indicator lamp; 4 - ignition key; 5 - 15A fuse; 6 - lamp of the control lamp PD-20; 7 - signaling lamp; 8 - gauge of emergency oil pressure ММ106А; 9 - central switch; 10 - wire connector; 11 - turn switch P-201; 12 - lamp A6-2; 13 - front light of the PF-200 sidecar; 14 - candle tip; 15 - A8U incendiary candle; 16 - ignition coil B-201A; 17 - PM-302 breaker; 18 - sound signal S-37A; 19 - rear light of the FP-230 stroller; 20 - lamp A6-15; 21 - lamp A6-3; 22 - brake signal switch VK-854; 23 - relay regulator RR-302; 24 - DC generator G-414; 25 - rechargeable battery ZMT-12; 26 - A6-2 speedometer backlight lamp; 27 - sound signal button; 28 - relay-interrupter of the direction indicator PC419; 29 - light switch P-25A; 30 - neutral sensor (contact button); 31 - lamp of the control lamp PD20G; 32 - lamp signaling the neutral position of the gear shift lever A6-1; 33 - control lamp for turning on the generator A6-0.25; 34 - parking light lamp A6-2; 35 - headlight FG-116. Coloring of wires; I - black; II - white; III - red; IV - green; V - brown; VI - yellow; VII - blue; VIII - purple; IX - gray

Figure: 75. Scheme of electrical equipment with an alternating current generator G-424, used on a motorcycle MV-650 (MT-10):
1 - A8U incendiary candle; 2 - candle tip; 3 - breaker PM-302U or PM-304; 4 - B-204 two-lead ignition coil; 5 - sound signal O-38; 6 - light switch; 7 - UP-223 direction indicator lamp; 5 - headlight FG-137; 9 - central switch VK-857; 10 - interrupter of direction indicators PC427; 11 - gauge of emergency oil pressure MM125; 12 - contact plug; 13 - P201 direction indicator switch; 14 - front lamp PF-232 of the sidecar; 15 - brake signal switch VK-854; 16 - rear light FP-219 of the sidecar; 17 - relay-regulator RR-330; 18 - paired storage battery ZMT-6; 19 - fuse block PR-118; 20 - rear light of the FP-246 motorcycle; 21 - alternator G-424; 22 - lamp of the control lamp of the high beam PD20D; 23 - lamp of the control lamp of the PD205 generator; 24 - lamp of the control lamp for emergency oil pressure PD20E; 25 - lantern of a control lamp of direction indicators PD20D; 26 - lamp of the control lamp of the neutral sensor PD20D; 27 - lamp A12-21 direction indicators; 28 - lamp A12-4 parking light; 29 - lamp A12-45 + 40 high and low beam; 30 - lamp А12-21 + 6 "Stop" of the stroller lamp; 31 - lamp A12-3 of a motorcycle rear lamp; 32 - lamp A12-1 speedometer illumination; 33 - wire tip; 34 - a bundle of wires of the brake signal switch and rear turns; 35 - motorcycle wire bundle; 36 - wire panel; 37 - speedometer wire; 38 - wire battery-fuse box; 39 - a bundle of stroller lantern wires; 40 - signal wire; 41 - wire babin-breaker; 42 - high voltage wire; 43 - battery wire - "mass"; 44 - wire of the PD20E lantern; 45 - wire of the PD20D lantern; 46 - battery connecting wire
ELECTRICITY SOURCES
The sources of electricity for the described motorcycle models are ZMT-12 rechargeable batteries and G-414 generators for K-750M, MV-750, K-650, MV-750M and MT-9 motorcycles and 6MTS-9 or ZMT-6 rechargeable batteries and generator G -424 alternating current with a voltage of 12 V for the MV-650 (MT-10) motorcycle.
The inclusion of sources in the circuit and the maintenance of the voltage in the network within the required limits is ensured, respectively, by the relay-regulators PP-302 and PP-330.
Accumulator battery ZMT-12
On motorcycles K-750M, MV-750, K-650, MV-750M and MT-9, a lead-acid rechargeable battery of the ZMT-12 type is installed, having a nominal voltage of 6 V, a capacity of 12 Ah.
The electrolyte is water solution battery sulfuric acid.
The storage battery (Fig. 76) consists of three batteries connected in series and placed in a common box 10 with a lid 16. Partitions 12 form a reservoir for the batteries.
Each battery consists of half-blocks - positive 9 and negative 6 and 11 plates, located in a container with electrolyte.
Battery plates are cast from a lead-antimony alloy in the form of a lattice filled with a porous active mass.
The plates of each half-block are interconnected by a baffle having an outlet in the form of a pin 4, and separated from each other by plastic or wooden separators 7 with a glass felt gasket.
The bottom part of the battery plates rests on the ribs 5, which exclude a short circuit in the event of the active mass of the plates falling out to the bottom of the can.
The batteries are covered with covers 13, which are sealed with acid-resistant mastic.
The filling holes of the batteries are closed with plugs 3 with sealing washers to prevent electrolyte splashing. At the lower, elongated end of the plug, there are gas outlet channels that are connected to the atmosphere.
The terminals of the individual batteries are connected to each other using lead-acid connections.
Output clamps 2 and 15 of the battery with lugs, to which the lugs of the wires are attached with bolts and nuts.
The positive (+) terminal of the battery is connected to terminal B of the relay-regulator, and the negative (-) is connected to ground.
The battery is installed on a special platform located on the left side of the motorcycle. A rubber gasket is placed under the battery. The battery is attached to the site with two tie-straps and a wing nut.
When operating the battery, do not over-discharge the battery, since the plates are covered with a layer of lead sulfate (sulfated) and the normal course of processes is hampered chemical reaction charging the battery therefore accelerates its discharge. AT winter conditions this can cause the electrolyte to freeze.
The state of charge of the storage battery is judged by the voltage at the terminals of the battery and the density of the electrolyte.
The voltage of each battery in a fully charged battery is 2.1-2.2 volts. When discharged, the voltage drops rapidly to 2V and then slowly drops to 1.7V. Do not allow voltage to drop below this limit.
The density of the electrolyte in a fully charged battery should be 1.285 g / cm3. The electrolyte of a charged battery freezes at -50ºÑ, and a discharged one at -6 ° C, therefore, in winter with frost below -15 ° C, the electrolyte density is recommended to be brought to 1.3-1.32 g / cm3 and systematically controlled. If the density of the electrolyte has decreased to 1.25, then the battery is discharged and should be put on charge.
The electrolyte level in the batteries should be 10-15 mm below the upper edges of the plates.
During the operation of the battery, water evaporates, therefore, when the electrolyte level drops below the specified limit, you need to top up with distilled water. The electrolyte is added only if there is a leak and it becomes necessary to maintain its concentration in the required range to avoid degrading the battery efficiency.
During operation, periodically, once every three months, it is necessary to check the relay-regulator to maintain the voltage in the charging circuit of 7.2 ± 0.2 V.
The battery must be kept dry and clean at all times, the ventilation holes must be cleaned, the terminals must be greased with technical petroleum jelly.
It is not allowed to connect wires of different polarities (“+” and “-”) to each other for spark testing.
You will also be interested in:
To change the oil in the variator, you need a little: First of all, you need the oil itself, for my ...

The Skoda automobile concern is one of the oldest in the world. We remind you that in 2000 ...
Through the site service, you can find out data from the STS. These include: sts number, brand, model, ...
Audi Q5 2.0 TFSI quattro / Audi Ku5, 5dv SUV, 211 hp, 7 automatic transmission, 2008 - 2012 -...

Test drive What is permanent four-wheel drive? And then why on the field the lever "lock ...

