


Repairing a VAZ 2103 car is in many ways similar to working with a model 2101. Since the engines of these cars only slightly differ in size, the problems are identical. Most of the cars of these models are already veterans of the automotive industry and are living out their last years, but their owners still do not give up and repair their cars. Every Zhiguli owner gives you practical advice on how to keep your car on the move.
The VAZ 2103 four-cylinder carburetor engine has a volume of only 1.5 liters. The limit of the engine's operational capabilities, according to factory calculations, is about 125-130 thousand km, but it can reach almost 200 if it is constantly looked after. In fact, the limit of the working state can be even greater if all parts are changed in time. Problems with such a motor often arise with overheating (this is with rather weak engine characteristics), as well as with a chain drive, which requires constant constriction.
The total engine power is 71 hp. sec., while the maximum number of revolutions per minute can reach only 5-6 thousand. Despite the weak characteristics, the VAZ 2103 engine has several indisputable advantages:
- with proper care, the operating time is doubled;
- repairs are quite cheap;
- replacement parts are very easy to find;
- has a small resource reserve for improving performance.

Conclusion: the motor is average, but it can serve for a very long time. In order for it to work for ten years, it requires care, constant replacement of working fluids and parts, and timely repair. Now in more detail about leaving.
Long-term operation
For a VAZ model 2103 car, care is very important. Timely replacement of oil, spark plugs, fuel and parts significantly extends the engine's working life, therefore, serious repairs in such conditions are practically unnecessary.
Much attention should be paid to the selection of oil. Since it is the mechanical wear of most parts that is the main problem that promises a quick engine breakdown, you need to choose a good technical fluid with an optimal set of additives. When changing the oil, it is advisable to replace the oil filter as well. The amount of fluid when changing should be 3.5 liters out of 3.75 liters. In addition to mechanical wear, when using high-quality oil, it will also be possible to avoid corrosion damage to parts.

Do not forget to change the air filter as well. Both filters must be replaced and checked regularly.
If frequent repairs of the VAZ engine are not included in your plans, pay your attention to the condition of other elements. Replacing sensors, timing belt and spark plugs keeps the entire assembly in good condition.
In cases where the engine starts to stall, try changing the brand of gasoline.
What parts need to be repaired?
The VAZ 2103 engine has many problems.

But it is worth considering the most popular ones:
- The first thing that should alert you is a knock from the side of the hood when idling. This sound is heard if the valve clearances need to be adjusted. Do-it-yourself adjustment if there is a diagram of the position of the elements in the valve mechanism.
- The second problem is the rapid wear of the crankshaft. If the part is at the limit, breakdown may occur suddenly or you will hear a characteristic knock from the engine side, slightly less distinguishable than in the first case. Do-it-yourself repair consists of dismantling and replacing the crankshaft.
- Engine overheating can be caused by a faulty cooling system. It is worth checking the fan, pump and thermostat. Occasionally, high octane gasoline can cause overheating.
- If smoke starts to blow from the engine side, check the piston rings and carburetor. Most likely, the oil got into the combustion chamber due to burnouts. Less often, valve seals fail, which can lead to the need to overhaul the VAZ engine.
In all these cases, you need to change the parts for new ones, and get rid of the old ones.
Do not forget that high speed is very destructive for the VAZ 2103 engine.
Overheating and overloading the unit can lead to serious damage to parts, after which many structural elements will have to be changed. You should not squeeze the maximum on the track without installing special parts, otherwise the engine will turn into a boiler with fire.
If you do not want to frequently repair the VAZ engine, replace the worn out parts with similar ones. If you install more powerful parts, then the design may simply not withstand.
The only way to improve the performance of such weak engines is to install additional parts. In the case of Zhiguli, a good option for increasing power would be the installation of new pistons and cylinder heads, as well as updating the elements of the exhaust system. To do this, you need to bore the cylinders up to 79-82 mm. Other tuning options affect the total resource of the car, therefore, it is highly not recommended.
Maintenance of VAZ engines is not difficult if you need to replace parts at home. With the instructions, you can dismantle and replace almost any element of the engine assembly. But if you are not sure of the cause of the breakdown, it is better to visit the service station, where the master can identify and eliminate the malfunction.
Hello dear readers! There was no time to mark at least short notes about the repair, but I will remind you that I was repairing my father's VAZ 2103, as a result it was replaced: four wings, one panel, an outer arch on the left side, short spars under the front fenders that connect the engine shield with mud flaps. Many more small parts were replaced, which were either made or bought.
But today I want to write exactly about my mistakes, the moments that I noticed, which during subsequent repairs (I hope they will), I will bring to life.
Mistake # 1. Application for welding car body parts of conventional electrode welding
Each of us, motorists who are going to repair the body of their VAZ themselves, want to save as much as possible on everything - on tools, materials, time, but I would like to note that it is quite difficult to weld two body parts by electrode welding, although in reality. But at the expense of quality. I tried it myself, cooked it, it turned out, the main thing is to remove the gaps between the parts to be welded to 0, then there are more chances not to burn holes. It goes without saying to use an electrode of 2 mm, and the minimum required current, cook with a separation.
Mistake # 2. Failure to comply with the thermal conditions of the parts to be welded
Keep in mind that you need to take breaks between welding, otherwise, when the metal cools down, it can lead to additional areas for puttying, which are not so easy to remove with putty.
Mistake # 3. First, we set everything up, level it, fix it, and then we can weld it on. I, on the other hand, an even higher trunk of the VAZ 2103, VAZ 2106, welded the right wing, and when I started to press a little on the left side, the right, the new wing began to play and a hole appeared in the back, which had to be heated and besieged, then putty.
Mistake # 4. Bent body iron purchased.
The story with the front fenders, one turned out to be slightly bent inward. Thinking that I would quickly fix it with a thin layer of putty, I was wrong. After I washed off, erased the transport soil and covered the body with soil, while it was drying and was glossy, I saw that the wing was jammed almost half the area, it was not so easy to remove it. So we check the body iron carefully when buying, especially when it comes to iron on vases.
Thanks for subscribing!
Mistake # 5. New parts do not need to be putty
With wings, it looks like nothing terrible, but the new panel is not very even, it is not dented, there are just stripes from the press. They were not visible until they covered the door with paint and looked at the part from a low angle.
Mistake # 6. Parts replacement sequence.
The point is that it is better to start replacing panels with the doors, then set sills and fenders along the new doors. I did the opposite, first I replaced the sills and fenders, and the door was last repaired, there were many difficulties with the installation of a new door, gaps.
Mistake # 7. Repair of old body parts, not replacing them with new ones.
You should not do this, because you will spend a lot of effort and resources, which are comparable to the price of a new part, although the fact is that it will not have to be cut and adjusted ...
VAZ 2103 engine
Engine characteristics 2103
Years of release - (1972 - present)
Cylinder block material - cast iron
Power system - carburetor / injector
Type - in-line
Number of cylinders - 4
Valves per cylinder - 2
Piston stroke - 80 mm
Cylinder diameter - 76 mm
Compression ratio - 8.5
Engine displacement 2103 - 1452 cc
Engine power 2103 - 71 HP / 5600 rpm
Torque - 104 Nm / 3400 rpm
Fuel - AI93
Fuel consumption - city 9.4l. | track 6.9 liters. | mixed 8.9 l / 100 km
Oil consumption - 700 g per 1000 km
VAZ 2103 engine weight - 121kg
Overall dimensions of the engine 2103 (LxWxH), mm - 565x541x665
Mac lo for the vaz 2103 engine:
5W-30
5W-40
10W-40
15W-40
How much oil is in the engine 2103: 3.75 liters.
When replacing, fill in about 3.5 liters.
Engine resource VAZ 2103:
1. According to the plant - 125 thousand km
2. In practice - up to 250 thousand km
Tuning
Potential - 200 HP
Without loss of resource - 80 hp.
The engine was installed on:
VAZ 21023
VAZ 2103
VAZ 21043
VAZ 21053
VAZ 21061
VAZ 2107
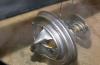
Malfunctions and repair of the VAZ 2103 engine
Engine VAZ 2103 1.5 liters. carburetor inline 4-cylinder with an overhead camshaft, the timing of the 2103 engine has a chain drive. The VAZ 2103 engine block is high, more on that below. The engine resource 2103, with careful operation and timely maintenance, exceeds 125 thousand km established by the plant and reaches 180-200 thousand km.
The main differences of the 2103 engine from the increased block height by 8.8 mm from 207.1 mm to 215.9 mm for the possibility of installing a crankshaft with an increased piston stroke, due to which the engine volume increased to 1.5 liters.
As noted in previous articles, there is a problem with camshaft wear in Lada engines. Due to the fact that the chain drive does not have a tensioner - you need to tighten the chain, the engine also needs constant (every 10 thousand km) adjustment of valve clearances, this will be prompted by a loud knock in the VAZ 2103 engine when the engine is idling audible from a place driver with the hood closed. Many people have a question, why regulate the valves, the answer is simple - the power will decrease, the fuel consumption will increase, the valve will burn out and many other joys of life. The adjustment of the valves of the VAZ 2103 engine should be done either by a master or with his own hand. To other problems, toarburetors Weber and Ozone constantly require CO adjustment and cleaning. It often happens that the VAZ 2103 engine is heating up, look for the problem in the pump, 99% this is it. Often when the engine is troit at 2103, there may be a lot of reasons, more often valve burnout, in any case it is necessary to measure the compression and show the car to the master. Many VAZ 2103 engine malfunctions repeat 2101 problems, due to their close relationship. For a more complete picture and in order not to miss anything, read about.
However, nabout the popular opinion, the 2103 engine is the most reliable and unpretentious among the classic line of engines, and given the prices of spare parts for the VAZ 2103 engine, one should not wonder why the classics still drive through our streets.
VAZ 2103 engine tuning
Boost engine 2103
There are a lot of methods for improving the VAZ 2103 engine, like all classics, from boring to a compressor with turbines, but let's start in order. How to boost a VAZ 2103 engine, the cheapest and simple tuning of the VAZ 2103 engine was and remains a cylinder bore of 3 mm under 79 mm piston from a VAZ 21011 or from a VAZ 2106, at the output we have 1.6 liters. Sharpening further, under 82 mm will not work due to the too thin walls of the block.
To further increase the volume, the piston stroke must be increased to 84 mm. Increasing the displacement in this way reduces the maximum operating rpm, a downstream engine is not the best choice for racing, but still. To increase the power of the VAZ 2103 engine with a piston stroke, they put the VAZ 2130 crankshaft, and also use the TRT piston, the connecting rods sit up to 134 mm. The disadvantages of TRT pistons are their lower strength in relation to standard ones, heat load on the ring and the likelihood of piston burnout.
Engine boring 2103
1.6 l. 79x80 ~ 75 hp
Maximum torque ~ 115Nm @ 3000rpm
With this configuration, we get exactly the 2106 motor.
- larger piston, standard stroke
1.7 l. 79x84 ~ 80 HP
Torque engine, not racing configuration.
How to boost a VAZ 2103 engine by fine-tuning the cylinder head
The cylinder head VAZ 2101 is used on the three-wheel motor, the main disadvantage of which is that it was developed for low-volume units. Accordingly, the passage sections of the channels do not correspond to the increased volume, this must be corrected by boring and polishing the channels.
Polishing and boring the cylinder head channels of the VAZ 2103 and the manifold will significantly reduce the intake resistance, the engine power in the entire range increases by 10%. How to polish and which shafts to select is described in the article "Tuning VAZ 2101", due to the identity of the motors, all this is applicable to the engine of the three Lada. The revision of the 2103 engine does not end there, a correctly selected camshaft for 2103, as well as a revised head, can show more than 100 hp.
Camshaft on VAZ 2103
The selection rule was simple, in the lower configuration, when the piston stroke is large and it is larger than the cylinder diameter, you need to take the lower shaft with a phase of up to 270, the valve lift is larger. Such an engine will turn out to be quite high-torque, urban and will go much better than the standard, while the high revs will disappear. Which camshaft to choose for the bottom, Estonian 1, Nivovsky shaft 213 or something similar in terms of parameters will do. With the top configuration, we accordingly select a wide-phase top shaft with a large valve lift.The camshaft Mastermotor 48, OKB Engine 480 and the like will fit into the standard head without modifications. More wide-phase ones will require additional work. The disadvantages of shafts with a wide phase are traction at the bottom, the angrier the shaft, the worse it rides from below and the more uneven idle speed, but losing the bottom we gain high power at the top. In which direction to move and whether it is worth moving at all is up to you, the basic and most popular principles of forcing the 2103 engine were presented to you in the most simple and accessible way.
Compressor for classics
A compressor for 2103 is an excellent option for inexpensively inflating a Zhiguli, in stores there are ready-made installation kits with a pressure of 0.5 and 0.7 bar from an autoturbine. Installing a 0.5bar compressor on a classic is quite simple and requires a minimum of modifications, paired with a modified cylinder head, the engine produces more than 125 hp. This method is opposed by the price of all activities.
Turbo classic
This is, without a doubt, the most expensive and unprofitable method of forcing a VAZ 2103 engine. The first item of your expenses will be the transfer of the engine to an injector. Then we buy a turbo kit for the classics, prices from $ 1.5 thousand. Most of the whales are built on the basis of the Garrett GT17 turbine, stand up without modification of the piston, but blow up to 0.5 bar. In this case, the classic compressor is more rational. In the case of a total revision of the 2103 engine, replacing the piston, installing the correct turbo shaft (phase 270-280, maximum lift), this kit will give out up to 1.2 bar with a power of more than 140 hp. The cost of such alterations will cost more than the car itself, even without taking into account the chassis, gearbox, brake system and other things 😀
VAZ 2103, a small subcompact car, a classic of mechanics, is widely known as "Zhiguli". Its driving performance, comfort, according to the estimates of many drivers of the older generation, were in many ways not inferior to modern foreign cars. The line of this series has fairly similar characteristics.
The main difference lies in the size and volume of the cylinders. The design and location of units and engines is considered classic. For a long time, textbooks and manuals for domestic cars were compiled on it. The power station is directed along the center line in the front, the leading drive is in the back. Thanks to the clutch, manual transmission, propeller shaft and rear axle shaft, the engine torque is transmitted to the rear axle. The engine is mounted on rubber mounts in three places. The car's motors are four-stroke, in-line, with an overhead camshaft and a carburetor. The lubrication system involves the use of special oils with a complex of additives. The closed ventilation system provides suction of gases from the crankcase into the intake manifold and increases the engine's service life.
To date, the VAZ 2103 meets the safety requirements, the European level at the level of Euro 2 and Euro 3 standards.

As a rule, the need to repair the VAZ 2103 engine appears over time, due to mechanical, abrasive, corrosive or fatigue wear. The procedure is performed most often after 50, 100 or 200 thousand kilometers. It depends on average load and service life.

The obvious signs of an impending repair are a change in the sounds of a running motor, some tapping appears. The need for work can also be determined visually, by inspecting the machine, and in relation to the period of operation.
Problems requiring the intervention of a master include:
- wear of the camshaft, or other components;
- the degree of chain tension, when it is loosened, tension adjustments are necessary;
- changed value of valve clearances (checked regularly);
- burnout of valves;
- contamination of individual parts.

In most cases, it is better to entrust the adjustment of the engine engine operation to a professional master. However, repairing the VAZ 2103 engine with your own hands is also possible. There are many videos in which experts share their experience, step by step commenting on each stage, paying attention to various details and nuances. You can find recommendations for any kind of breakdown, as well as for a preventive inspection of the car.
Before repairing a VAZ 2103 engine with your own hands, the video below is recommended to be carefully studied. In it you can find advice for both novice craftsmen and professionals, compare different options for approaching work, choose the most suitable technologies. There are also various options for improving existing models.
When repairing a VAZ 2103 engine, it must first be removed. Start with a pallet. Further, sequentially unwind and carefully remove the oil pump, the connecting rod, on which the pillow is immediately put on. Determine the degree of piston wear by first pushing it up.

By measuring the thickness, you can bore the block with pistons, if it has never been done before.
The clutch basket is unscrewed and removed, the cushions are removed from the crankshaft (it is necessary to remember their initial position so as not to swap places in the future).
All parts are washed and polished, a list of necessary spare parts replacement is drawn up.
After replacement, the engine is assembled in reverse order and installed on the machine.
To reduce the cost of the work performed, it is necessary to repair the units on time, without waiting for their emergency wear.
When operating a car, it is worth considering the average load (three adults, silt about 200 kg), as well as not allowing the motor to run constantly at high speeds.
The washed and cleaned cylinder block is installed on the stand and the missing studs are tightened.
The cylinders, pistons, oil seals, bearing shells and thrust half rings of the crankshaft are lubricated with engine oil. The inserts without a groove on the inner surface are placed in the seat of the middle main bearing and in its cover, and inserts with a groove in the remaining slots and in the corresponding covers. The crankshaft is placed in the main bearings and two thrust half rings are inserted into the sockets of the rear support with recesses to the thrust surfaces of the crankshaft; and a steel-aluminum half-ring is placed on the front side of the rear support, and a cermet (yellow) one on the back. Engines manufactured before 1980 should also be equipped with a cermet half-ring.
Install the main bearing caps in accordance with the marks. Then the axial clearance of the crankshaft is checked (the gap between the thrust half rings and the thrust surfaces of the crankshaft). To do this, install the indicator 1, as shown in the figure, and move the shaft 2 with screwdrivers, checking the axial clearance on the indicator, which should be within 0.06-0.26 mm. If the gap exceeds 0.26 mm, the thrust half rings are replaced with other, new, normal size or repair ones, increased by 0.127 mm.


The gasket of the rear oil seal holder is put on the crankshaft flange, and the bolts of the front cover of the clutch housing are inserted into the holder's sockets. A holder with an oil seal is put on the mandrel 41.7853.4011 and, having moved from the mandrel to the crankshaft flange, is attached to the cylinder block. The front cover 6 of the clutch housing is installed on two centering bushings.


Mandrel 41.7853.4011 for installing the holder with an oil seal on the crankshaft
Install the flywheel on the crankshaft so that mark B is opposite the axis of the connecting rod journal of the fourth cylinder.
After that, the flywheel is blocked with the lock A.60330 / R and fastened to the crankshaft flange.
Using a sleeve from the set A.60604 for engines 2101 and 2103, or 02.7854.9500 for engines 21011 and 2106, or using an adjustable sleeve 67.7854.9517, pistons with connecting rods are inserted into the cylinders. The mark "P" on the pistons should be directed towards the front of the engine. Bushing kits for crimping piston rings during piston installation in cylinders include four bushings - one for nominal size pistons and three for oversized pistons. Therefore, a bushing must be selected that is suitable for the size of the piston to be installed.


Liners are installed in the connecting rods and the connecting rod caps, the connecting rods are connected to the necks of the crankshaft and the connecting rod bolts are tightened. The covers are installed so that the cylinder number on the cover is opposite the cylinder number on the lower connecting rod head.
An asterisk and an oil pump drive shaft are placed on the crankshaft and secured with a thrust flange.
A gasket and a cylinder head complete with an intake pipe, an exhaust manifold and a valve mechanism are installed along two centering sleeves on the block. Tighten the cylinder head mounting bolts in two steps, as indicated in section. "Removal and installation of the cylinder head".
Loosen the nuts of the valve adjusting bolts and screw the adjusting bolts deeper so that the valve levers lower and do not interfere with the installation of the bearing housing with the camshaft.
Turn the flywheel so that the mark on the crankshaft sprocket matches the mark on the cylinder block. Put a (preliminary) sprocket on the camshaft, assembled with the bearing housing, and turn it so that the mark on the sprocket is against the mark on the bearing housing. Then the sprocket is removed and, without disturbing the position of the camshaft, the bearing housing is installed on the cylinder head and secured by tightening the nuts in a specific sequence. After that, a chain damper is installed on the cylinder head.
Install the camshaft drive chain in the following sequence:
- lubricate the chain with engine oil, put it on the camshaft sprocket and insert it into the drive cavity from above, positioning the sprocket so that the mark on it coincides with the mark on the bearing housing. Then install the lock washer and the sprocket mounting bolt without tightening it all the way;
- an asterisk, a lock washer, and a bolt are put on the drive shaft of the oil pump, without completely tightening it;
- put the chain on the crankshaft sprocket and install the chain tensioner shoe and tensioner without tightening the cap nut so that the tensioner spring can press the shoe; the chain stop pin is wrapped in the cylinder block;
- turn the crankshaft two turns in the direction of rotation, which will provide the required chain tension, and check the coincidence of the marks on the sprockets with the marks on the cylinder block and on the bearing housing. If the marks match, then, after blocking the flywheel with the lock A.60330 / R, finally tighten the sprocket bolts, the chain tensioner cap nut and bend the sprocket bolt lock washers. If the marks do not match, then repeat the operation to install the chain.
Adjust the clearance between the camshaft cams and the valve levers. Install the camshaft drive cover with a gasket and an oil seal on the cylinder block, without finally tightening the bolts and mounting nuts. Using a mandrel 41.7853.4010, center the position of the cover relative to the end of the crankshaft and finally tighten the nuts and bolts of its fastening. Install the crankshaft pulley and tighten the ratchet.


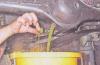
Lubricate the oil filter O-ring with oil and install the filter by manually screwing it to the fitting on the cylinder block. Install the crankcase ventilation oil separator, breather cap and fix the oil separator drain tube retainer. Install the oil pump and oil sump with a gasket.
Install the coolant pump, generator bracket and generator. Put the belt on the pulleys and adjust its tension. The inlet pipe of the heater radiator and the outlet pipe are mounted on the cylinder head. Attach the heater radiator outlet pipe to the coolant pump and the exhaust manifold. Install the control gauge sensors, the oil pump drive gear and the ignition distributor.
They put an ignition distributor, for which:
- remove the cover from it, check and, if necessary, adjust the gap between the breaker contacts;
- turn the crankshaft before the start of the compression stroke in the 1st cylinder, and then, continuing to turn the crankshaft, align mark 4 with mark 2;
- turn the rotor to such a position in which its outer contact will be directed towards the contact of the 1st cylinder on the ignition distributor cover, and, keeping the distributor shaft from turning, insert it into the socket on the cylinder block so that the center line passing through the spring latches was approximately parallel to the engine centerline.
Fix the distributor to the cylinder block, install the cover and connect the wires. The spark plugs are screwed into the cylinder head, the key 67.78J2.9515 is installed on them and tightened with a torque handle.
The fuel pump is mounted according to the instructions in the section "Removal and installation of the engine and its components". They put a heat-insulating shield with gaskets, a carburetor and attach hoses to it. The carburetor is closed with a technological plug. Install the cylinder head cover with gasket and fuel line bracket. Pour oil into the neck on the cylinder head cover.
You will also be interested in:
With the onset of autumn cold weather, all motorists begin to turn on the interior heater to ...

In a wide range of power units of the German auto giant VAG (Volkswagen AG), FSI engines, ...
1. Unscrew the filler plug of the rear axle. 2. Substitute under the drain ...

OUR PARTNERS: Website about German cars Lamps used in a car Any ...

The car heater helps to maintain the optimum temperature in the passenger compartment not only ...

